-

The Student Notes Menu.
1 - The Notes button will toggle the Notes Window
2 - The Screen Capture button will hide the Notes Menu and capture the current screen to the Notes window
3 - The Save Notes button allows a Student to save a ZIP file of all notes taken during the class
4 - The Record Screen button will toggle Screen recording
.

From the Notes screen simply select "Add or Edit" on the Subjects side to add a new Subject or edit the name of a selected subject. Click "Add" in the bottom left to add a new Note. Simply click in the text box to add. You can also select a Note and select "Delete". A confirmation box will give a delete warning.
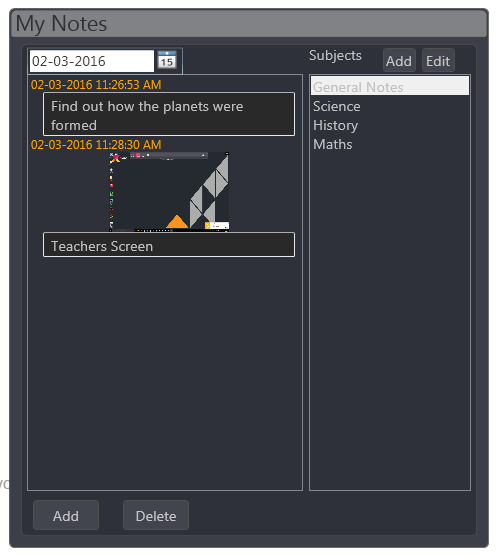
The above image shows an added Note and an added screen capture of the Teacher PC with a Note.
.

To Share the Teacher screen with the Students simply click "Share Screen". The button will highlight pink and the Teacher screen will now be seen on all the Student screens. The Xest tab will highlight with a green bar animation to alert that the Teacher screen is being shared.
To stop sharing simply click the "Share Screen" button again. The button will return to its normal state and the Student screens will return to their own screens.
.
.
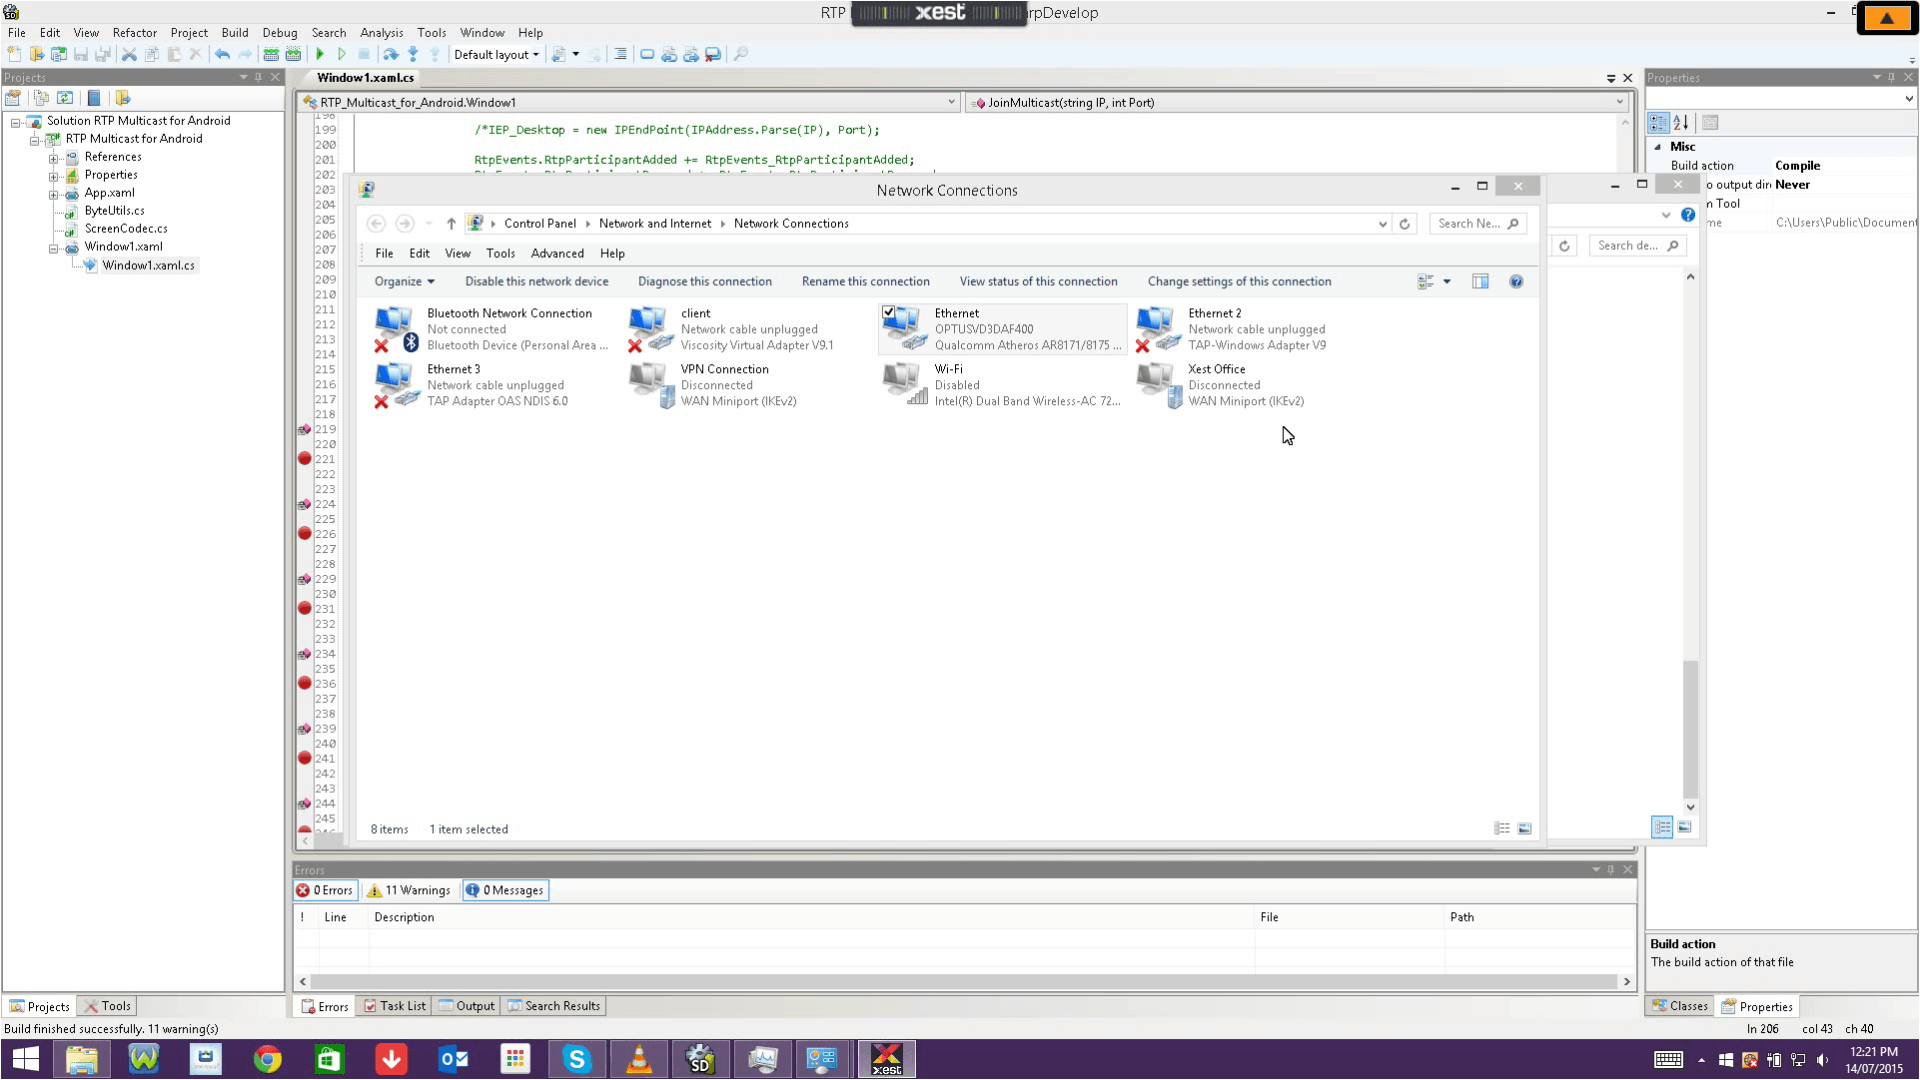
The Student view of the Teacher screen. Students have a Minimize/Maximise button to the top right. This allows the Students to minimize the Teacher screen to allow Students to access their own desktop and follow what the Teacher is doing.
.
.
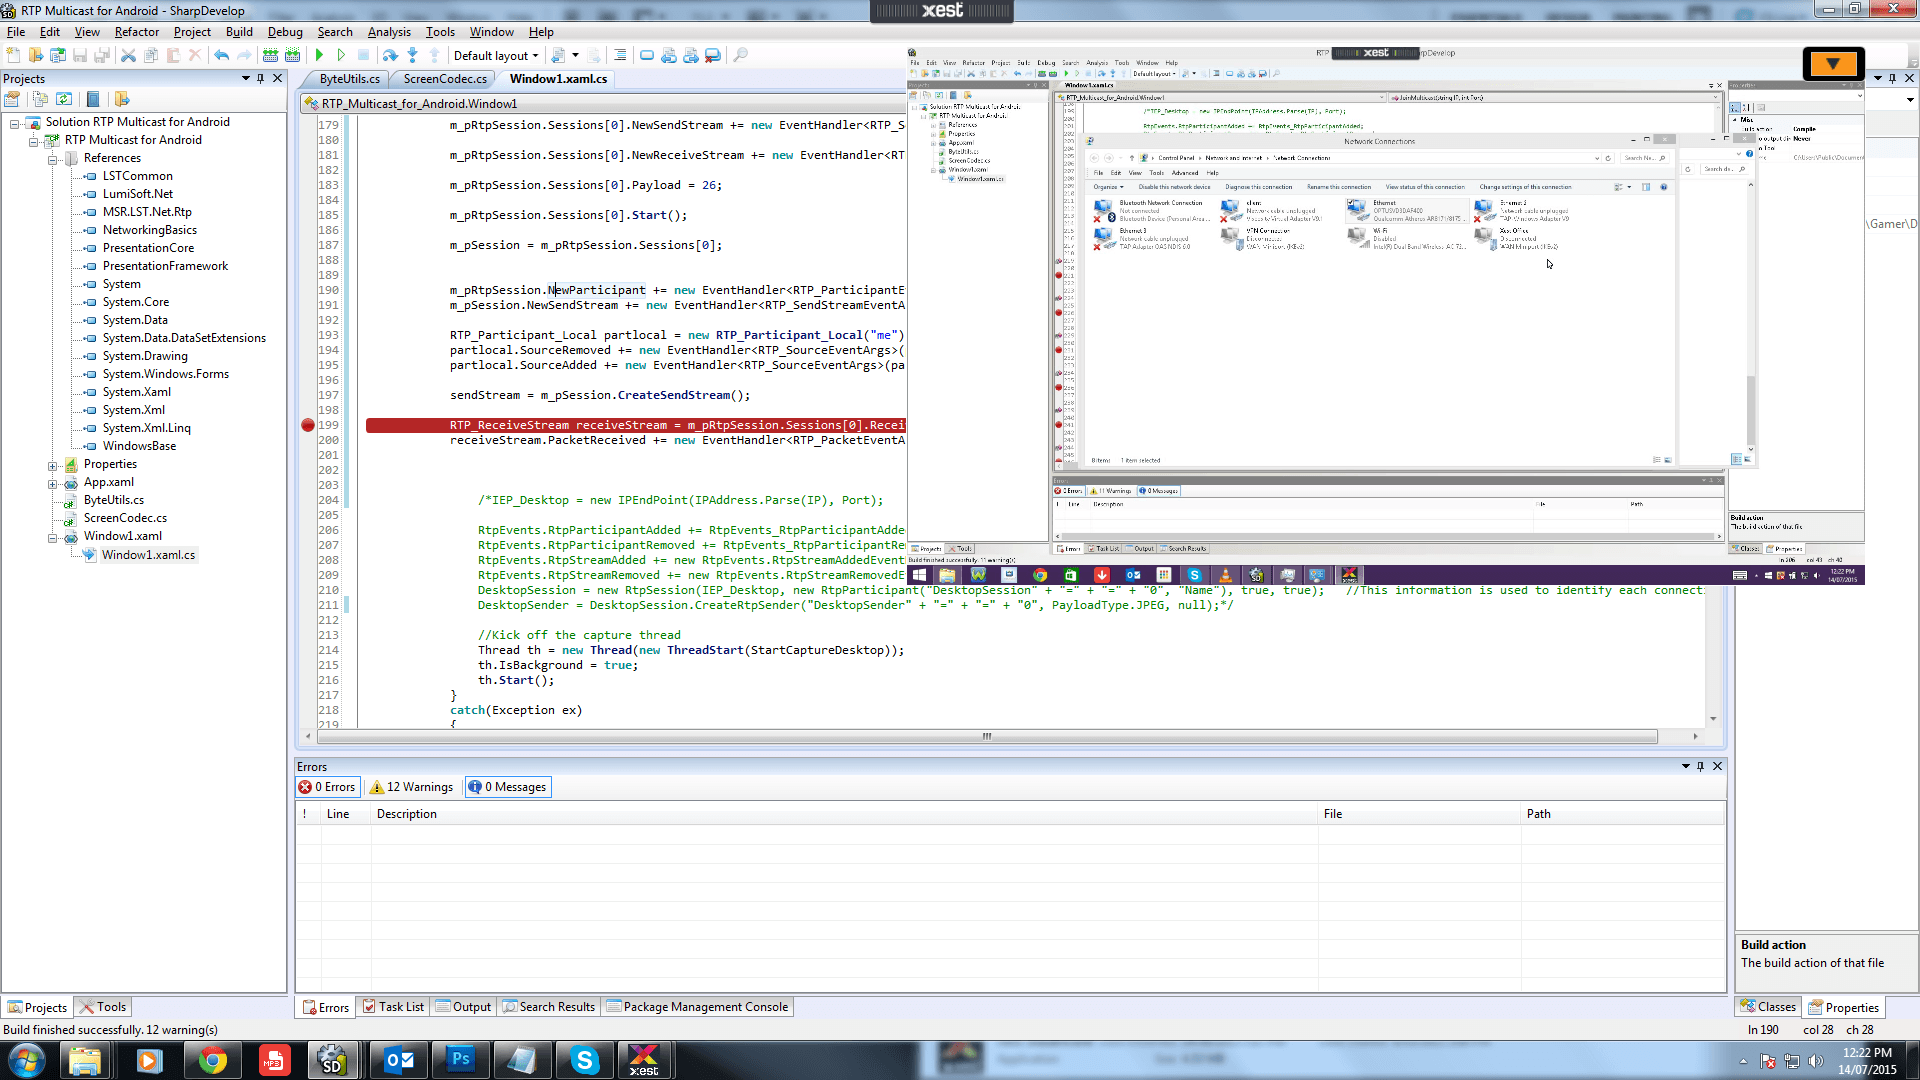
When the Teacher screen is minimized to 1/4 of the display area, it can be dragged around the Student screen simply by clicking and dragging. This allows the Student to access different parts of their display while watching what the Teacher is doing.
.
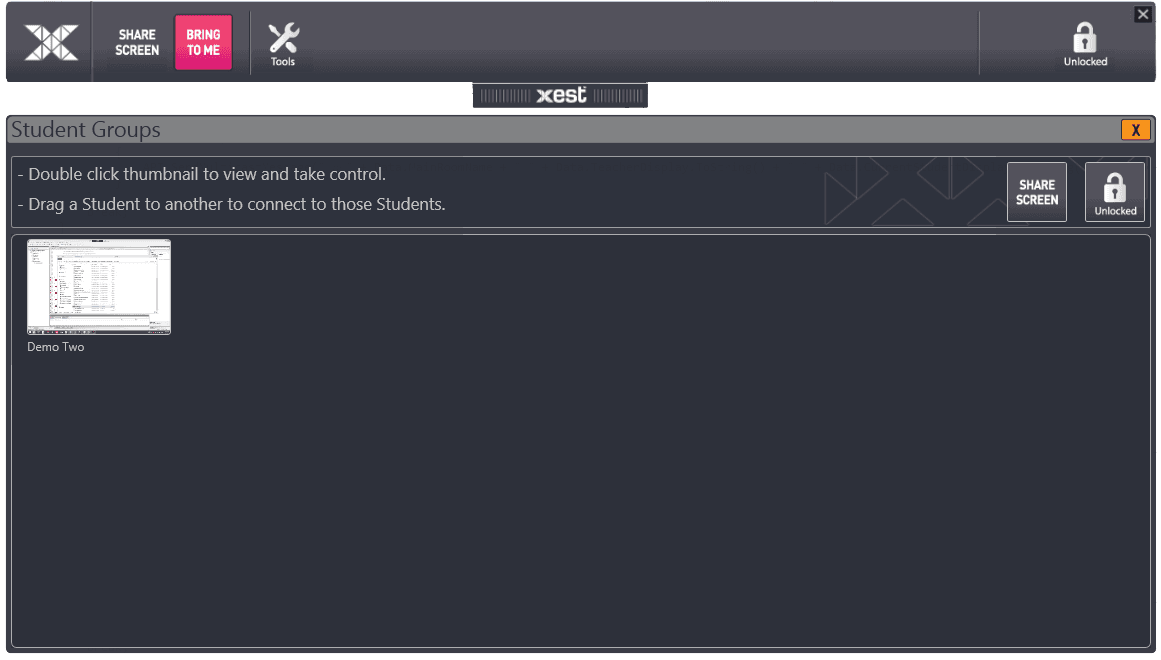
Bring to Me allows people to stream a Students screen to their display. Click the "Bring to Me" button on the menu to show the Students connected thumbnails. Click a thumbnail for a full screen view of that Student. Students who are connecting to other Students will send a connection request for that Student to either allow or reject. Teachers can always directly connect to Students without requesting the connection.
.
.
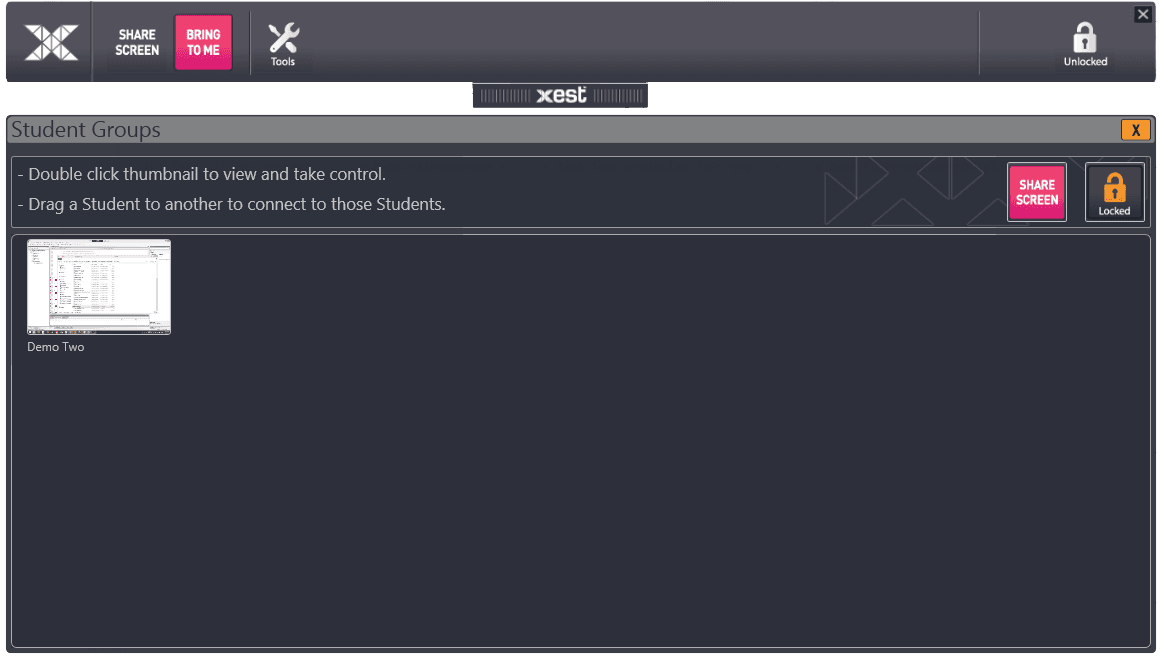
(Toggle On/Off) Allow Students to share their screen. This feature allows the Teacher to roam the room and engage directly with the Students. Taking on a Director role, the Teacher can draw peoples attention to a particular Student and ask them to share their screen. This then allows each Student to share their screen the same way the Teacher can. Simply click again to disable and take back control.
.
*** Below is the Student Xest Menu that reflects the "Share Screen" as being active.

.
.
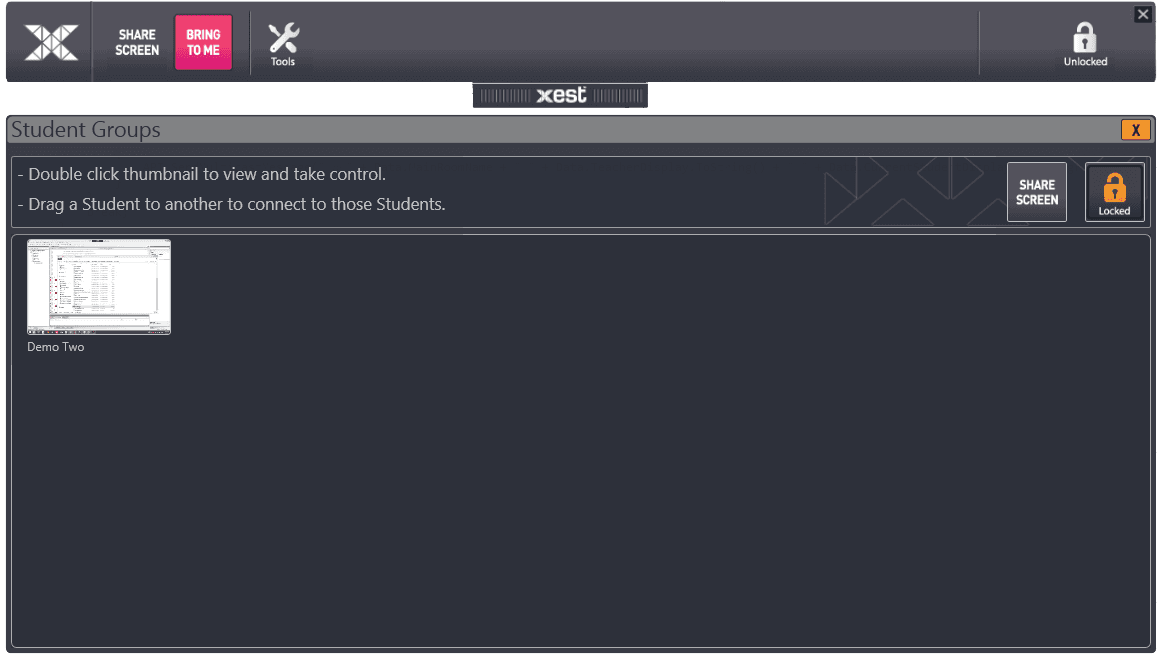
(Toggle On/Off) The Lock Student Interaction feature allows the Teacher to enable or disable Students from interacting with each other. This could be during a test or when the Teacher needs the Students to focus on their own work.
.
*** Below is the Student Xest Menu that reflects all interactive buttons have been disabled.

.
.
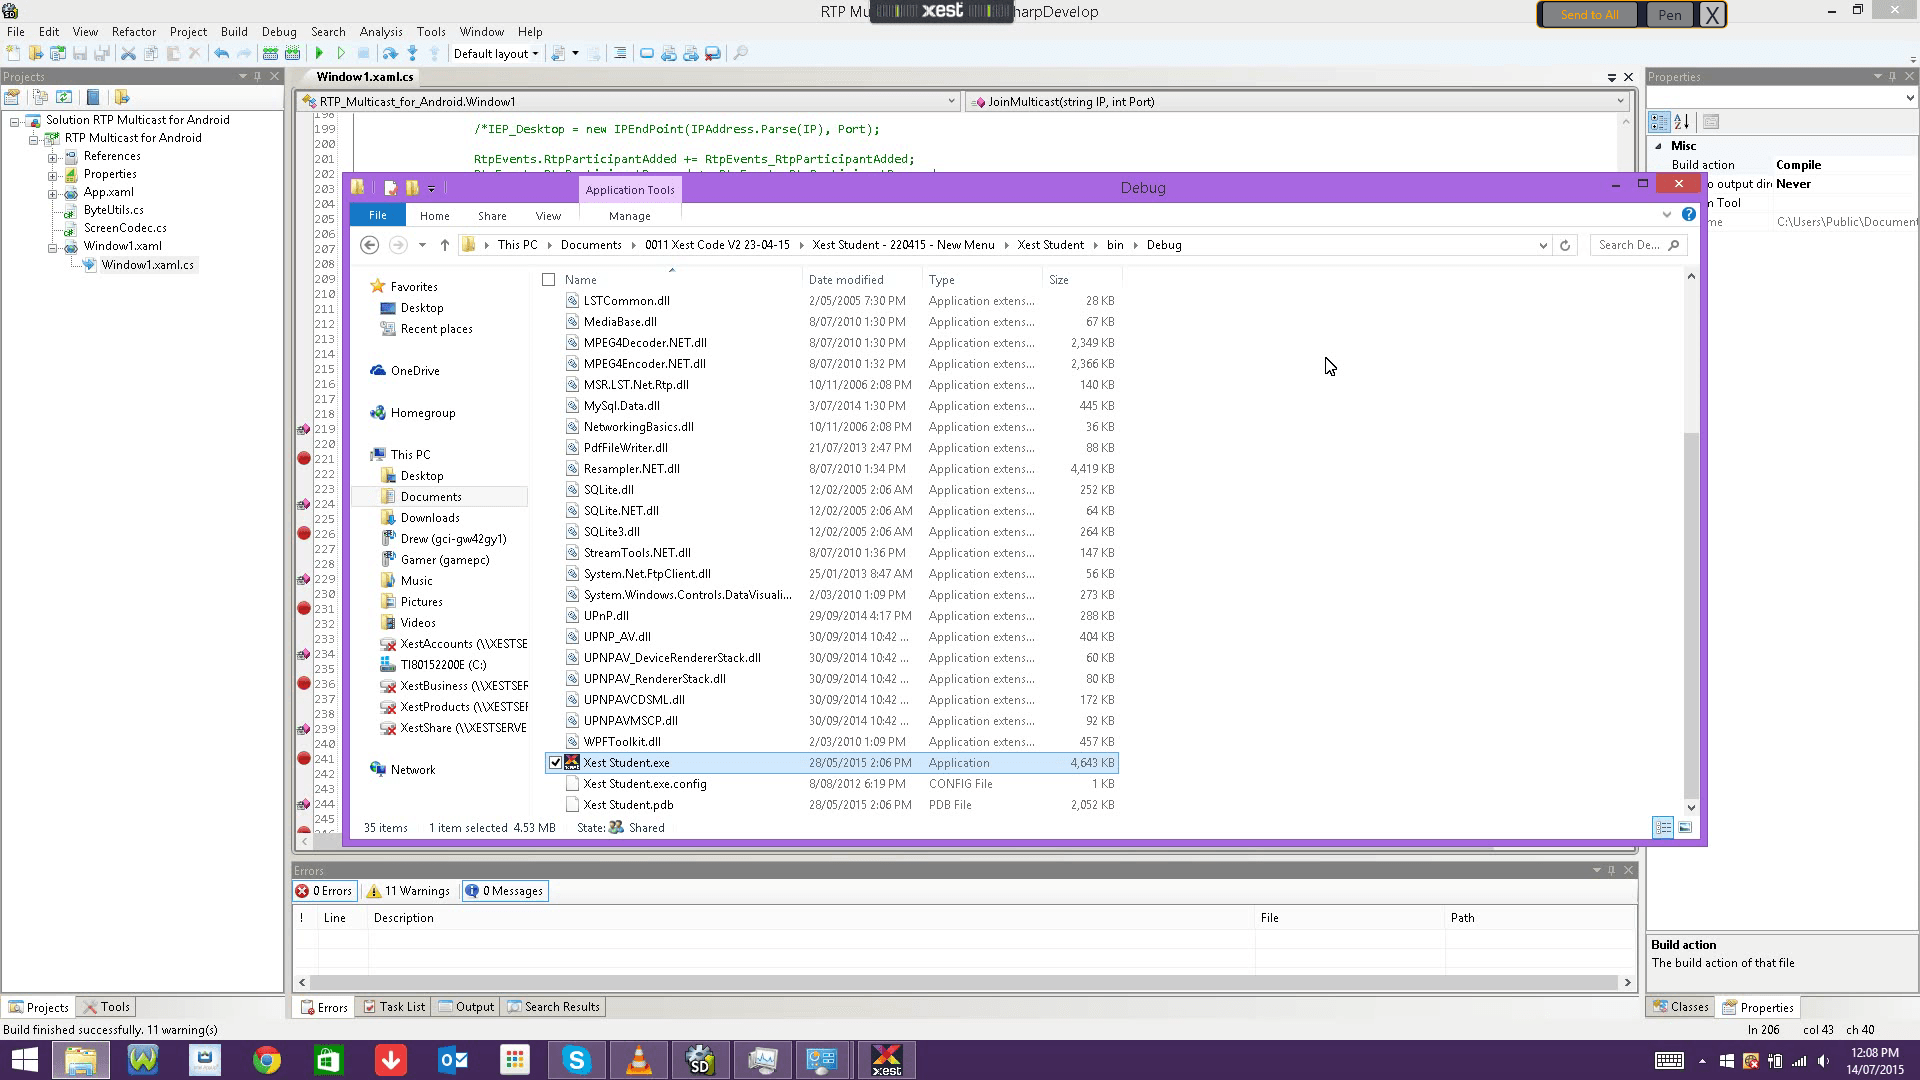
Student Screen view being sent to the Teachers desktop.
.
.
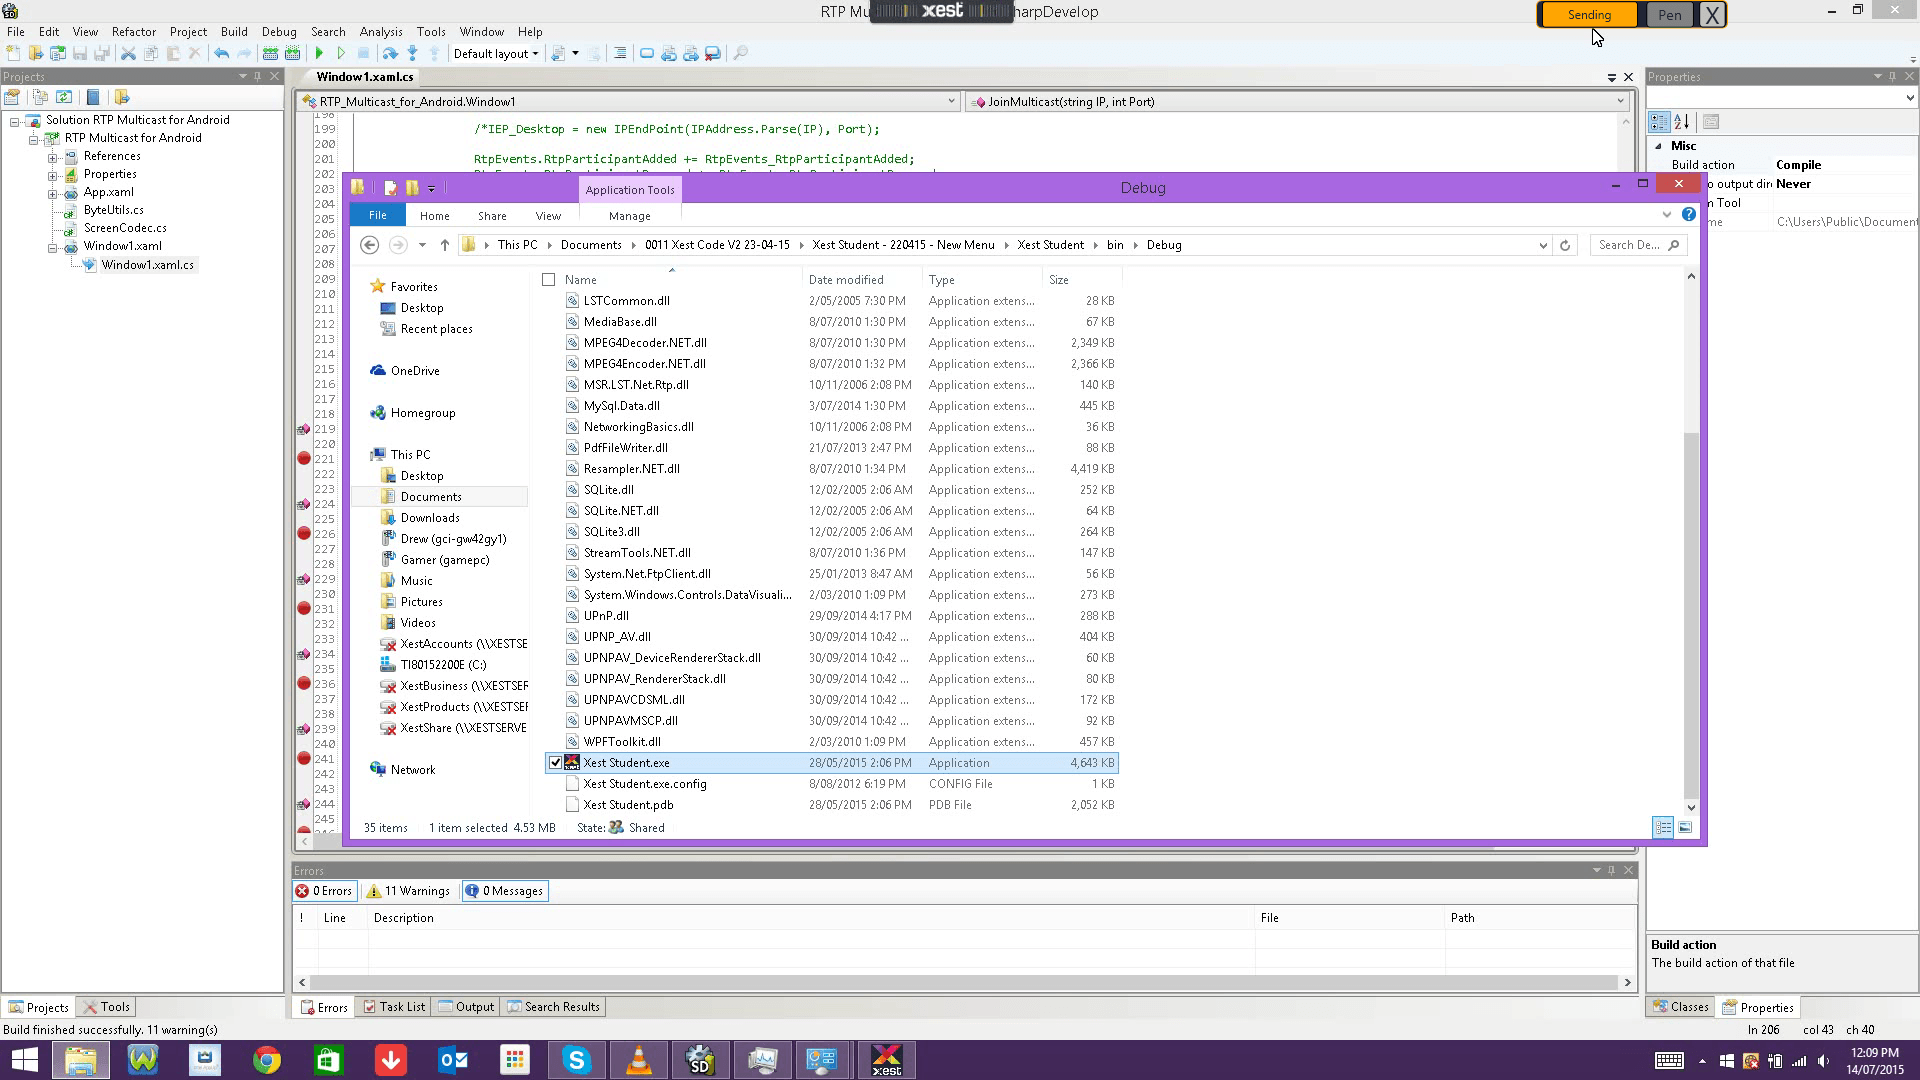
Click the "Send to All" button to push that Student's screen to the rest of the room. The button will flash each second. Click again to return Students to their own displays.
.
.
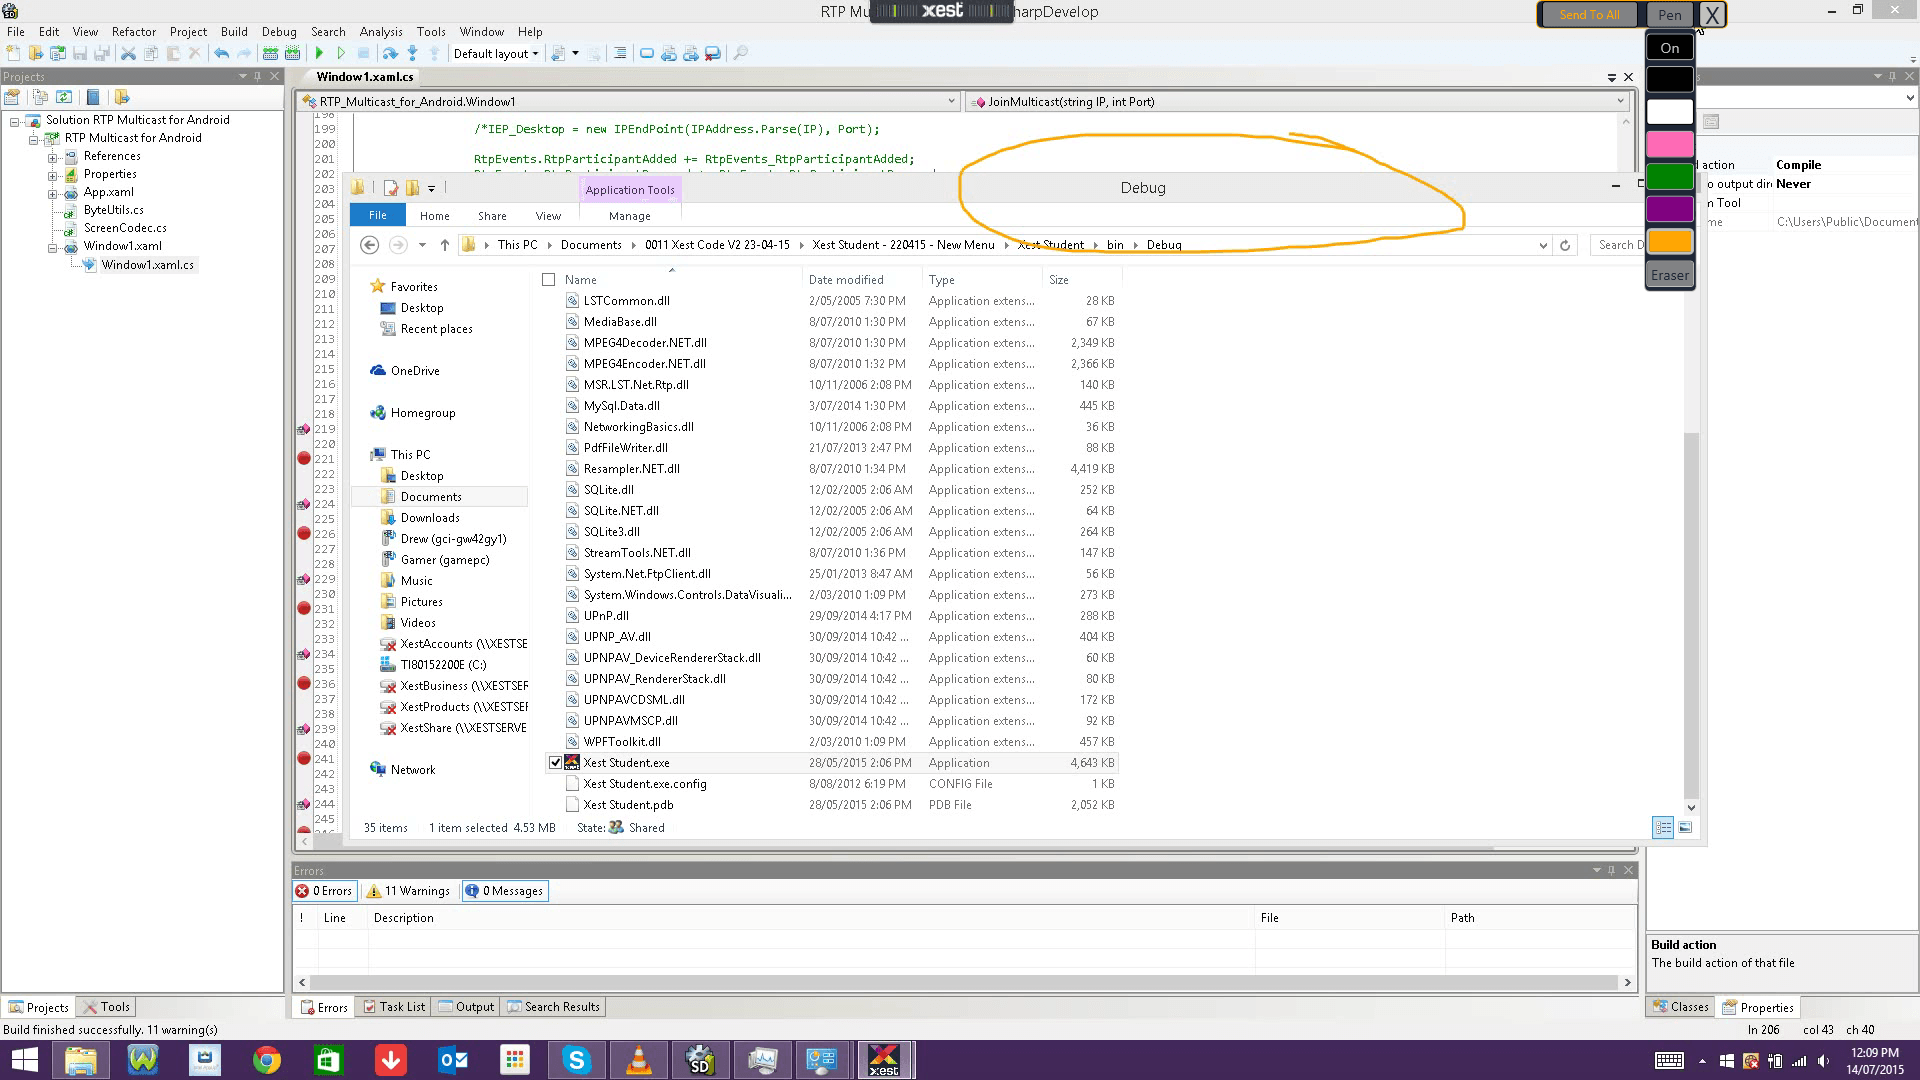
To annotate over a Students screen simply click the "Pen" button to select a pen colour. You can now draw directly over the Students screen. To stop the stream and return to your desktop simply click the "X" in the top right hand side of the controls.
.
*** The Xest Student Menu also has this feature to allow Students to connect and engage with each other.
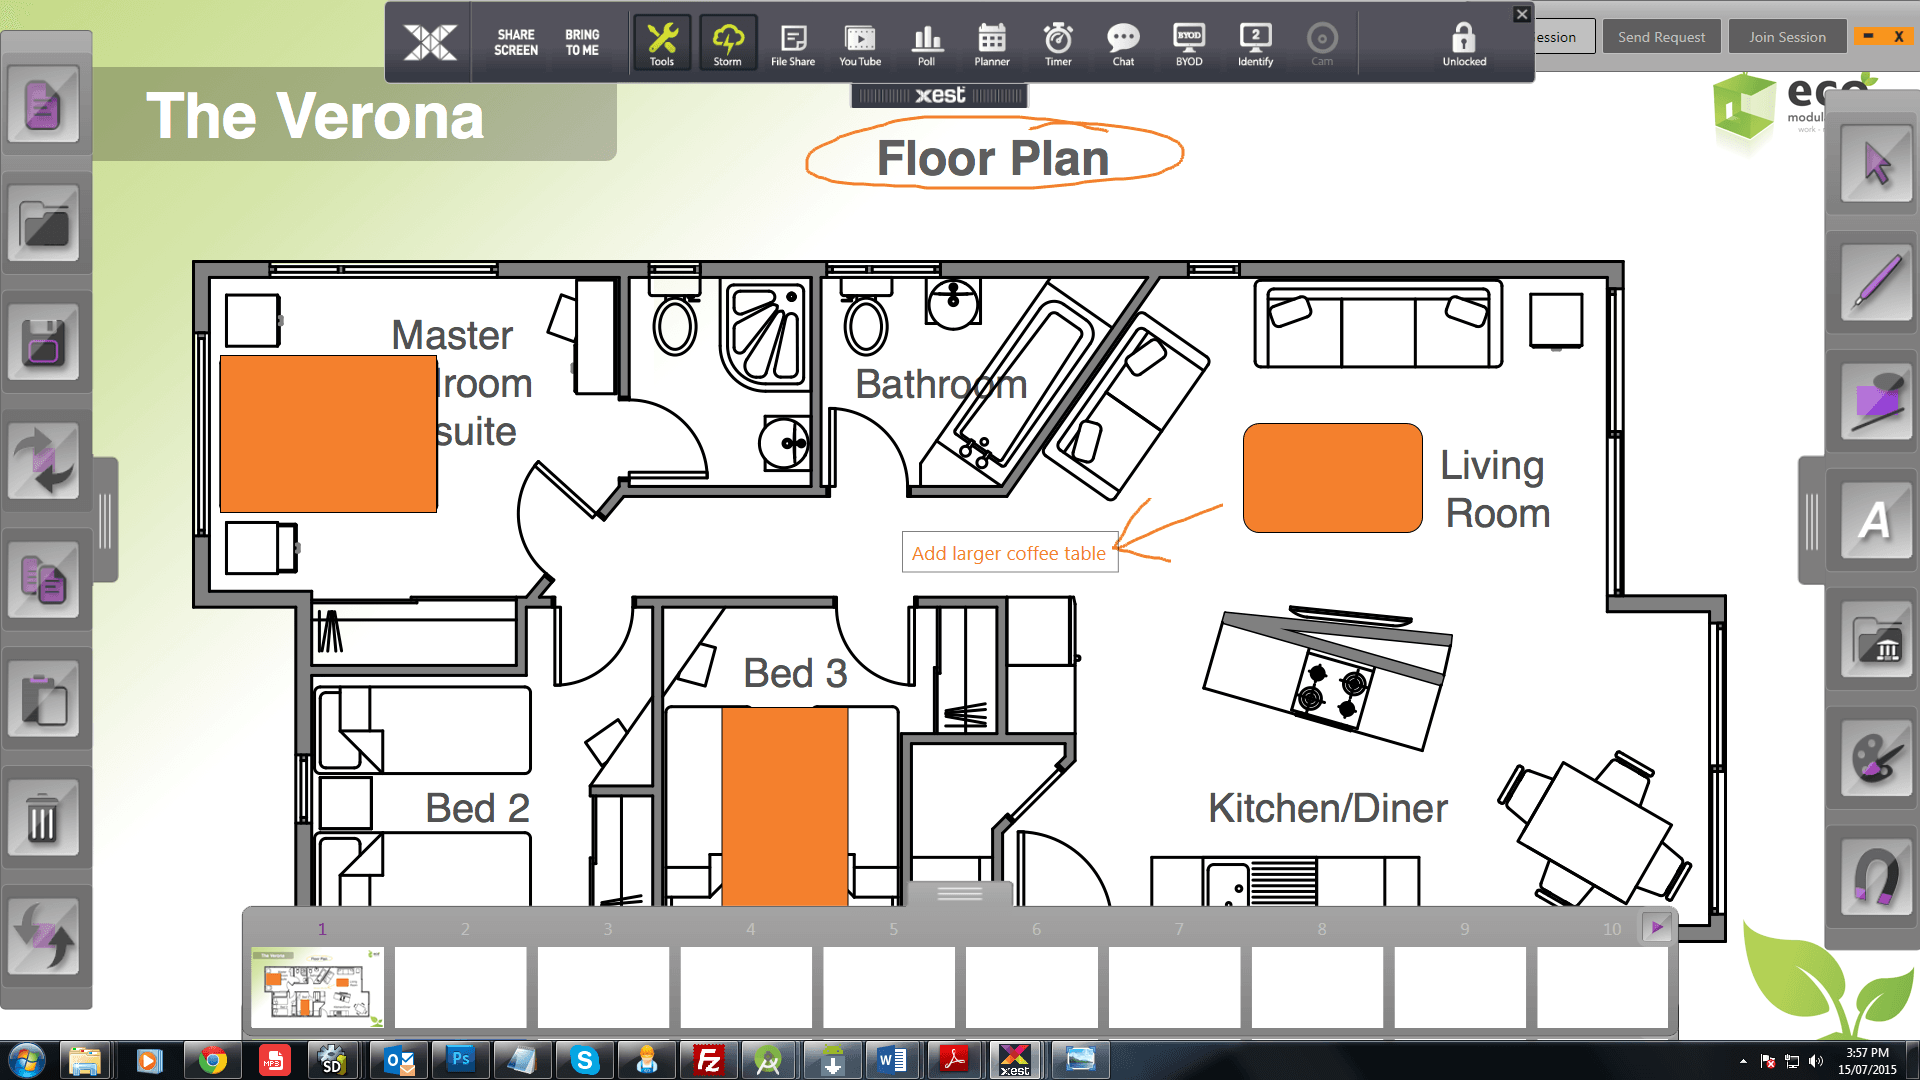
As StormCloud is a feature rich fully interactive multi board we have prepared a pdf to cover everything and make it even easier to find what you are looking for.
.
.
.
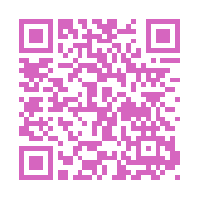
Download the PDF via this QRCode directly to your device or click Full StormCloud User Guide to download to you Computer.
.
.
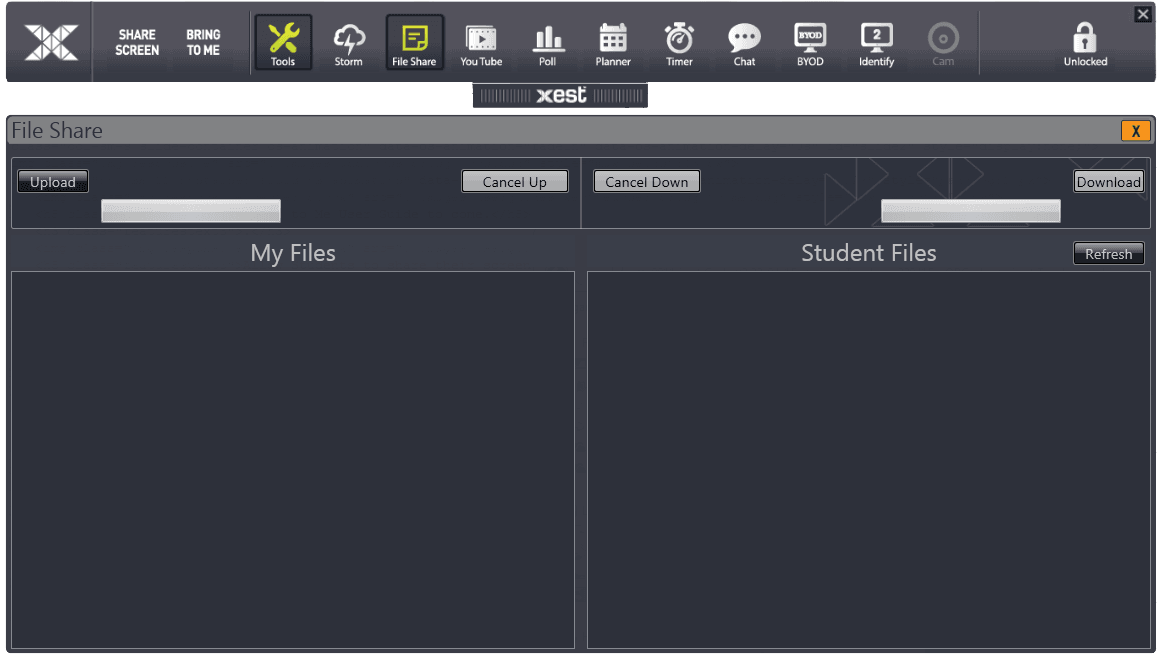
To start sharing files simply click the "Upload" button and navigate to your file. Once you have selected your file you can either cancel the upload by clicking on the "Cancel Up" button or allow Xest to connect and upload your file to the cloud.
If someone has just joined the class and files have already been shared, simply click the "Refresh" button located to the right to be updated with all currently shared files.
.
.
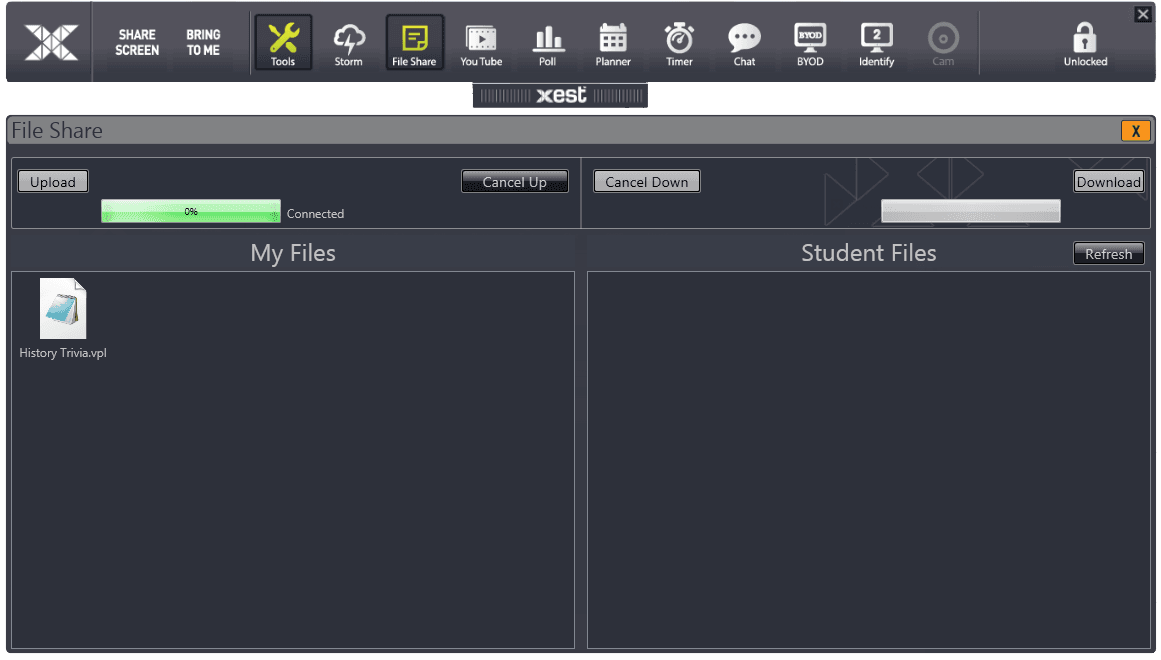
Your uploaded files will apear on the left hand side of the window.
.
.
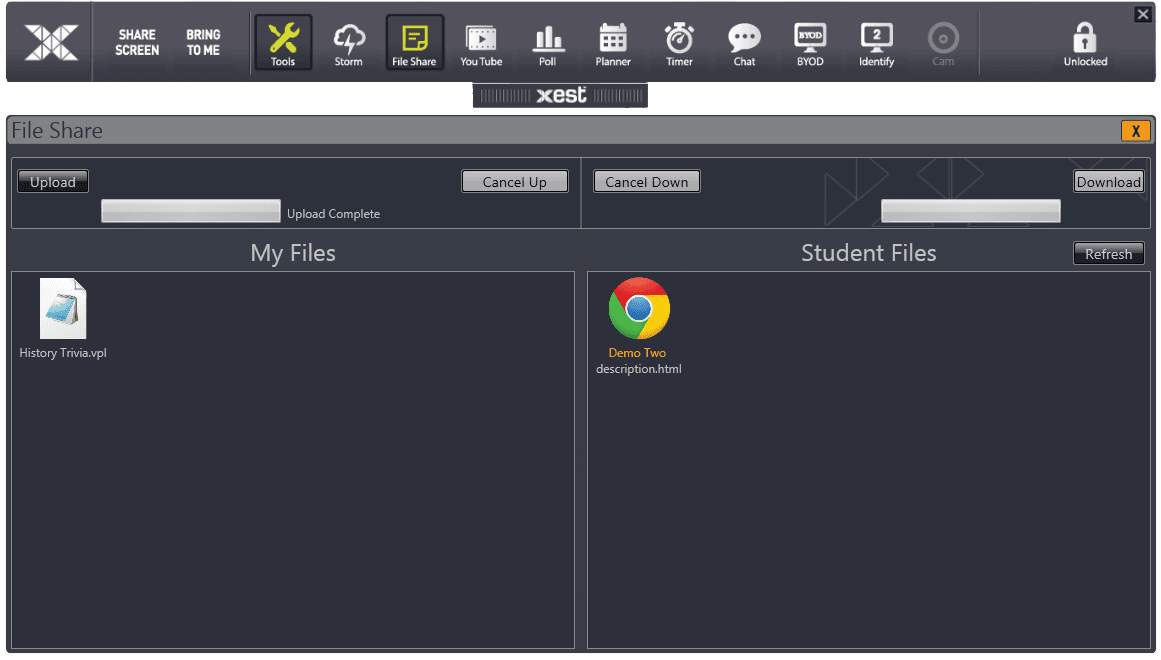
Other peoples uploaded files will appear on the right hand side of the window. The shared file owners name will appear in the title. In this example Student "Demo Two" has uploaded this file.
.
.
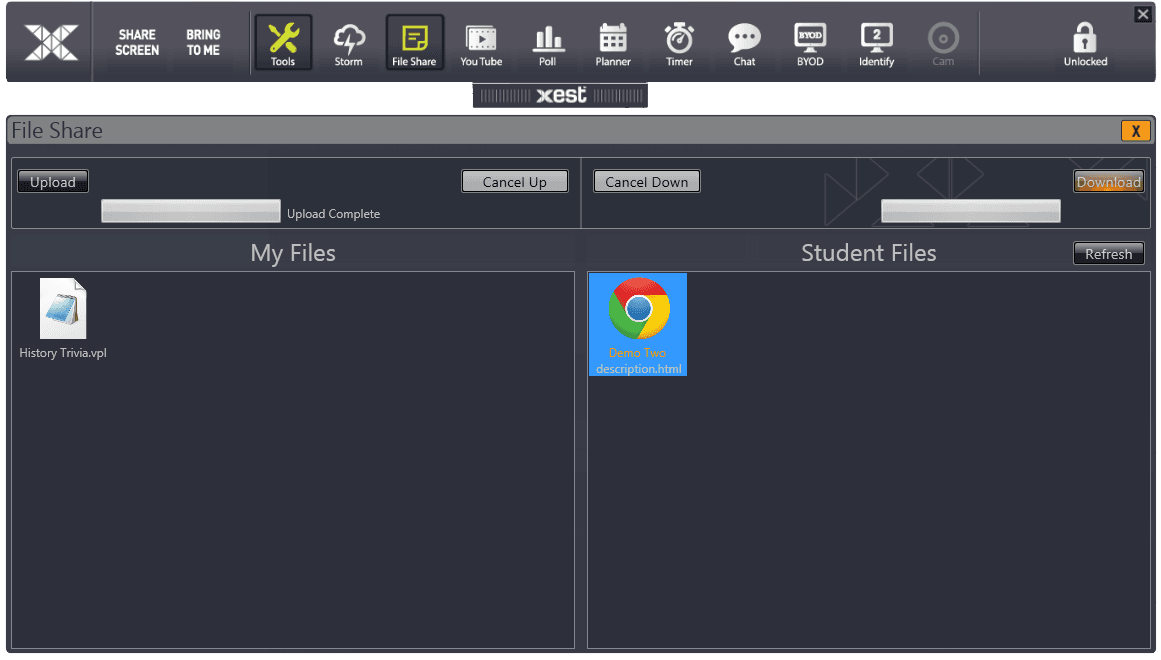
To download a shared file simply select the file you wish to download and click the "Download" button on the right hand side.
.
.
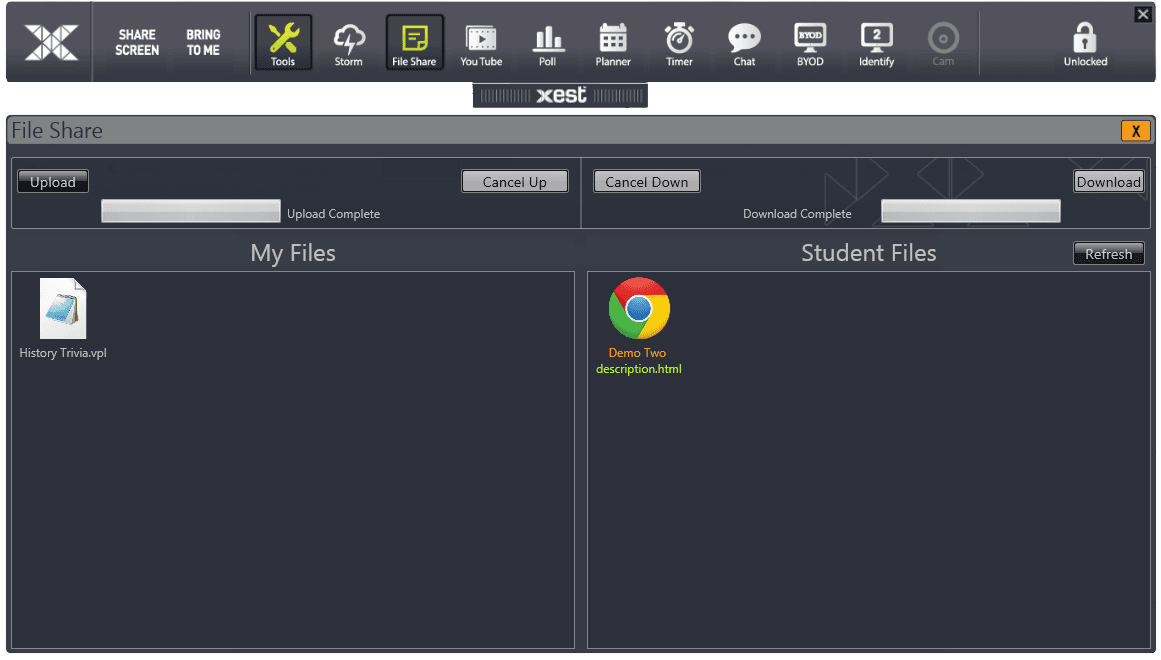
Once your selected file has been downloaded, the title of the file will highlight green to let you know that you have already downloaded this file.
.
.
*** The Xest Student Menu also has this feature and works in the same way.
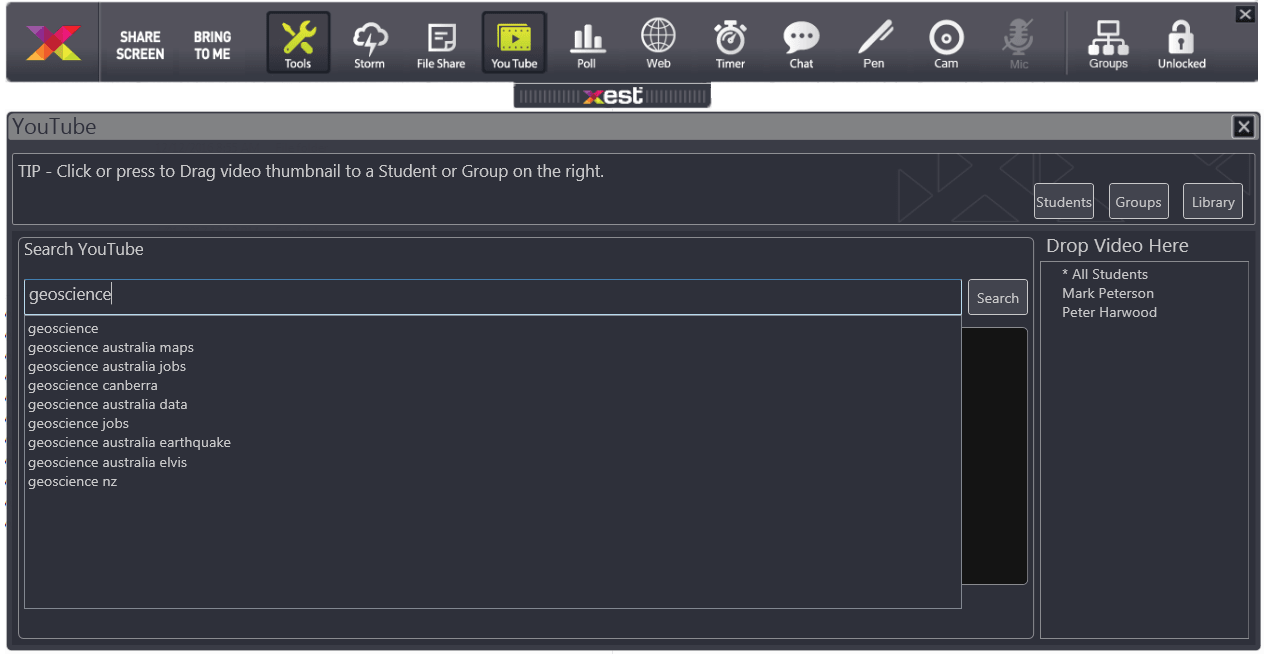
As soon and you start typing you will be presented with auto suggestions of what you are typing. If you see a suggestion that you are after you can double click the word to start searching for that.
.
.
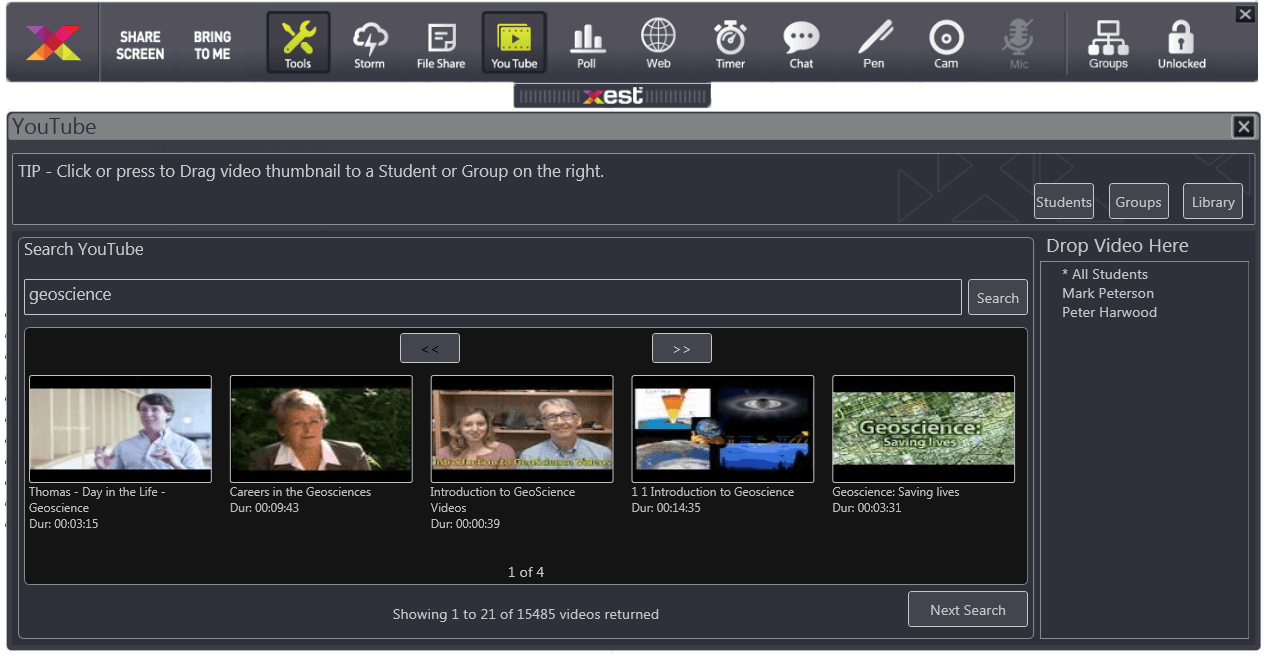
The thumbnails of your returned results will be shown in blocks of 20 videos. To show the next 5 videos or the previous 5 videos, simply click a Next/Previous located above the thumbnails To play a video locally simply double click a video to launch the Xest YouTube Player that will show your video in full screen and automatically select the highest video quality that the video publisher has available.
.
.
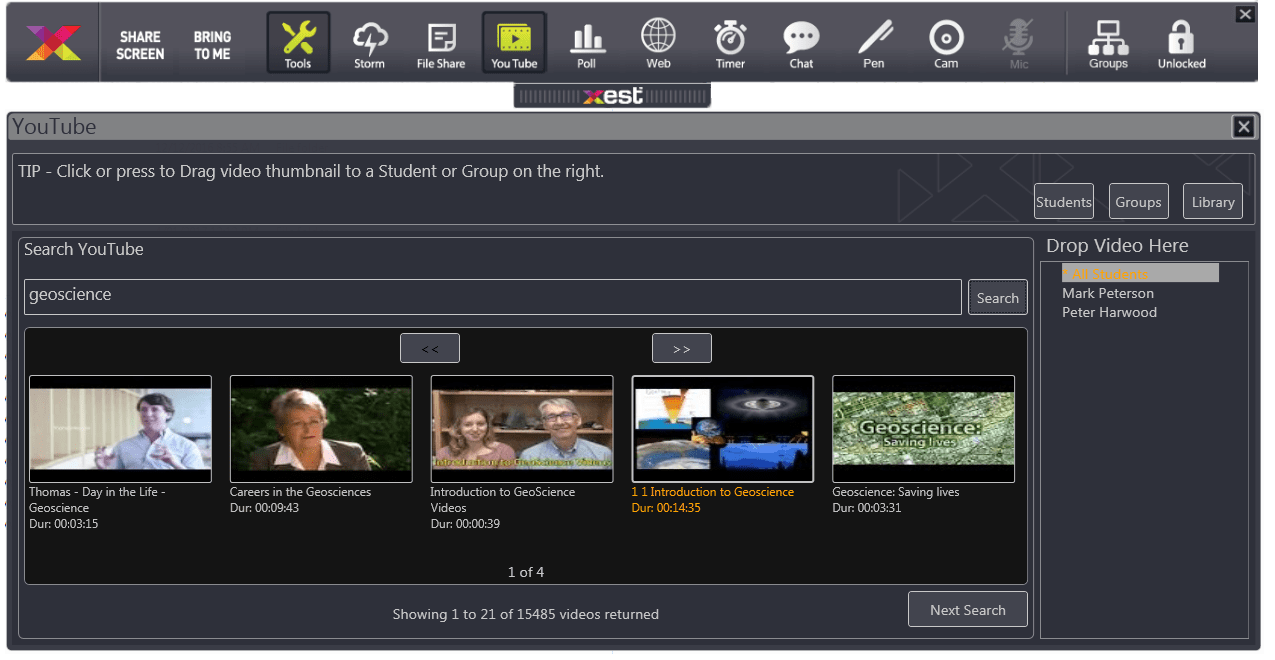
To allocate videos to each Student simply click and hold a video thumbnail until the border turns orange then drag the video and drop it on a Student name to the right of the window. This will now instruct that Student's application to launch their Xest YouTube Player and play the video. You can allocate different videos to each Student. Alternativly you can drop a video on "*All Students to send that video to all Students.
.
.
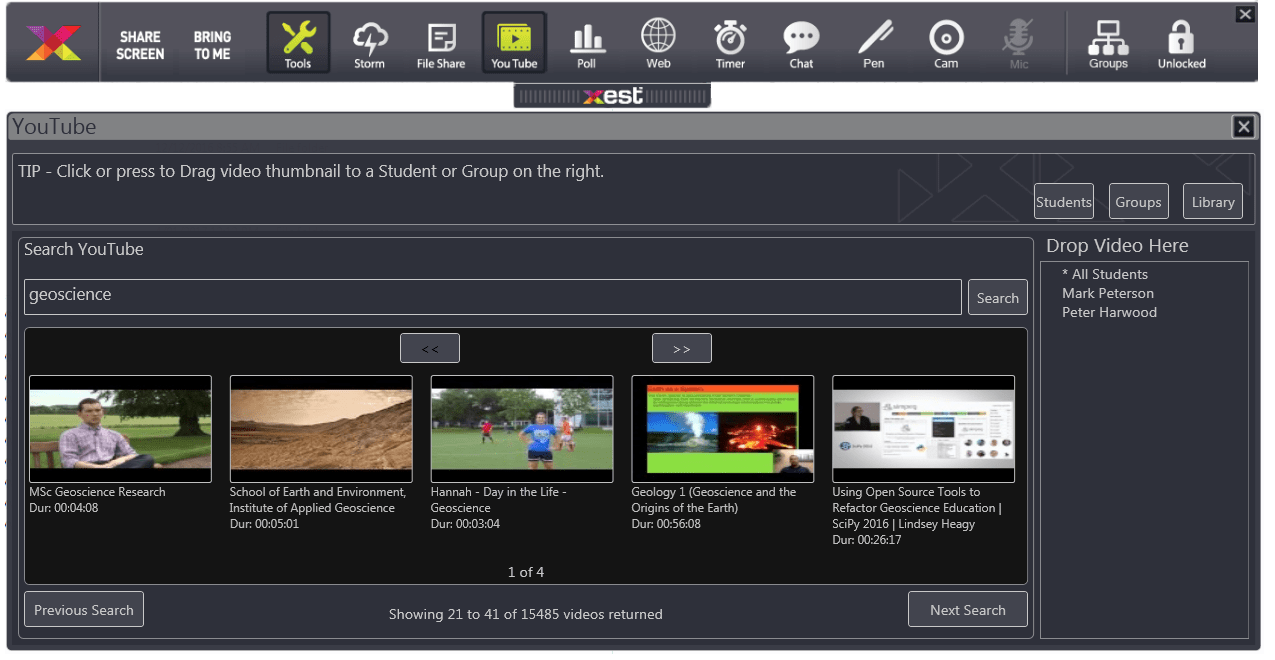
The "Next" and "Previous" buttons will display the next or previous 20 videos from your search results. In our example we searched for "geoscience" and YouTube returned 15485 videos. The most popular videos have been sorted to the front of the results list.
.
.
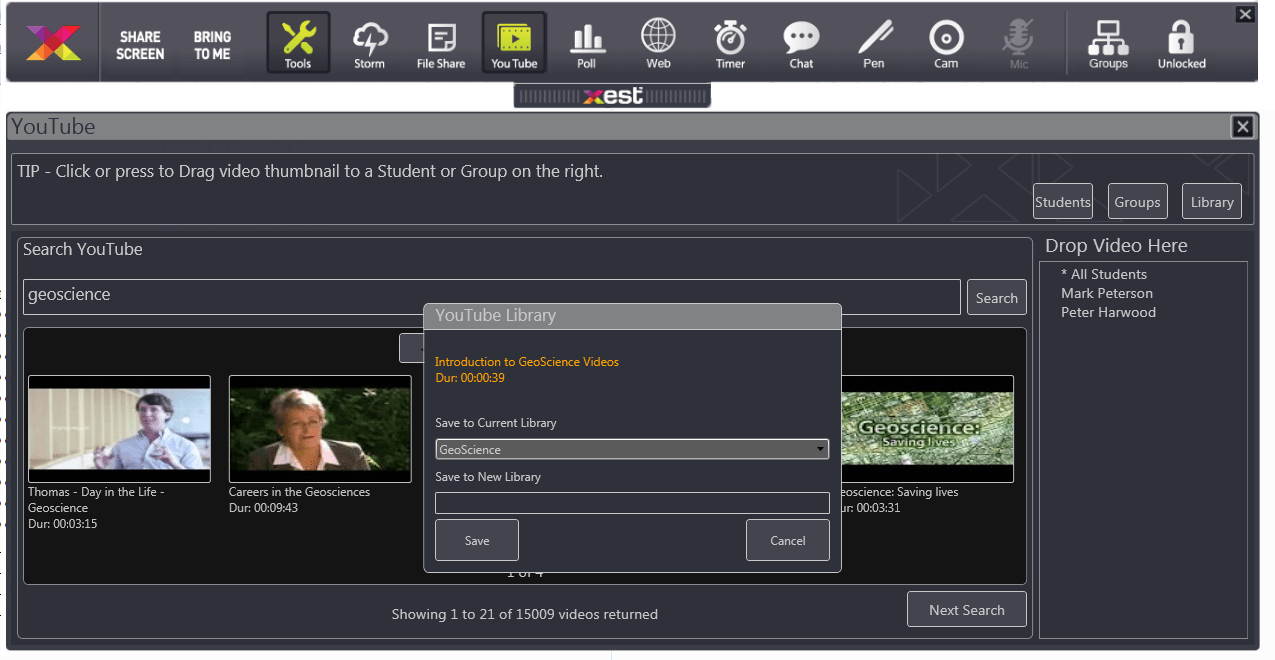
To save a video to the Library simply right click a video thumbnail and select "Add to Library". From here you either select an exsisting Library via the drop down box or add another Library for the selected video by typing a title in the "Save to New Library" box.
.
.
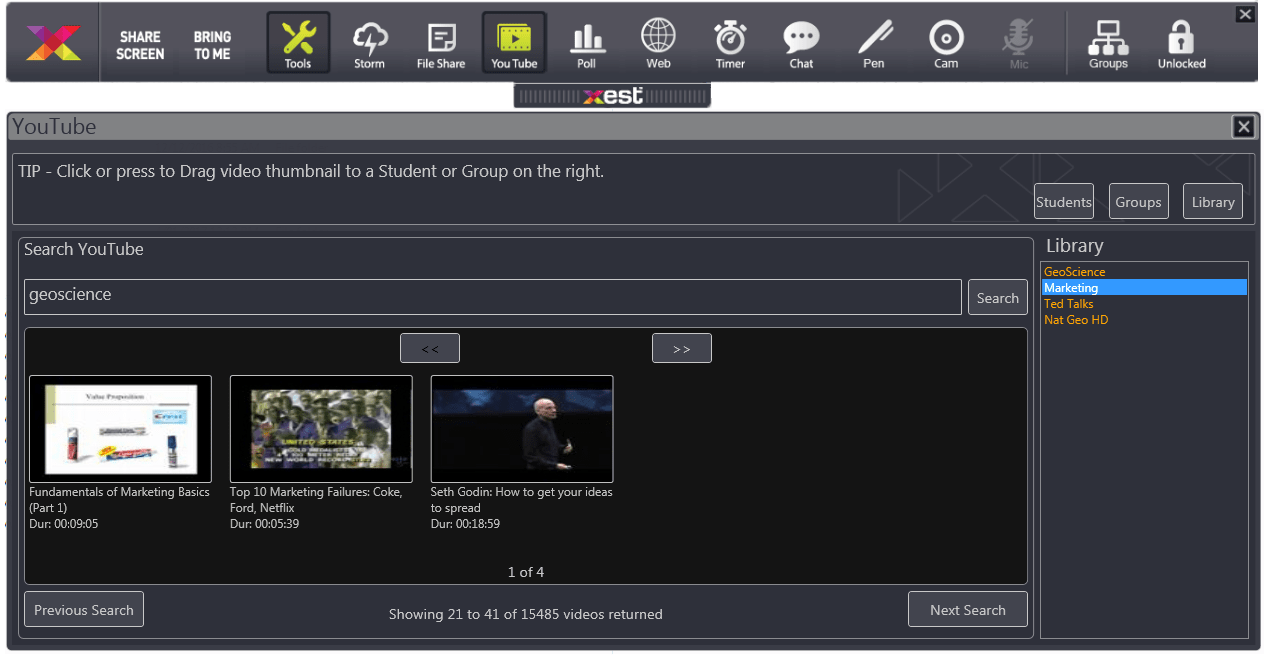
To access the YouTube Video Library simply click the "Library" button located to the right of the window. You will now see the current libries that have been previously created. To access each Library simply click the desired Library to show the video thumbnails in the display window. You can now access these saved videos the same way as the previous search results list.
.
.
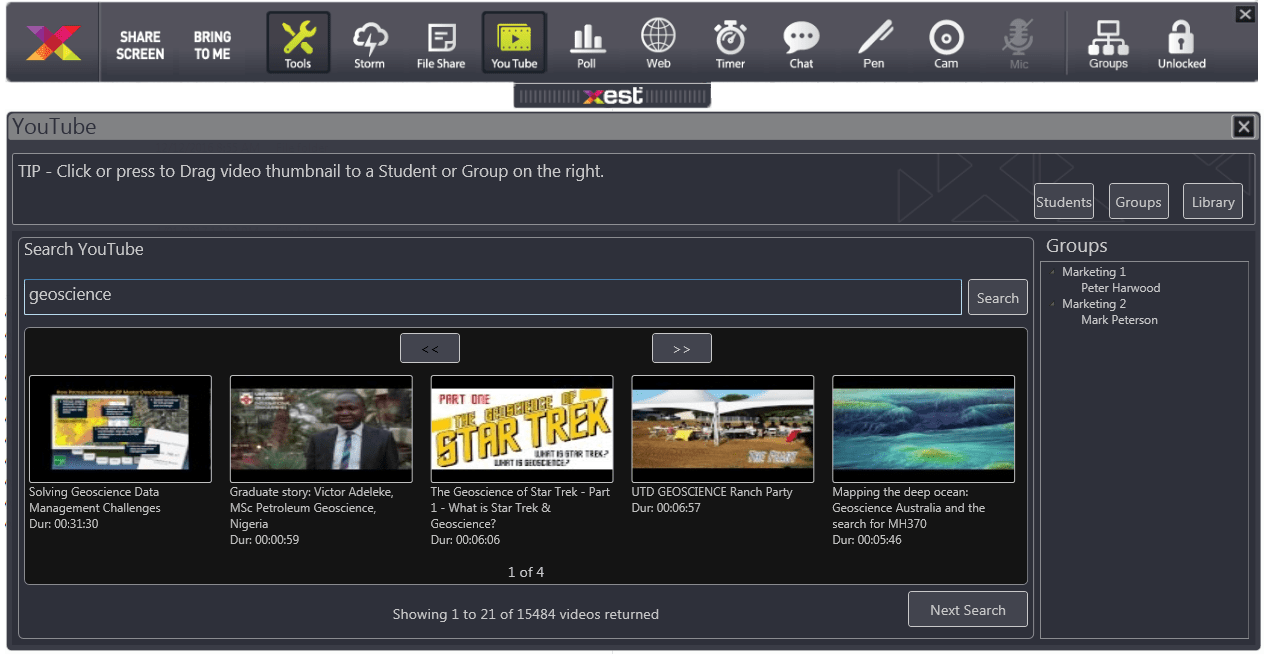
To access the YouTube Groups simply click the "Groups" button located to the right of the window. You will now see the current Groups that have been previously created in the Groups Window. Simply Drag and Drop a video clip onto a Group to send that Video to that Group only.
.
.

The Xest YouTube Player automatically plays in full screen with the highest video quality that the video is available in and avoids any start advertisements. All of the usual YouTube controls remain the same.
.
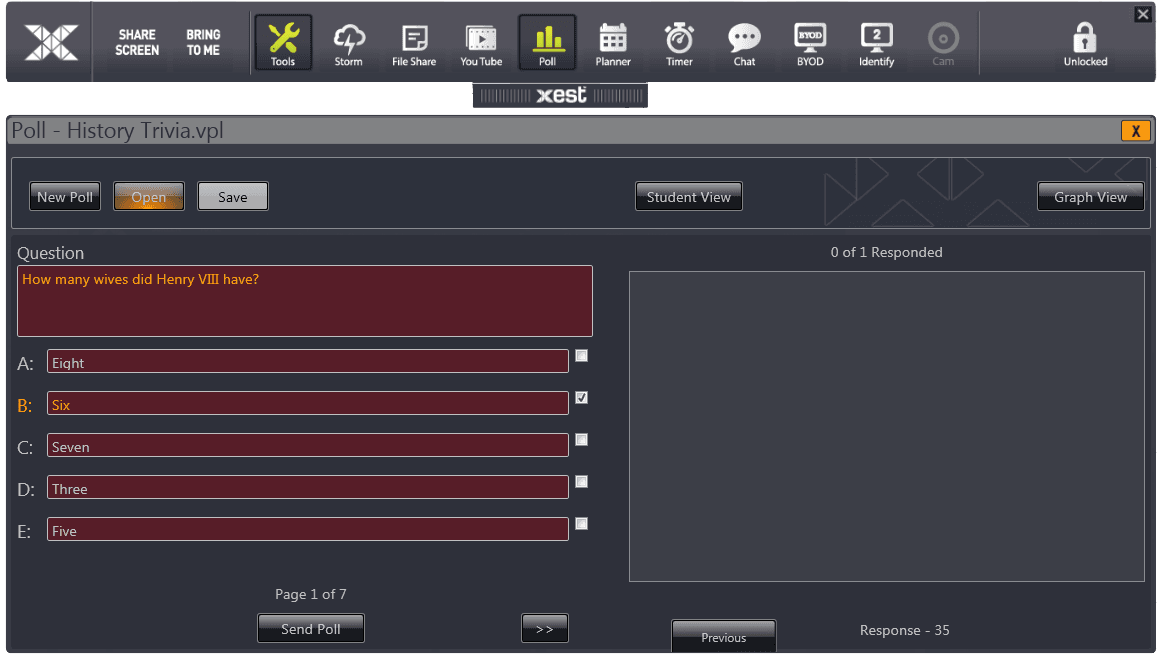
Poll Open Questions.
.
.
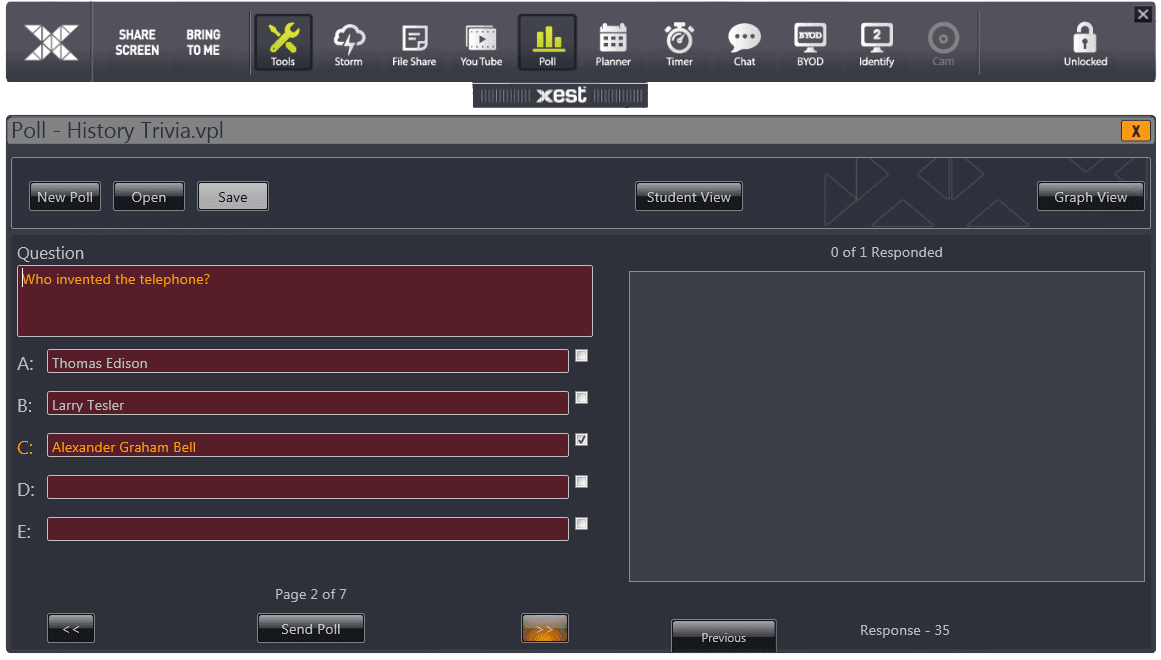
Poll Next/Previous.
.
.
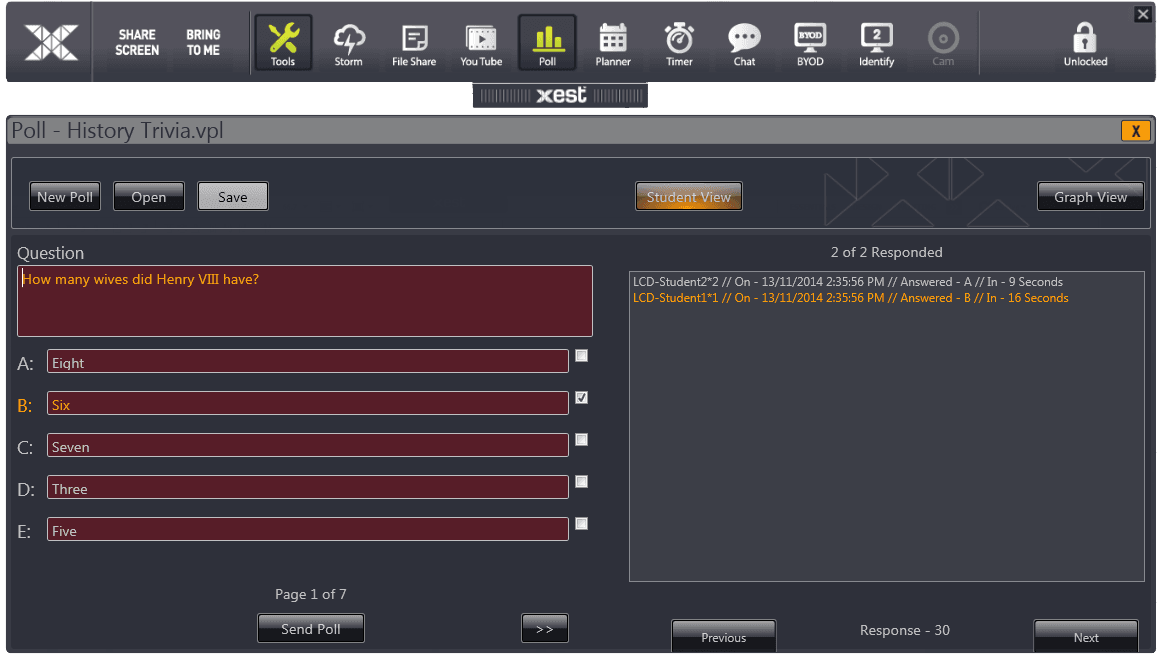
Student View Results.
.
.
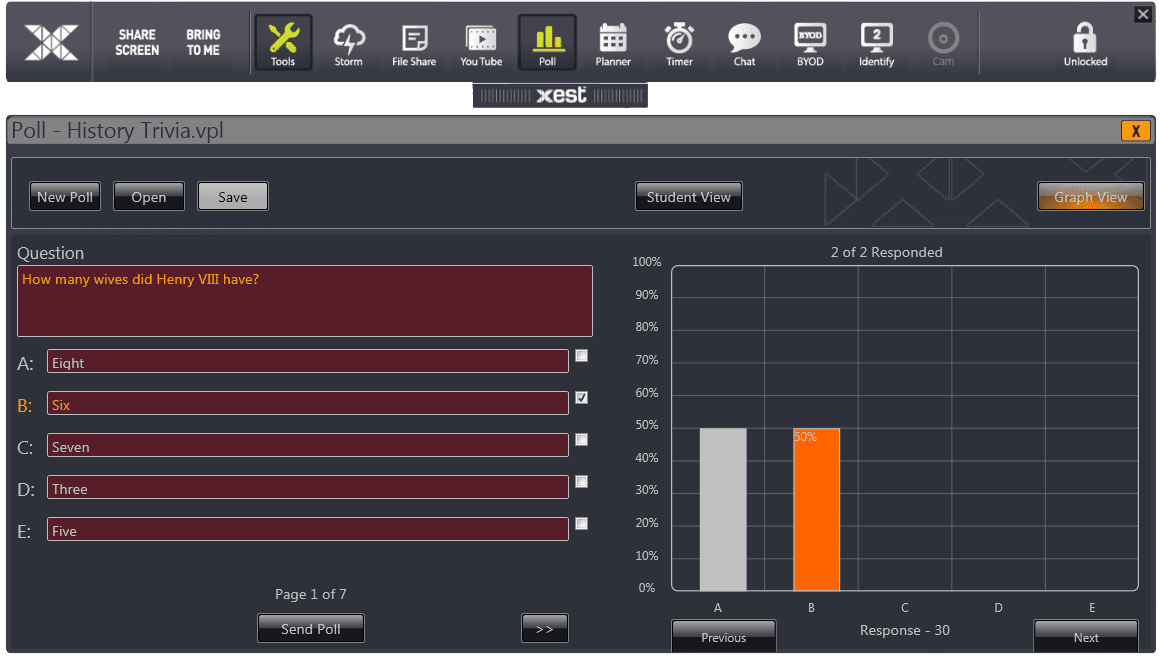
Graph View Results.
.
.
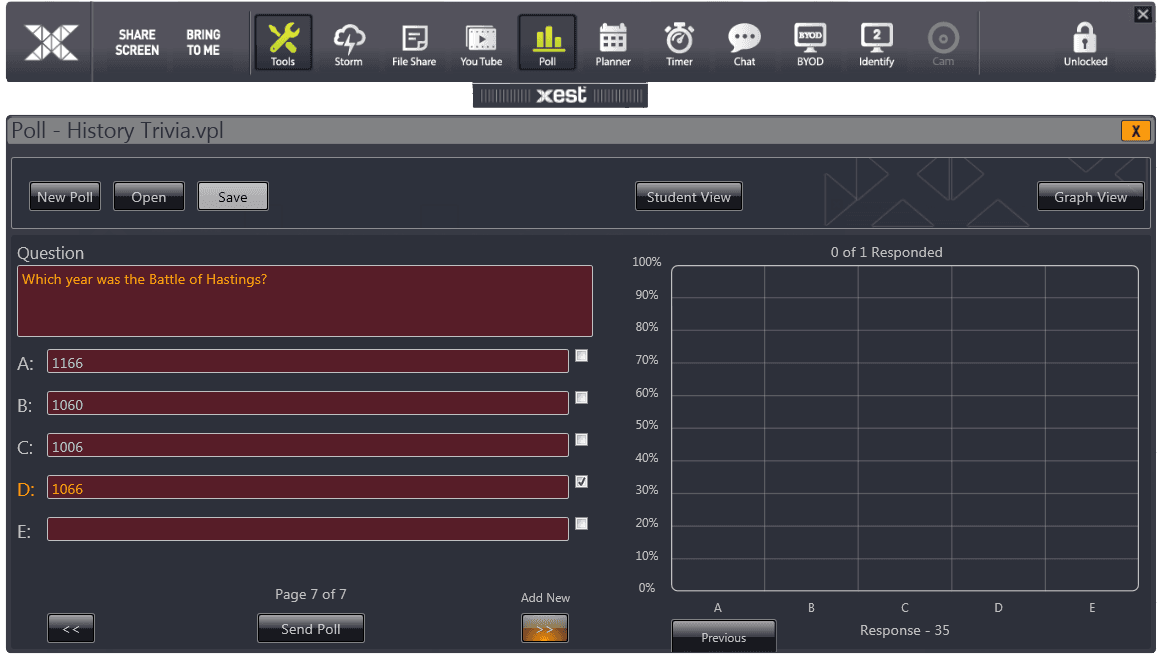
Poll Add A New Question.
.
.
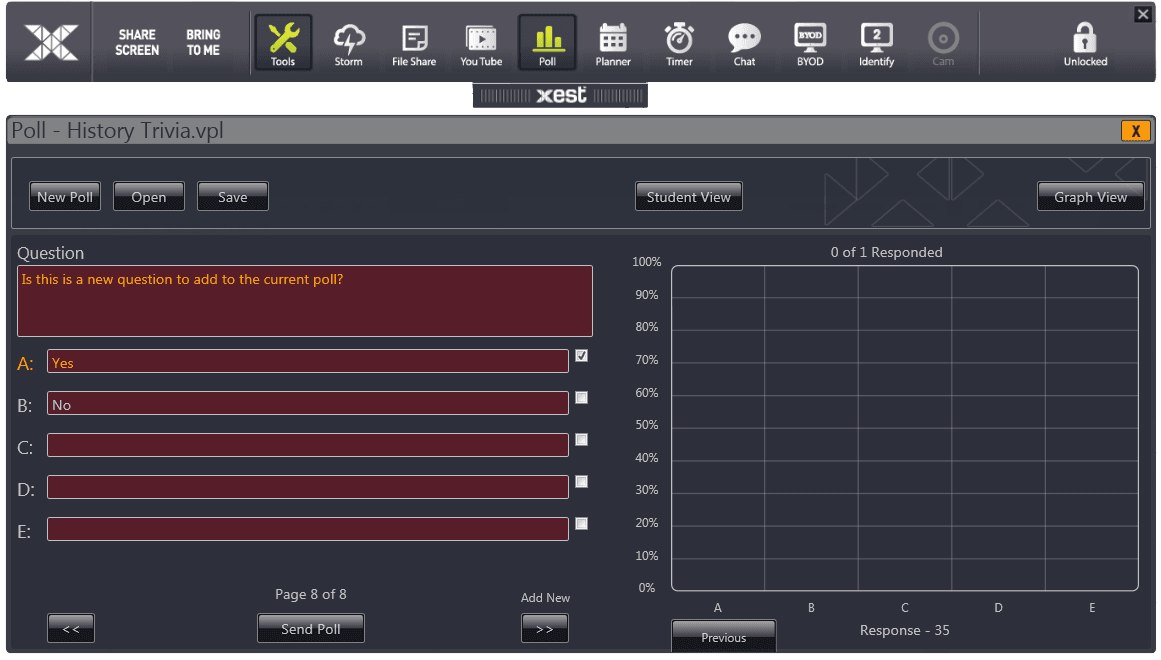
A New Question Added.
.
.
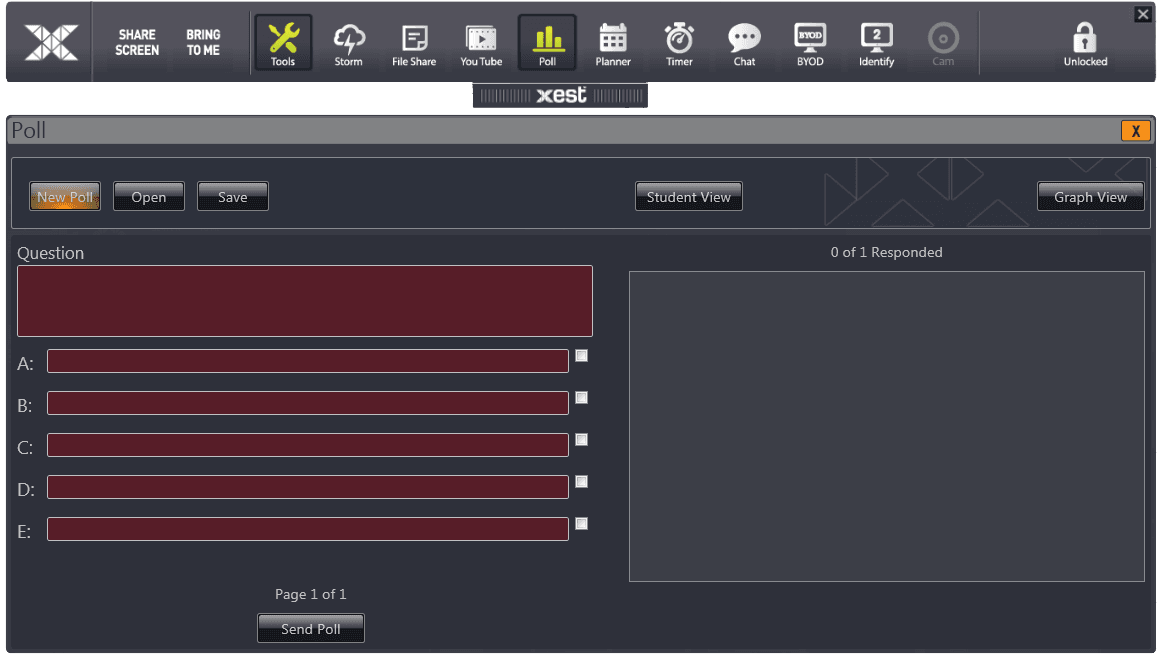
Ask Questions On The Fly.
.
.
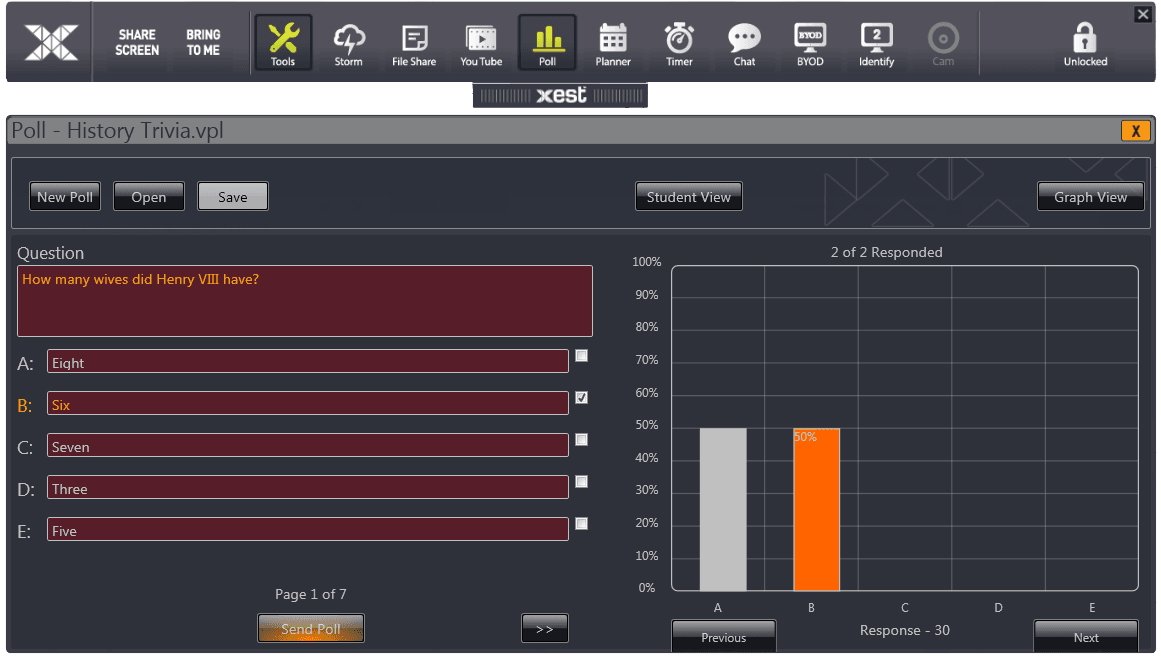
Send A Poll To Students.
.
.
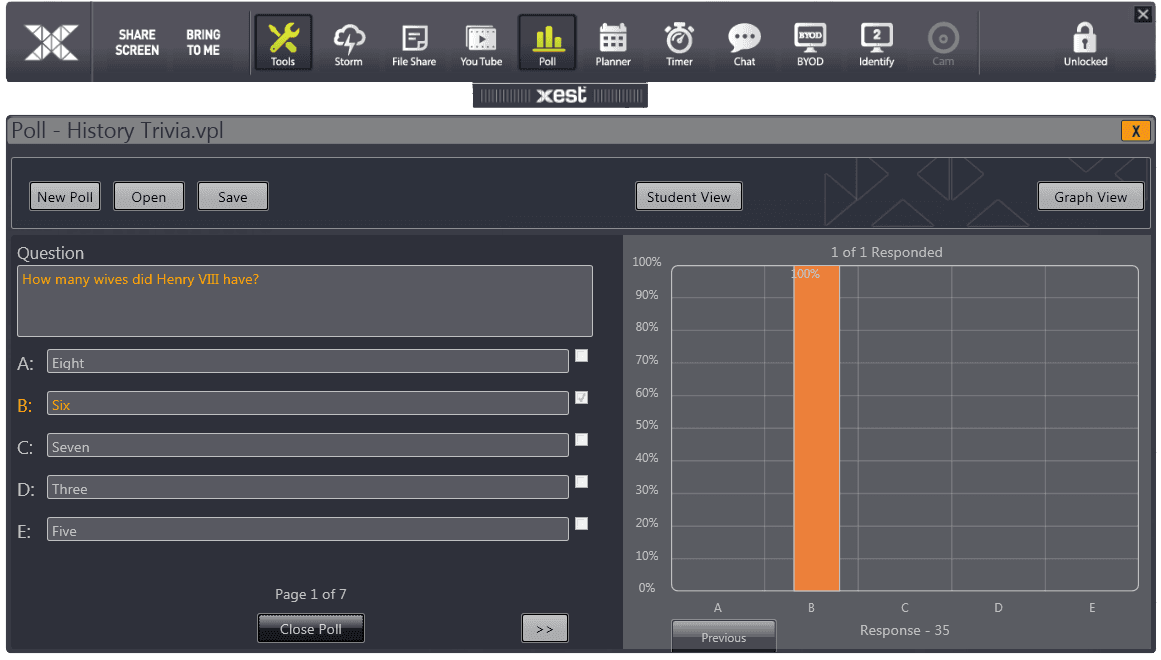
Close A Current Poll.
.
.
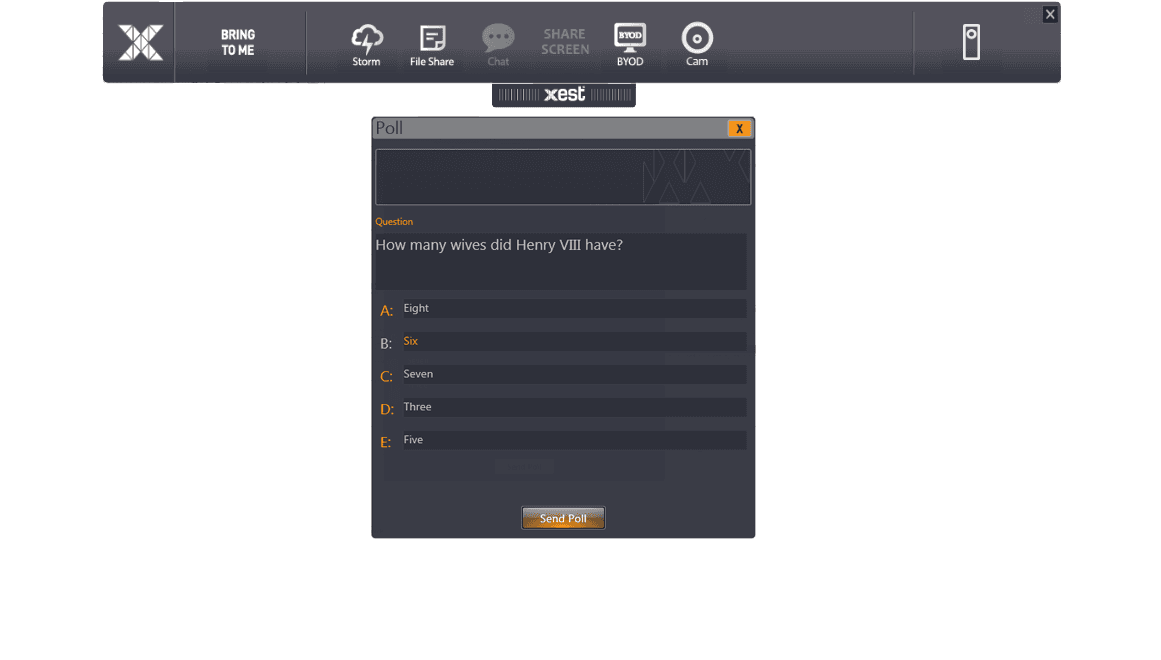
Each Student receives a popup with the question and multiple choice answers. They simply click their selected answer then click "Send Poll". The popup will then disapear from the Student screen.
.
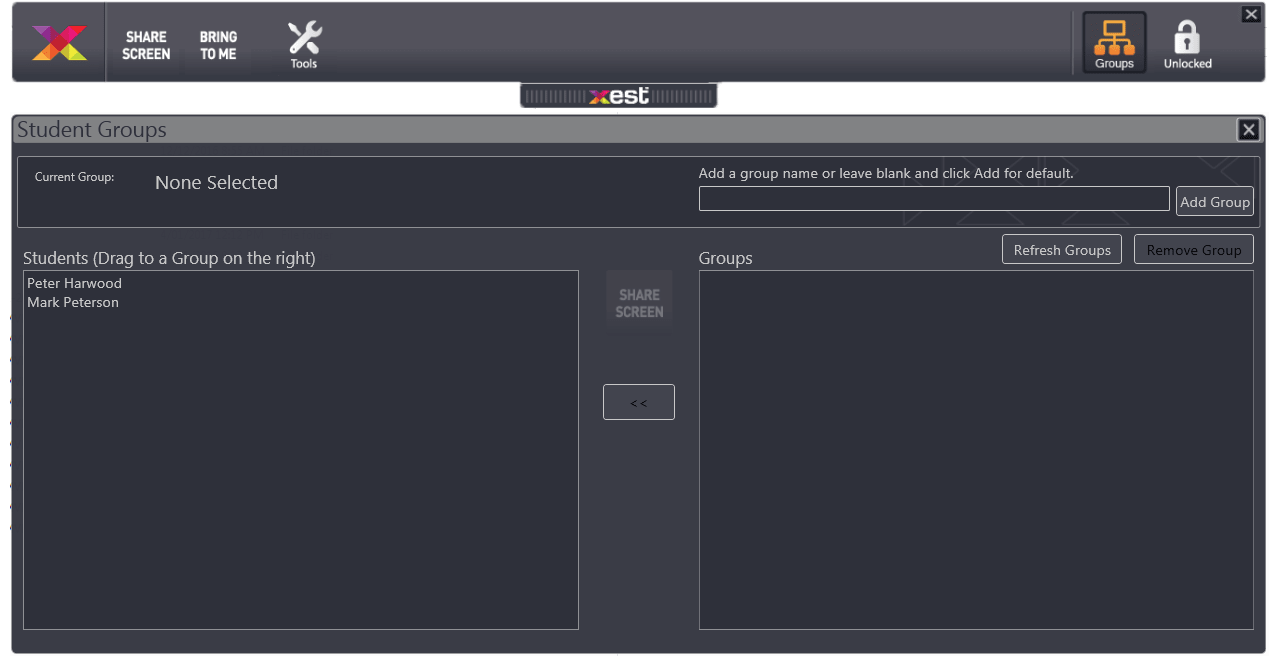
Create and Manage Groups.
.
.
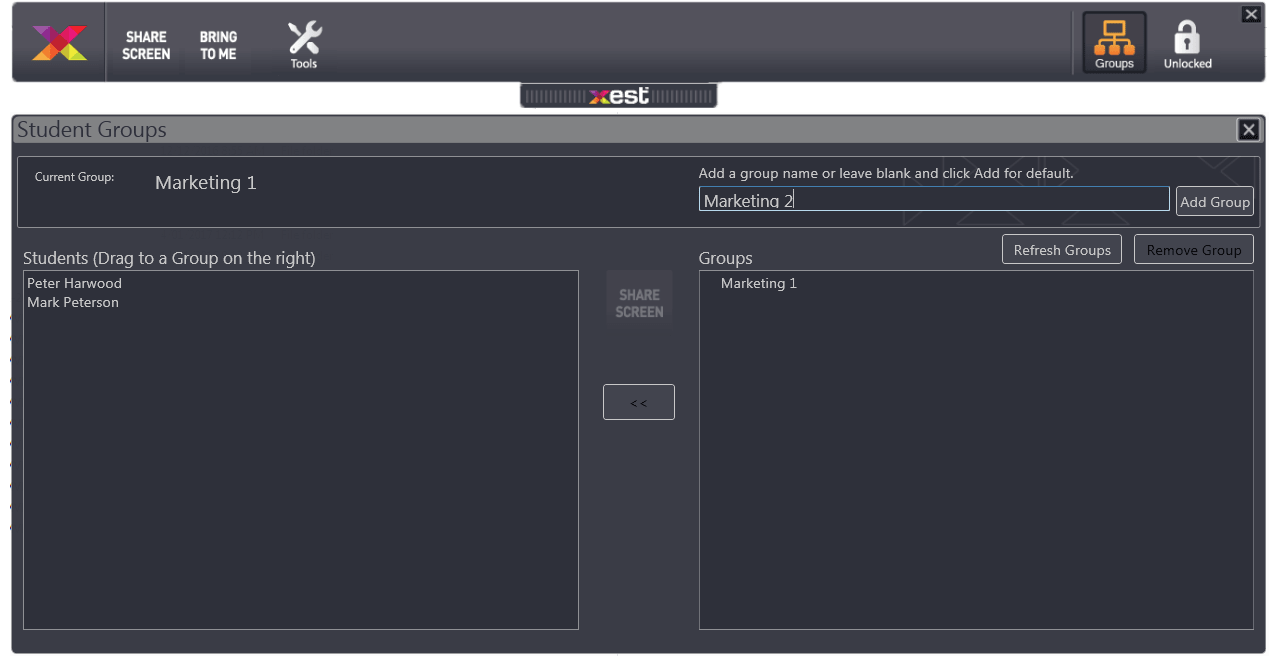
Add Groups.
To add a Group, simply enter a name into the top right text field and press "Add Group". Alternatively you can just press "Add Group" for a default name.
.
.
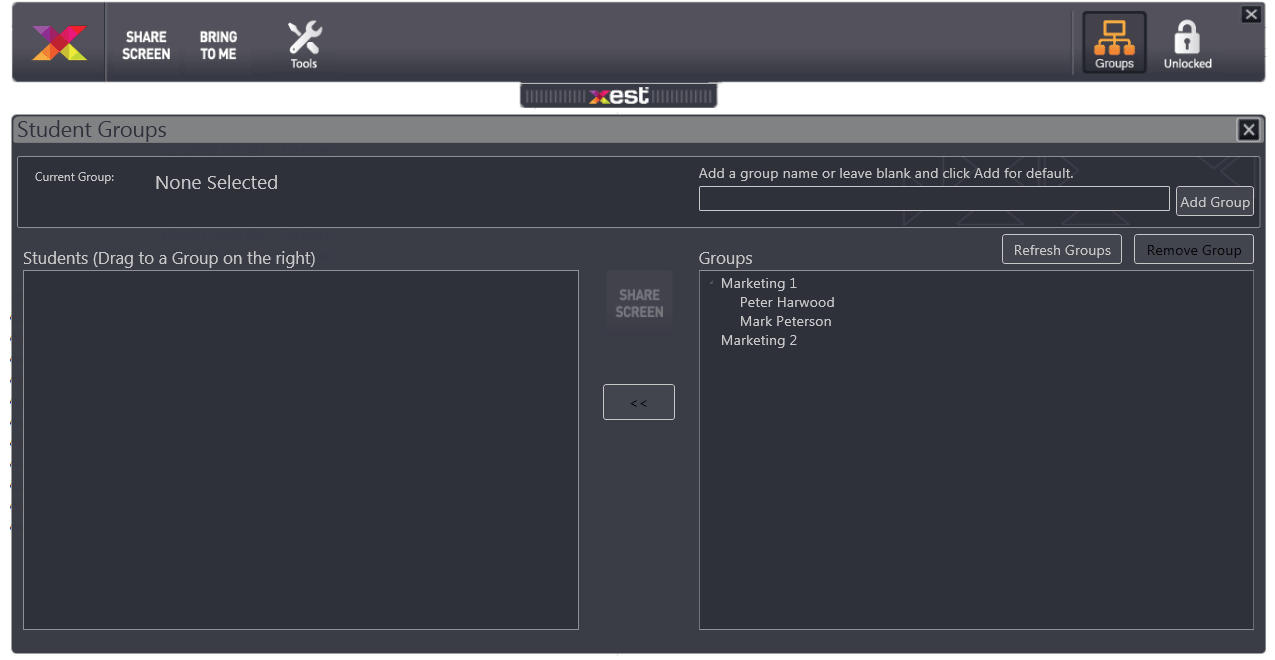
Add Students.
To add a Student to a Group, simply select a Student from the Students list and drag and drop onto a Group in the Groups list.
.
.
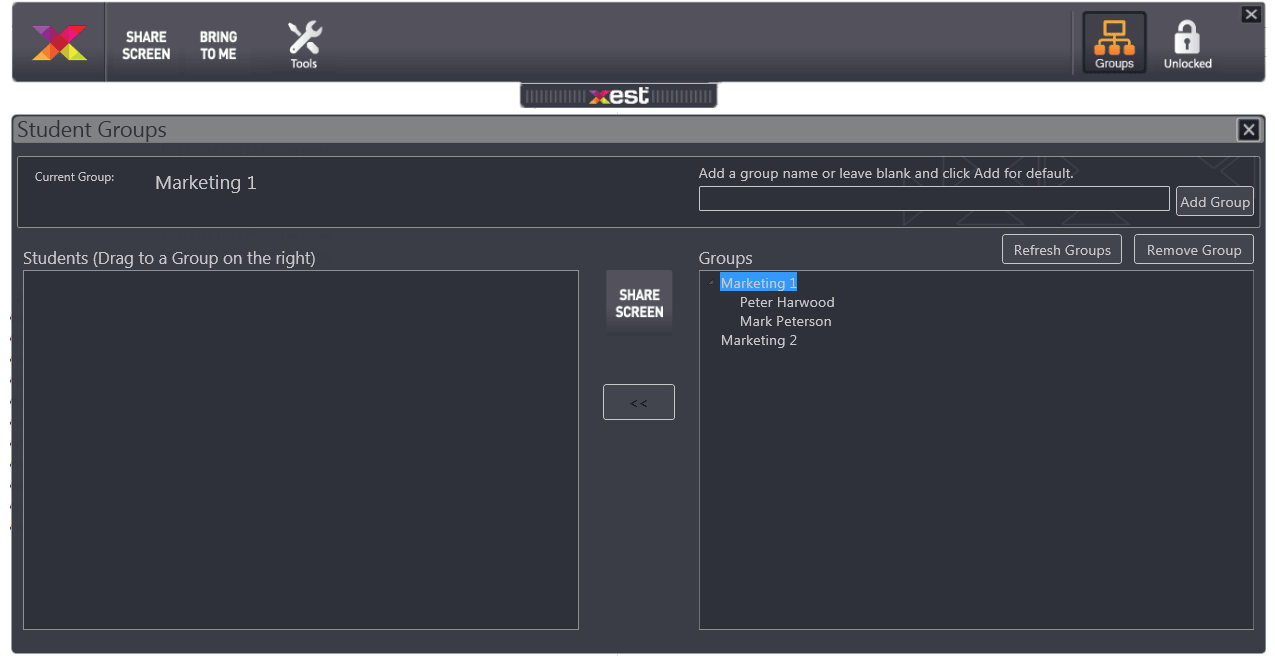
Select a Group.
To select a Group, simply click or press on the Group name within the Groups panel. This will highlight and be reflected in the "Current Groups tag at the top.
.
.
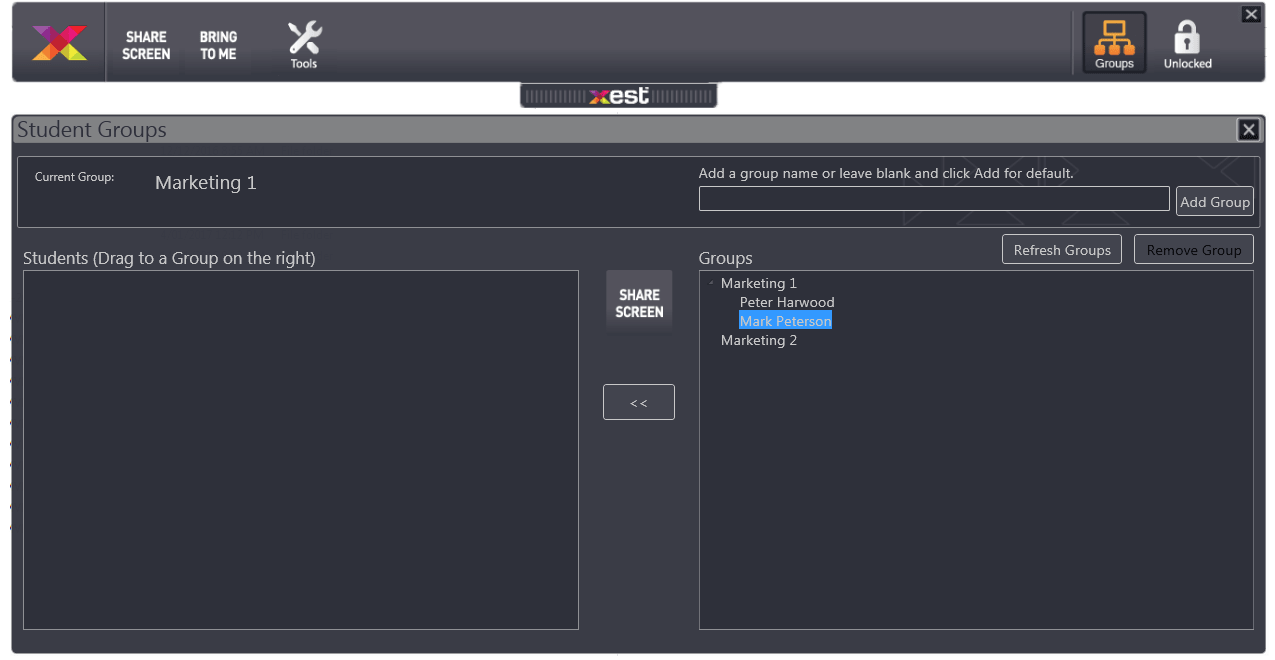
Select a Student.
To select a Student, simply click or press on the Student name within the Groups panel. The selected Student name will be highlighted.
.
.
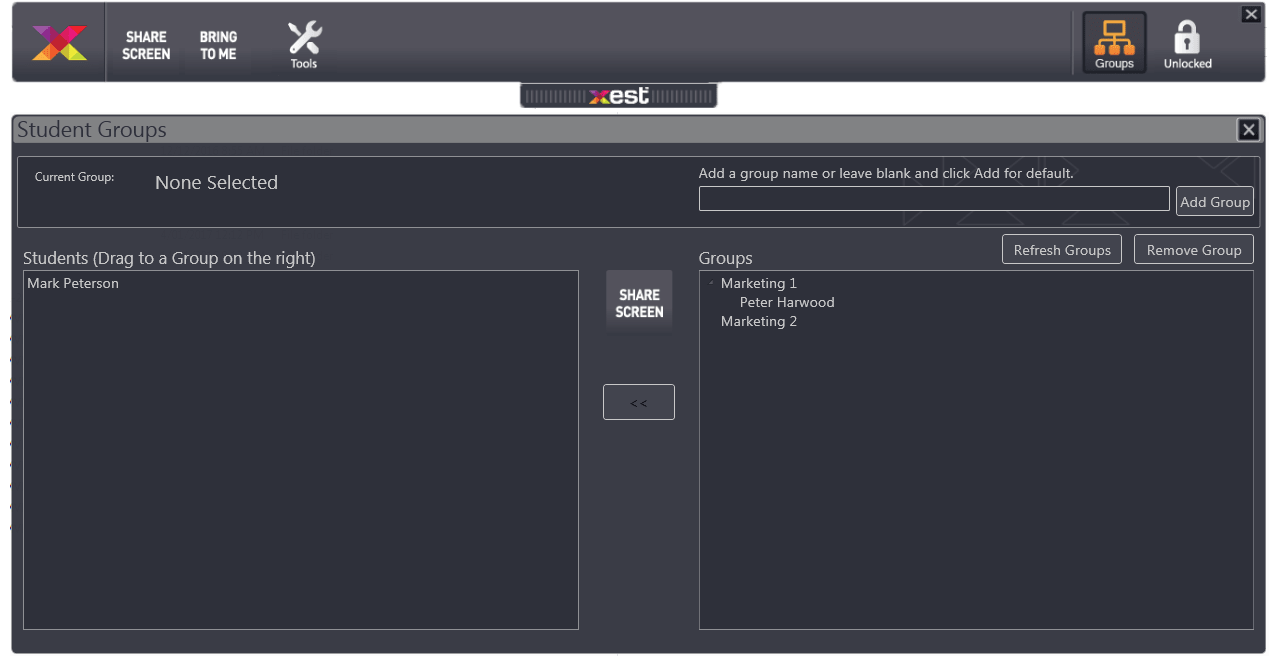
Remove a Student from a Group.
Once having selected a Student in the above step, simply click or press the button located in between the 2 panels. This will add that Student back into the Students panel.
.
.
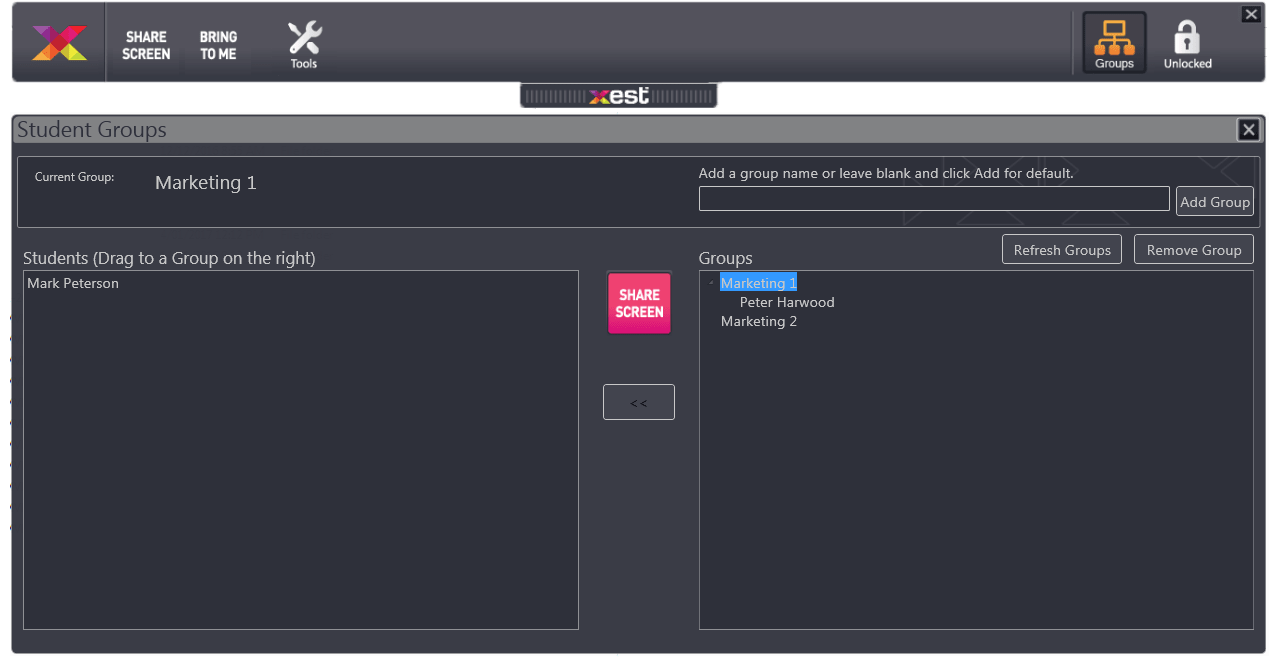
Share Screen to a Group.
Once a Group has been selected from the Groups panel the "Share Screen" is enabled. This now works the same way as the main "Share Screen" button but will only share the screen to that group.
.
.
.

Lock Student Interaction.
.
*** Below is the Student Xest Menu that reflects all interactive buttons have been disabled.

.

The Chat window appears in the bottom left of the screen and can be moved around the screen by clicking and draging the top bar of the window. The Minimize Button will compress to the bottom of the screen. Press again to maximise the Chat Window.
Note: When a name or button is highlighted in pink, this means there is a chat message waiting to be read.
There are 3 Modes of Chat.
Local Chat. This mode will Chat to all participants.
Private Chat. This mode will Chat to an individual participant only.
Group Chat. This mode will Chat to all participants in a Group.
.
.
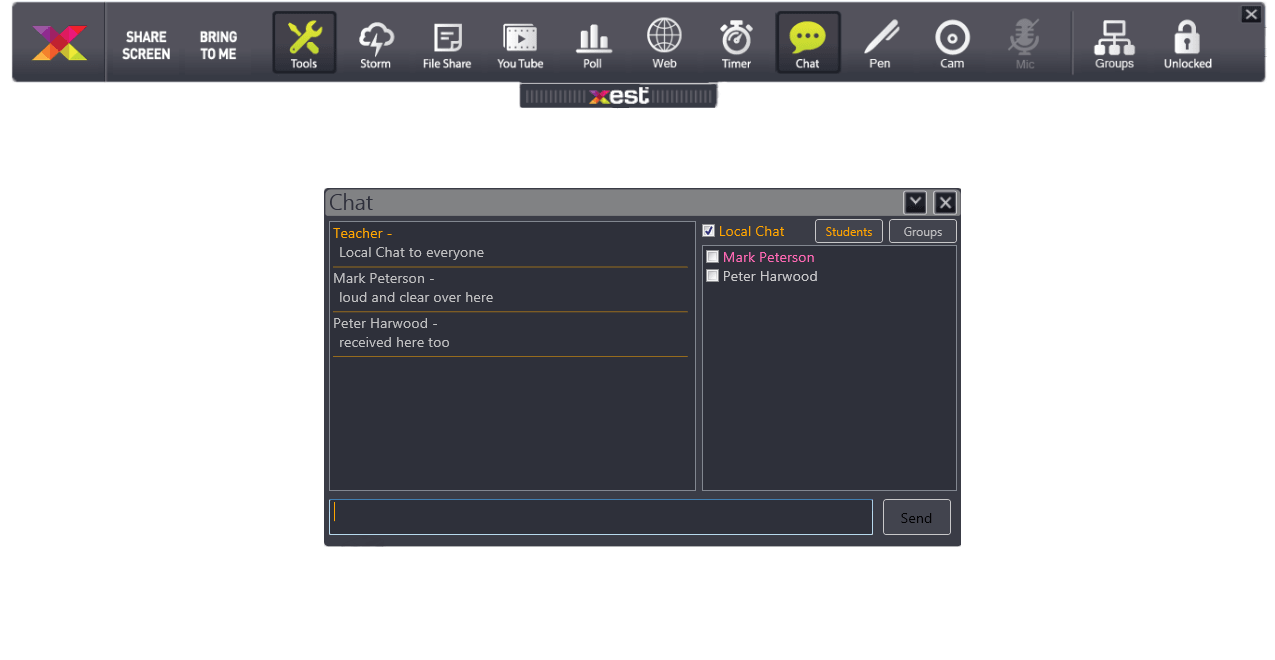
When in Local Chat Mode (Local CheckBox is ticked) all chat conversations reach all participants in the session.
In the above image we have received a Private Chat from Mark Peterson. Simply click to view the message.
.
.
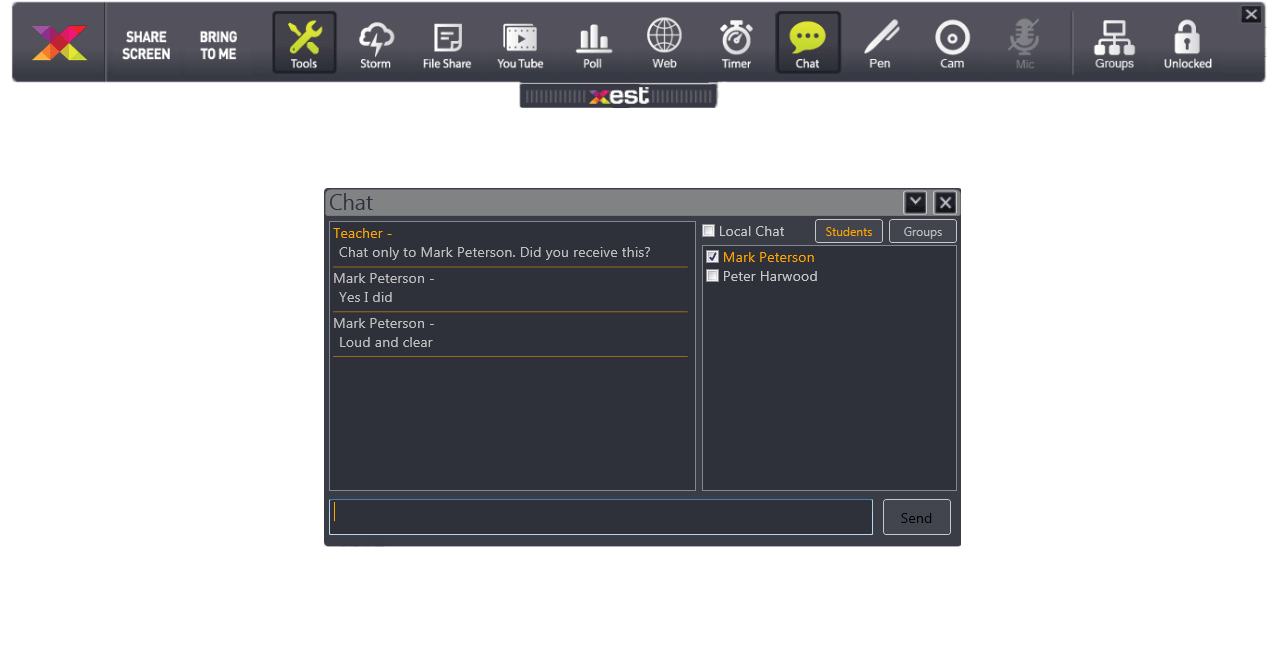
To Chat to an individual Student, simply select the Student Button to list the Students, then select a Student name and begin typing. This message will only be seen by that Student.
.
.
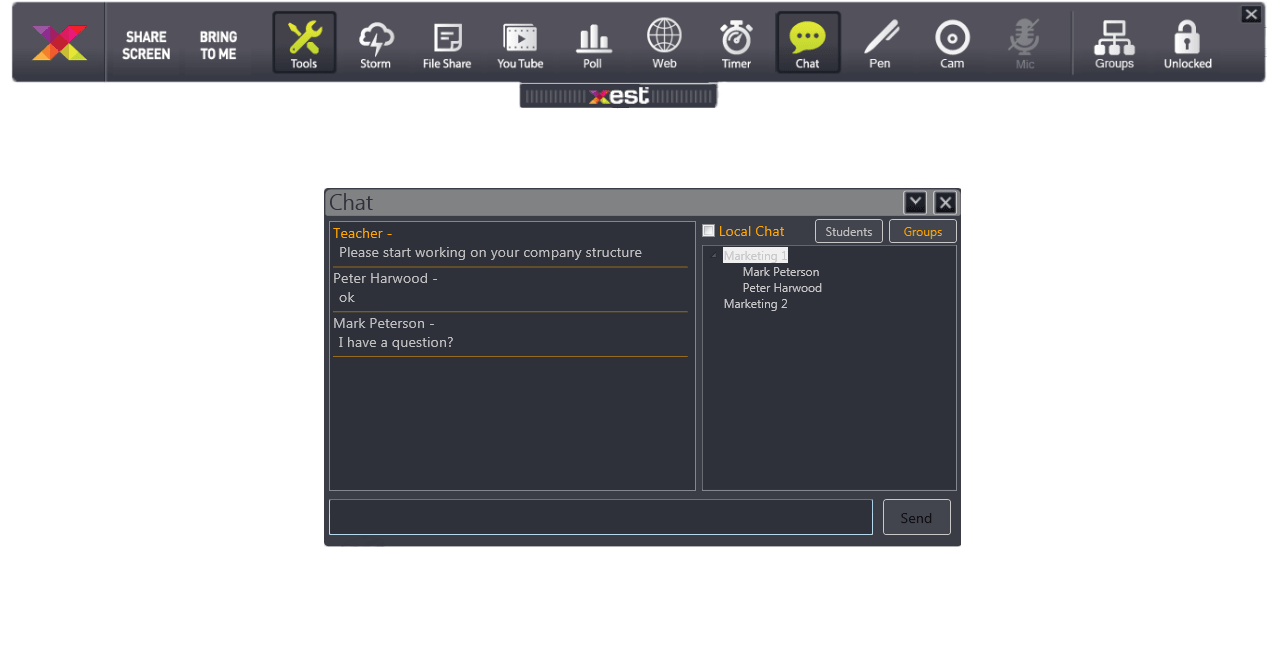
To Chat to a Group, simply select the Group Button to list the Groups then select a Group name and begin typing. This message will only be seen by that Group.
.
.
*** The Xest Student Menu also has this feature.
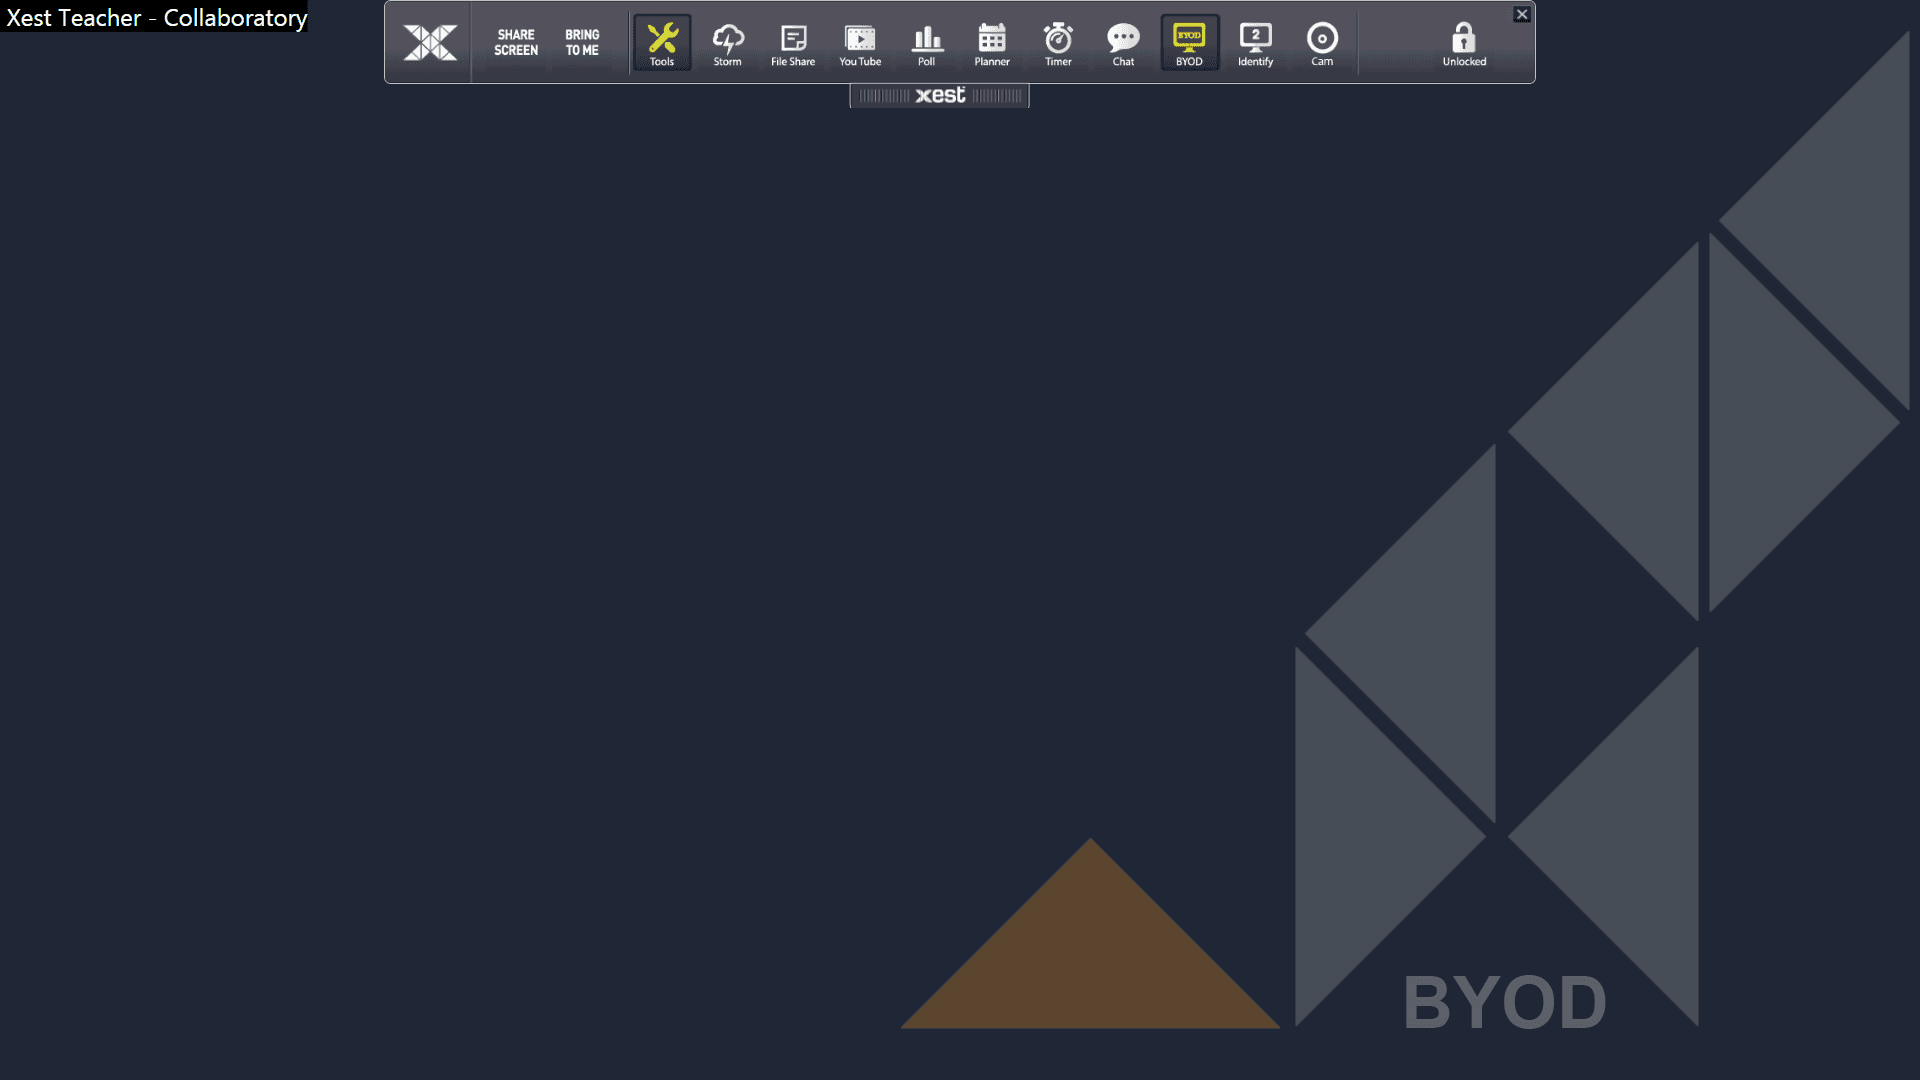
BYOD (Bring Your Own Device). Xest allows people to connect with their mobile devices to present media from their own device. Xest BYOD utilizes UPNP/DLNA and can be used by any UPNP/DLNA app found in the app store or google play. The UPNP/DLNA device name is found in the top left corner and is made up of the XestTeacher and room name.
.
*** In our example below we have used "AllCast".
.
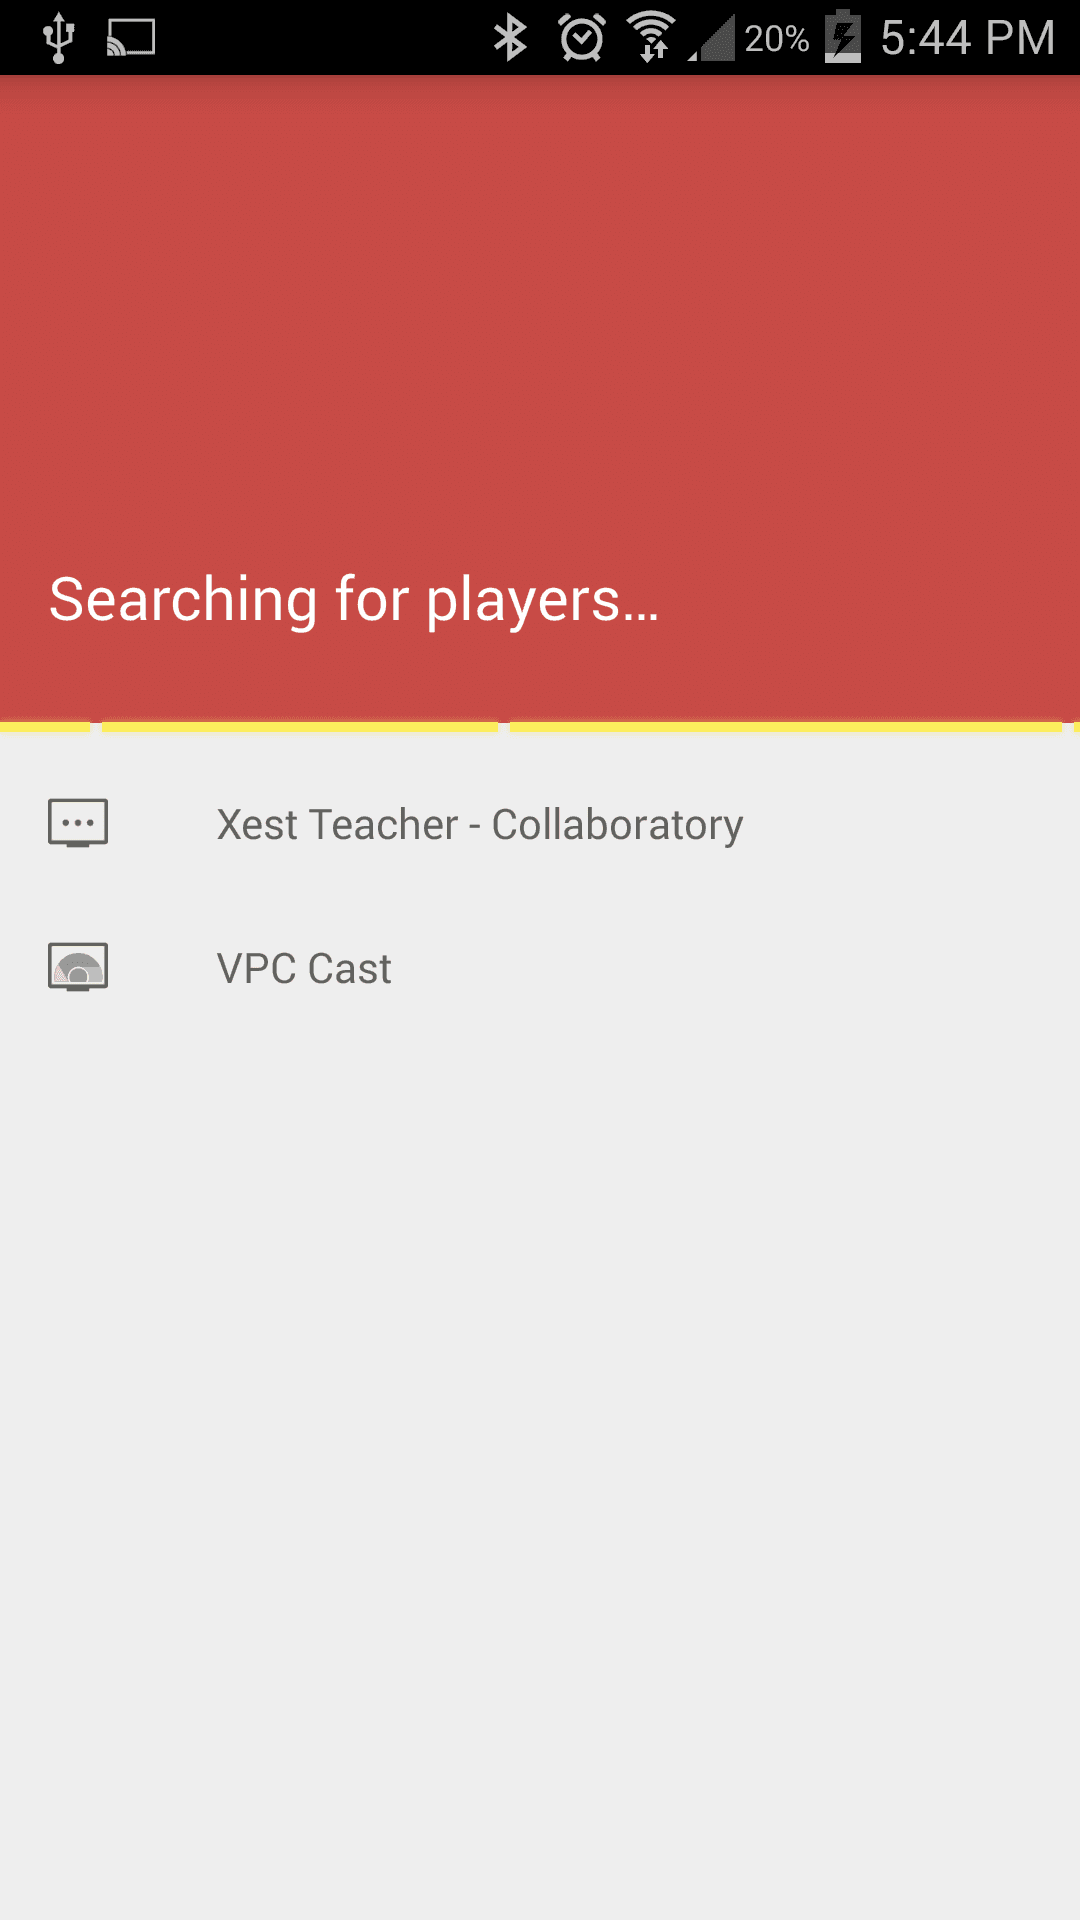
In this example we have used "AllCast". Here we can select "Xest Teacher-Collaboratory" as the device we wish to send our media to.
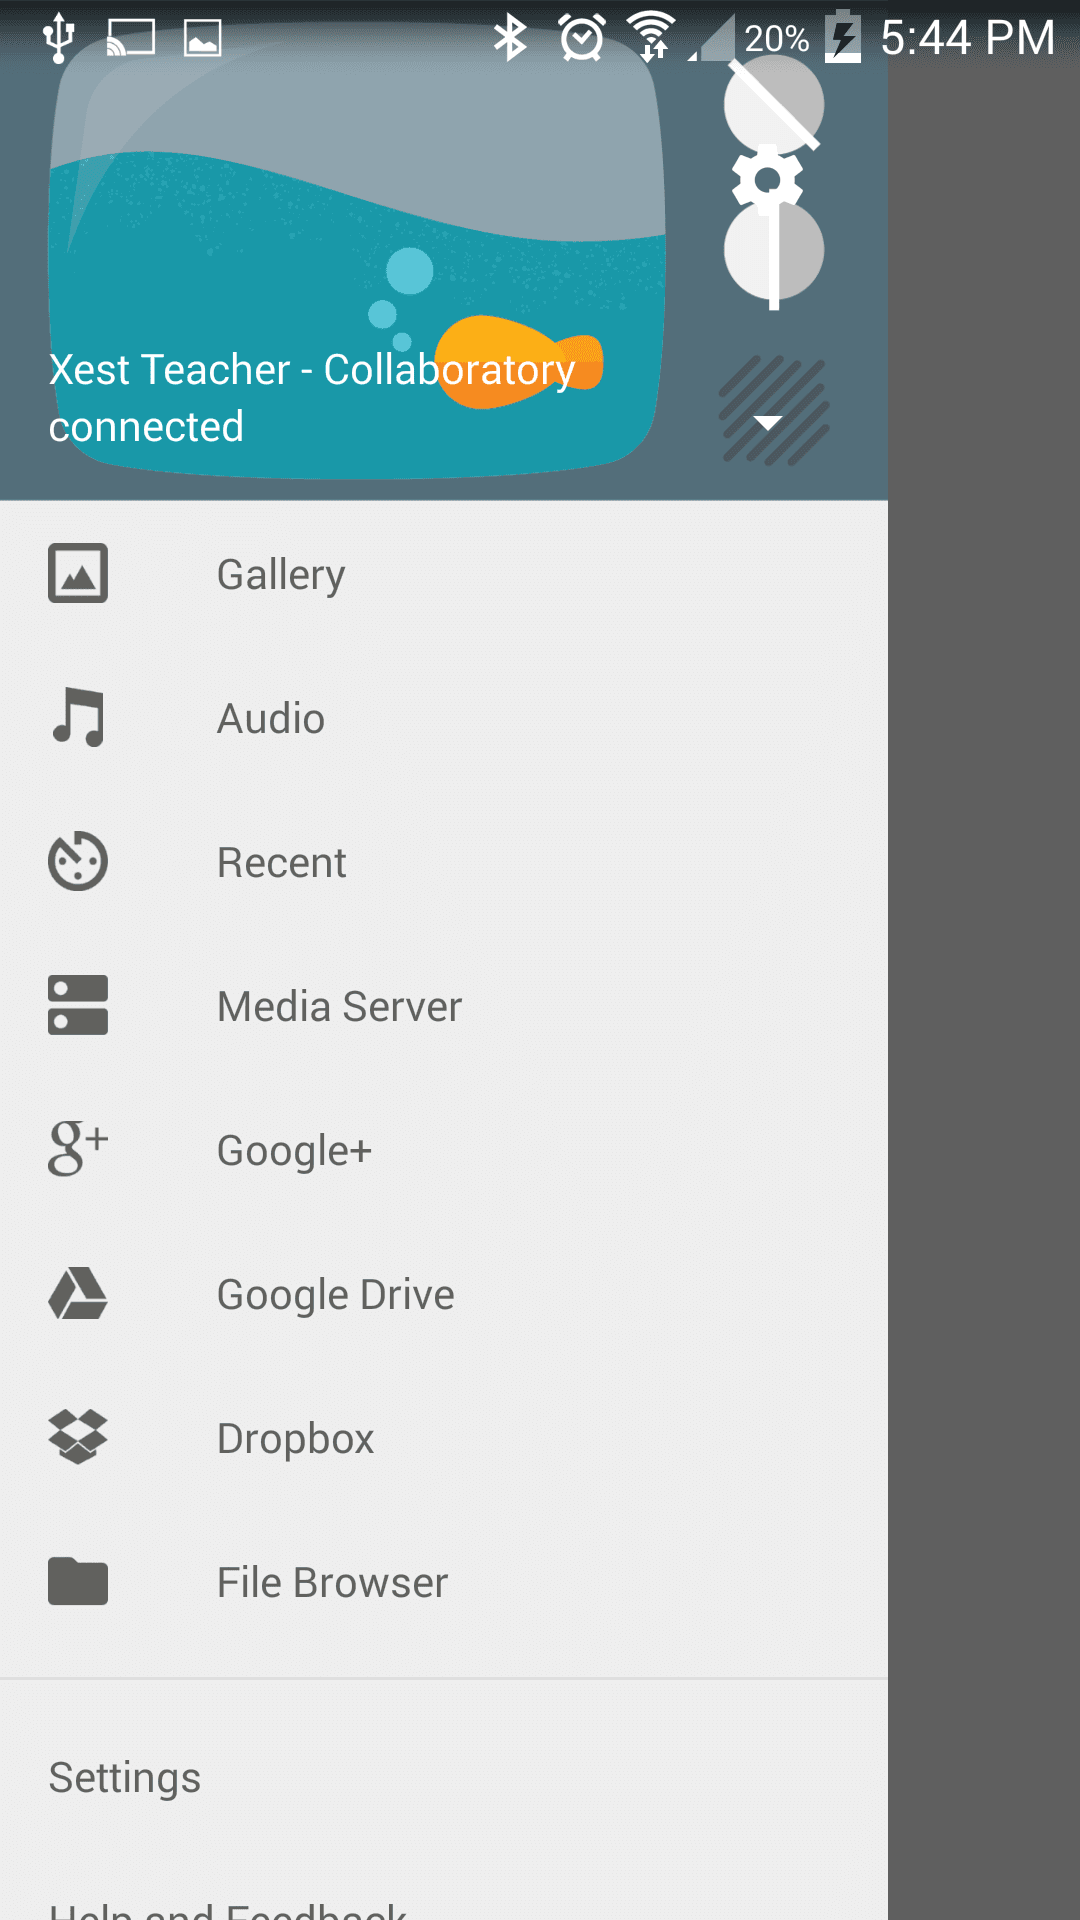
Here we can select the type of media we wish to send to Xest.
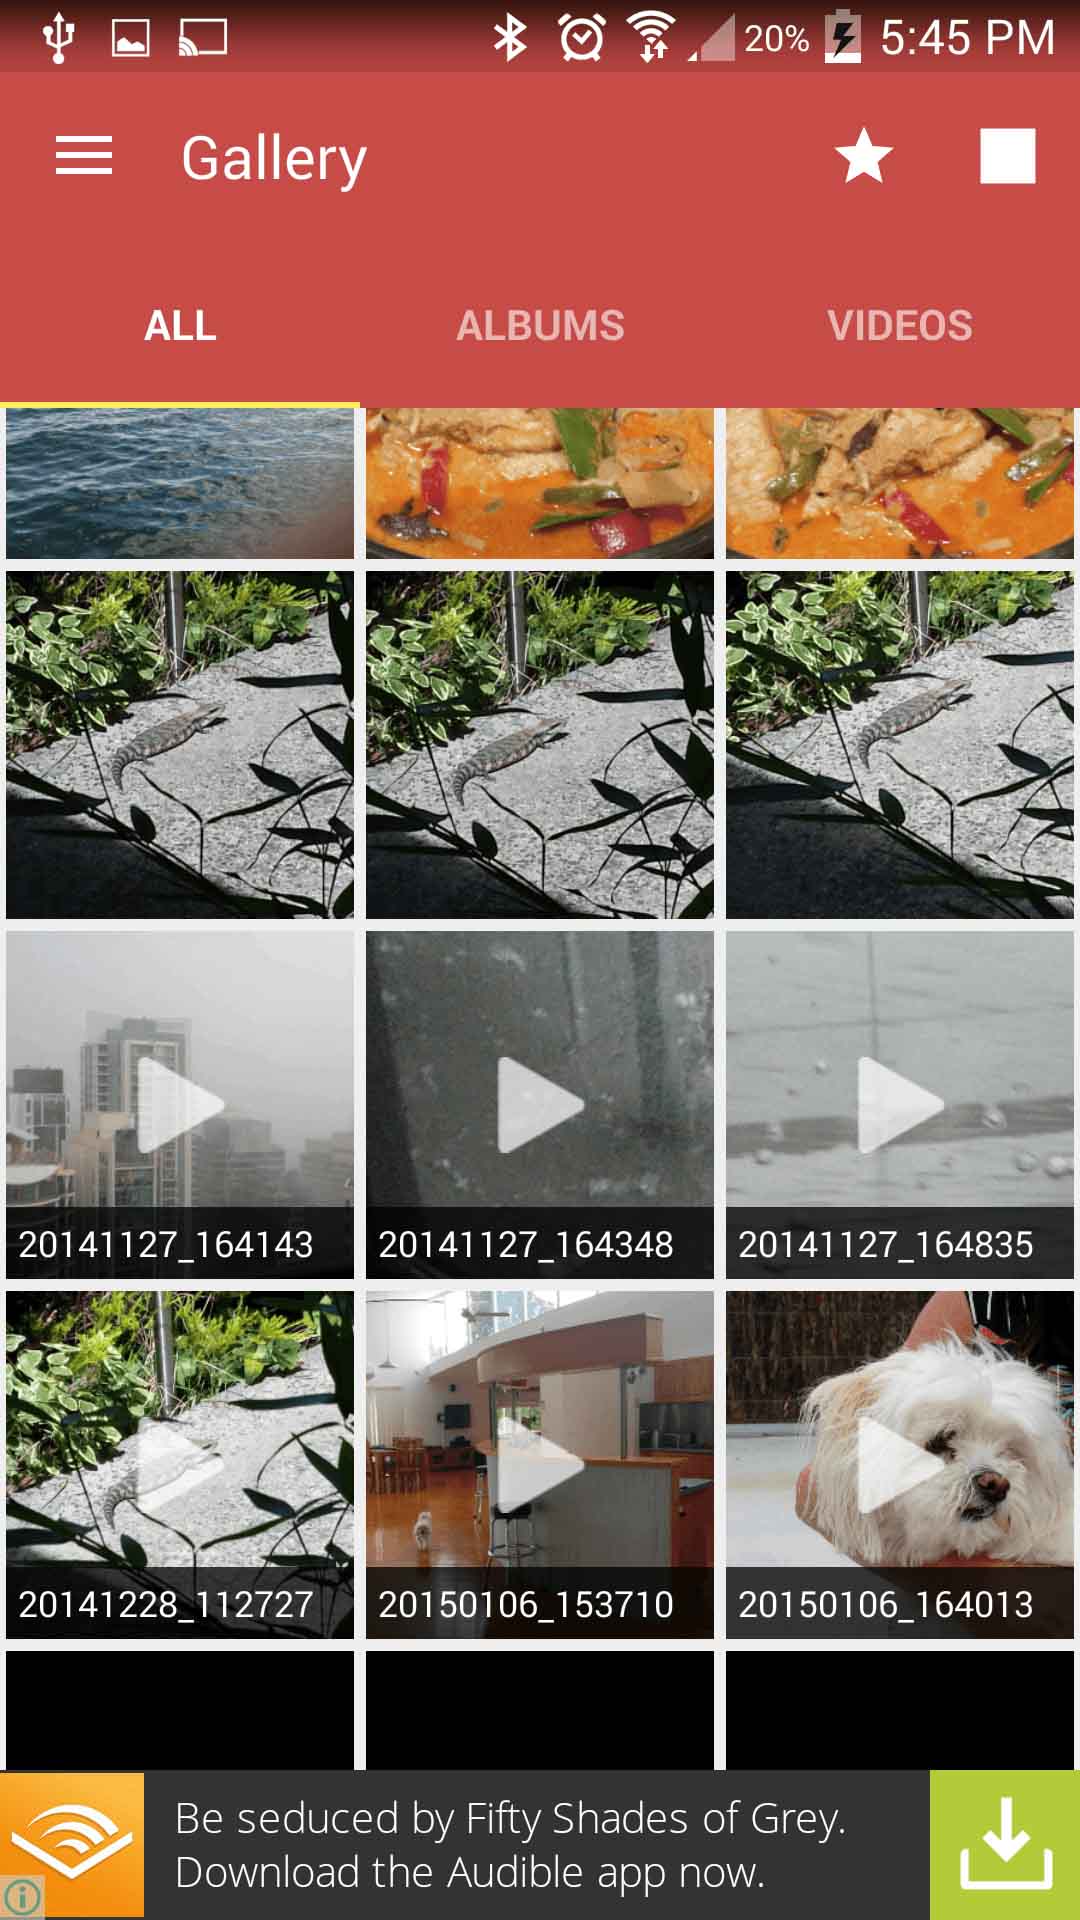
With "AllCast" (different apps work in different ways) by selecting the media it will be sent to Xest and displayed.
.
.
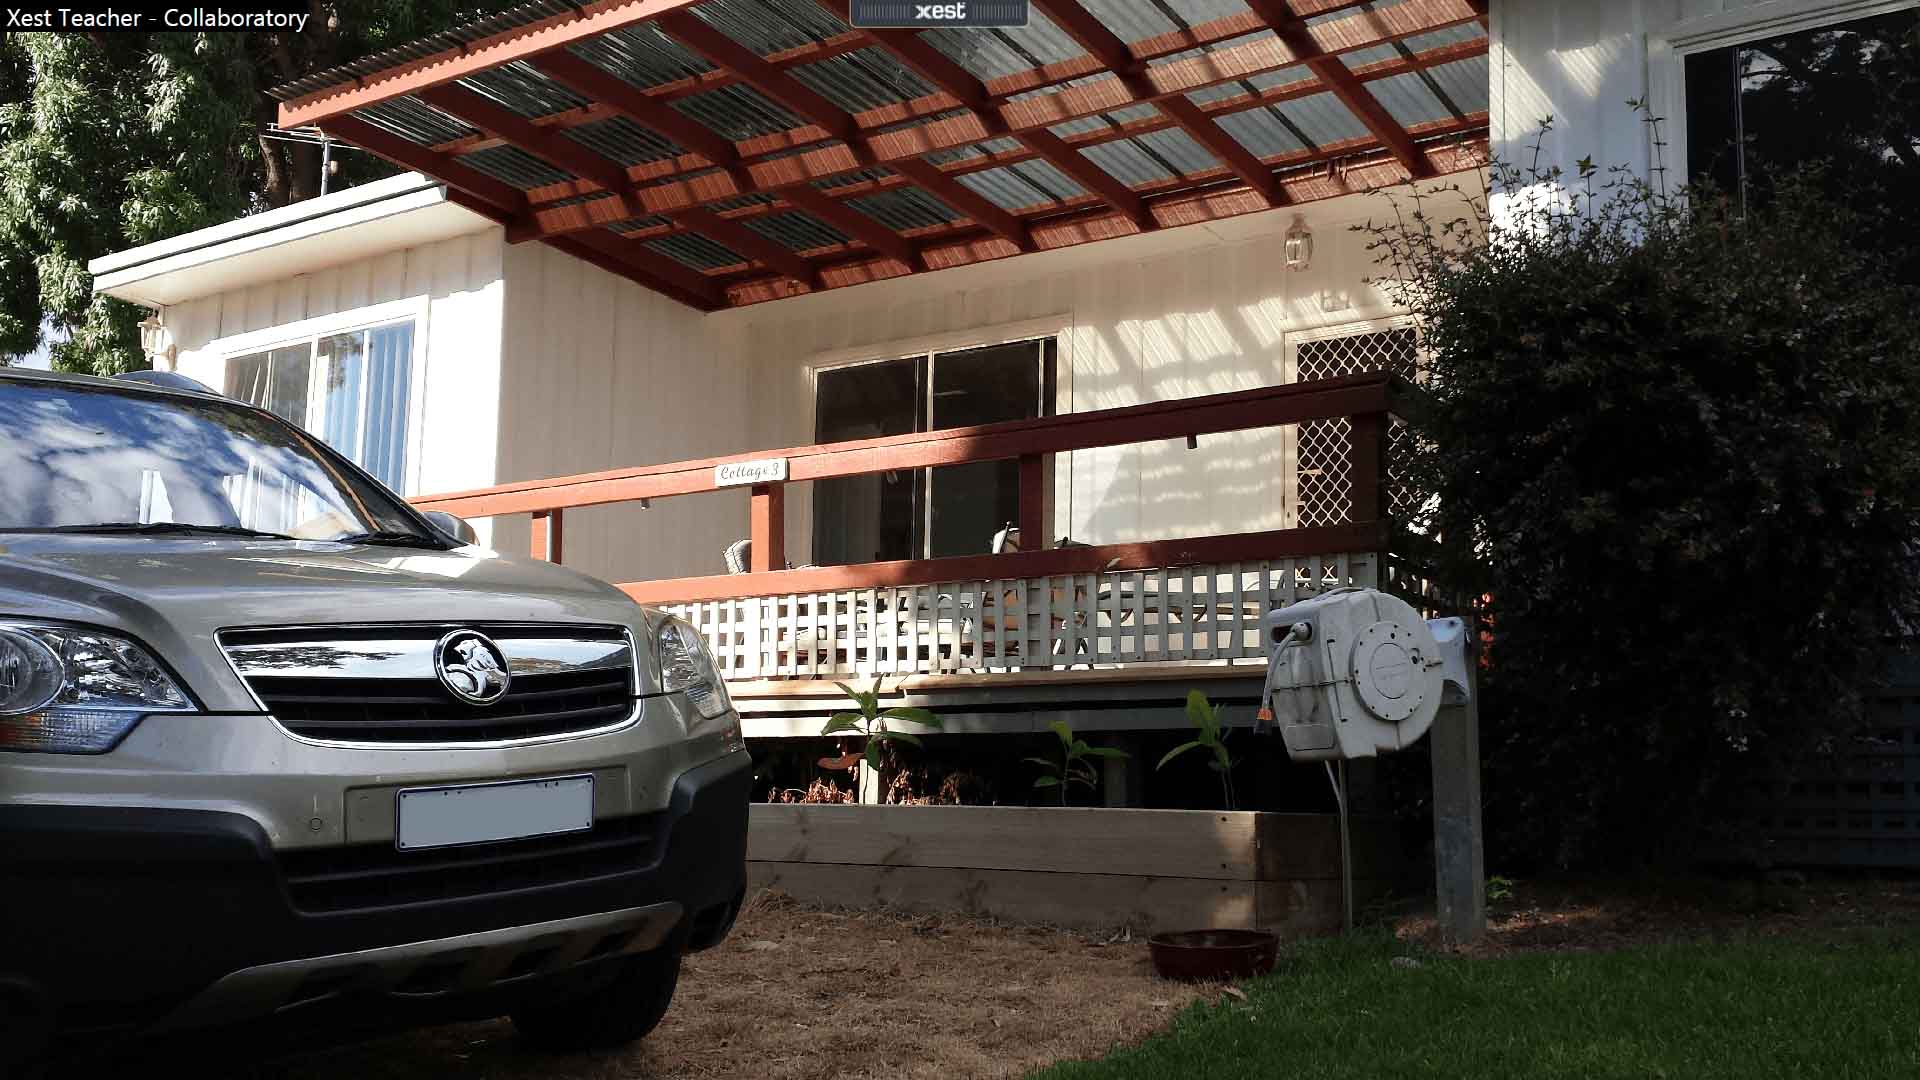
BYOD Photo displayed on the Teacher screen. From here you can click "Share Screen" to send to all other Students.
.
.
*** The Xest Student Menu also has this feature and works the same way. Each Student screen will display their BYOD connection name in the top left of the screen.
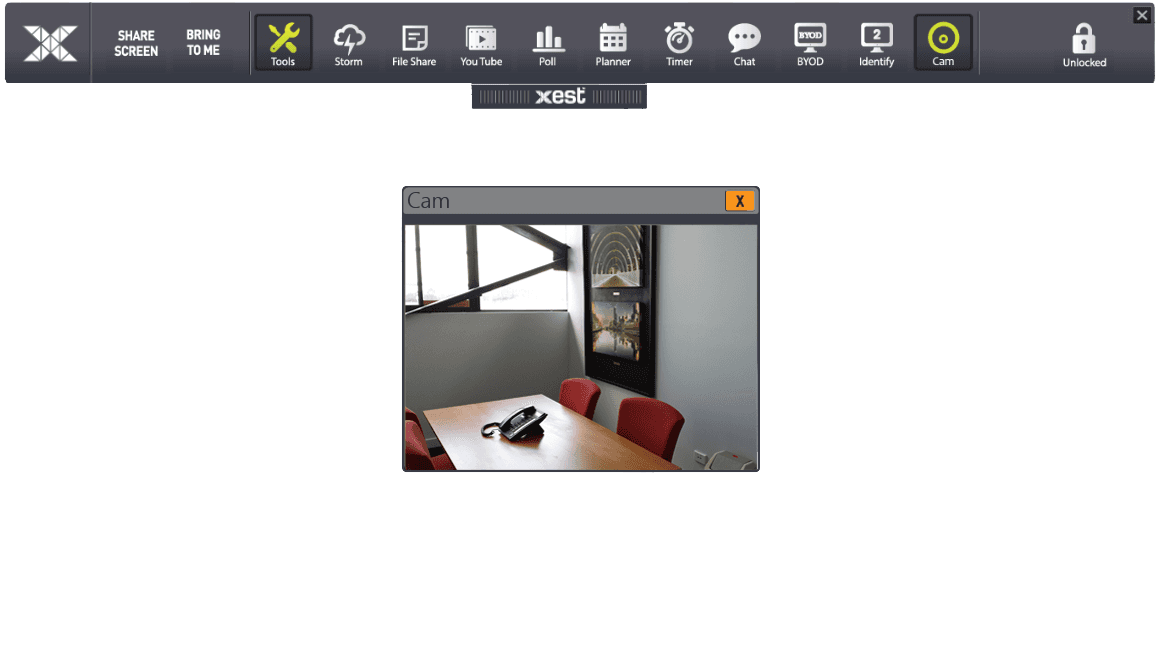
The Cam button will show as enabled if a cam is installed on your computer and disabled if a cam is not found. Simply click the Cam Button to show the Cam window in the top right of your screen. The window can be moved around the screen by clicking and draging the top bar of the window. This allows for showing parts of your screen that you are presenting that may be covered.
.
*** The Xest Student Menu also has this feature and works the same way.
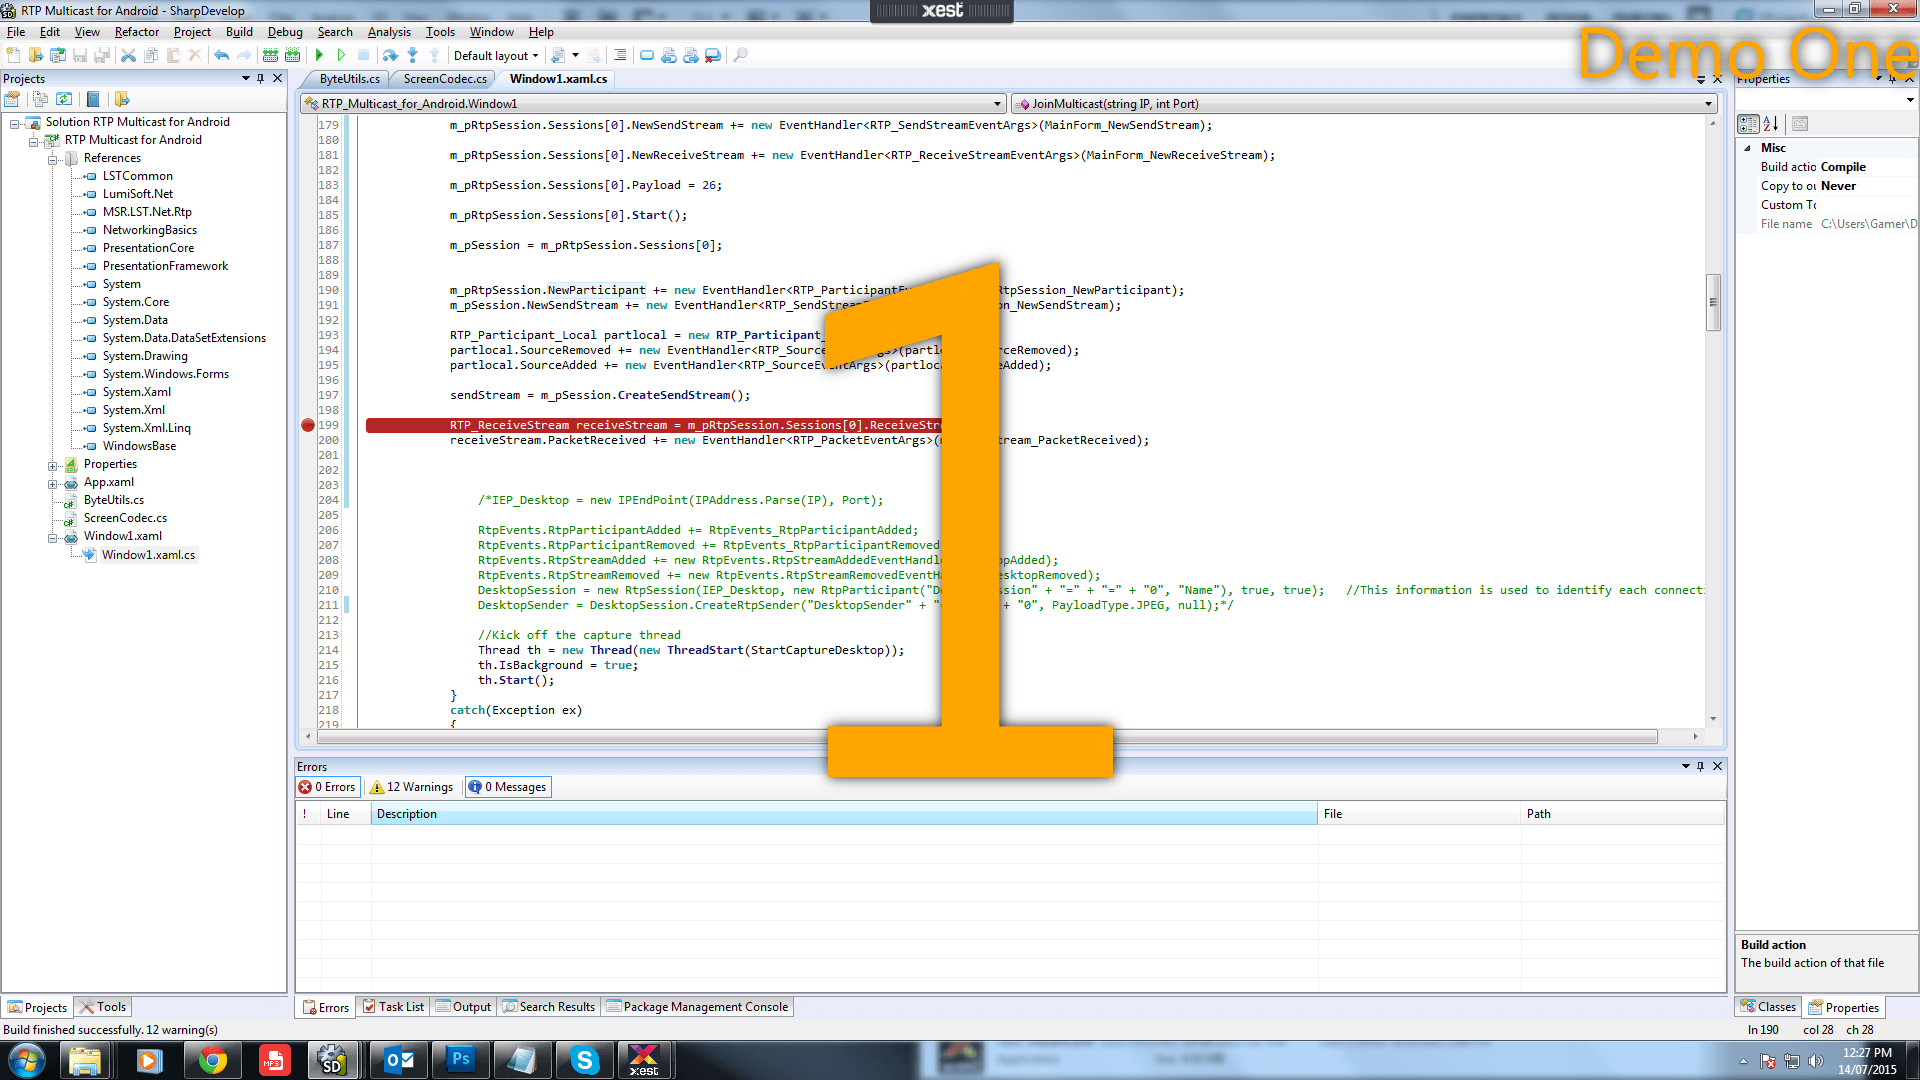
Identify shows the Student number and name on each Student screen. This is helpfull if some Student displays look similar on the "Bring to Me" thumbnail page and you would like to see which one is which.

Set individual Timers for each person or group.
.
.
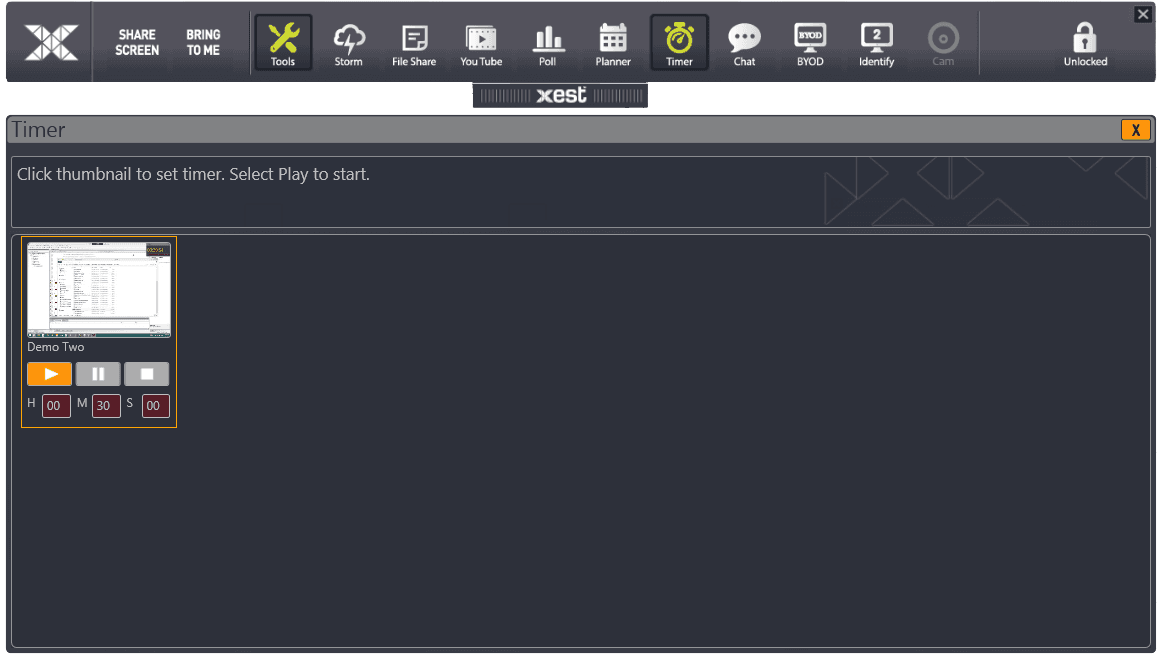
Set the time and hit "Play".
.
.
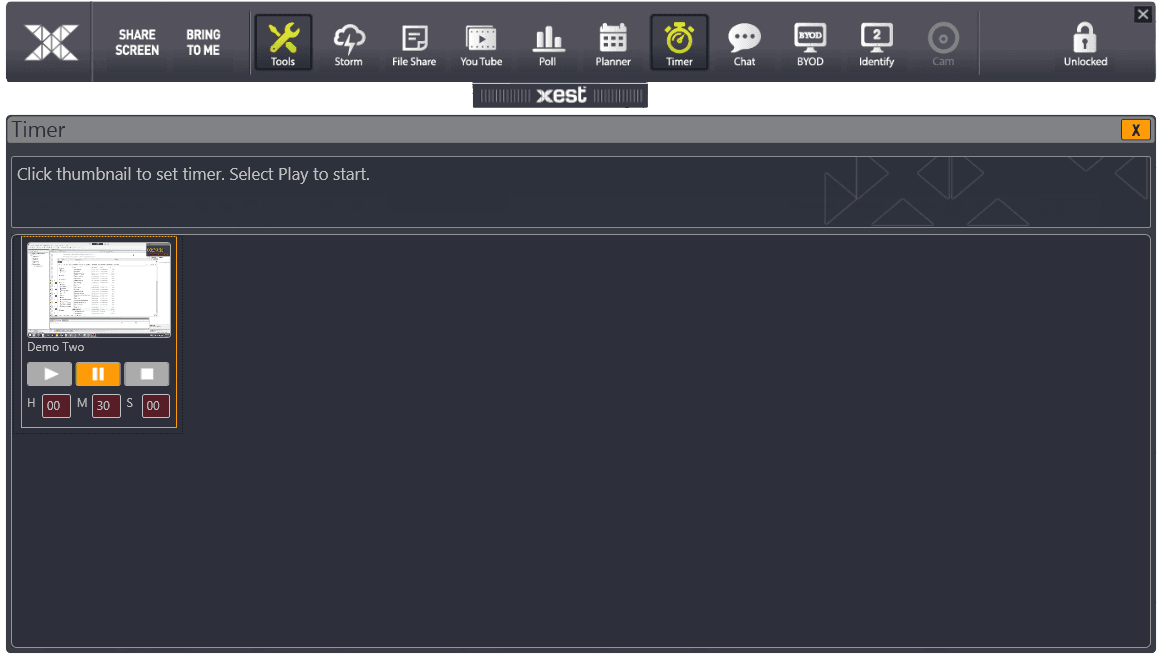
Pause each Student Timer as required.
.
.
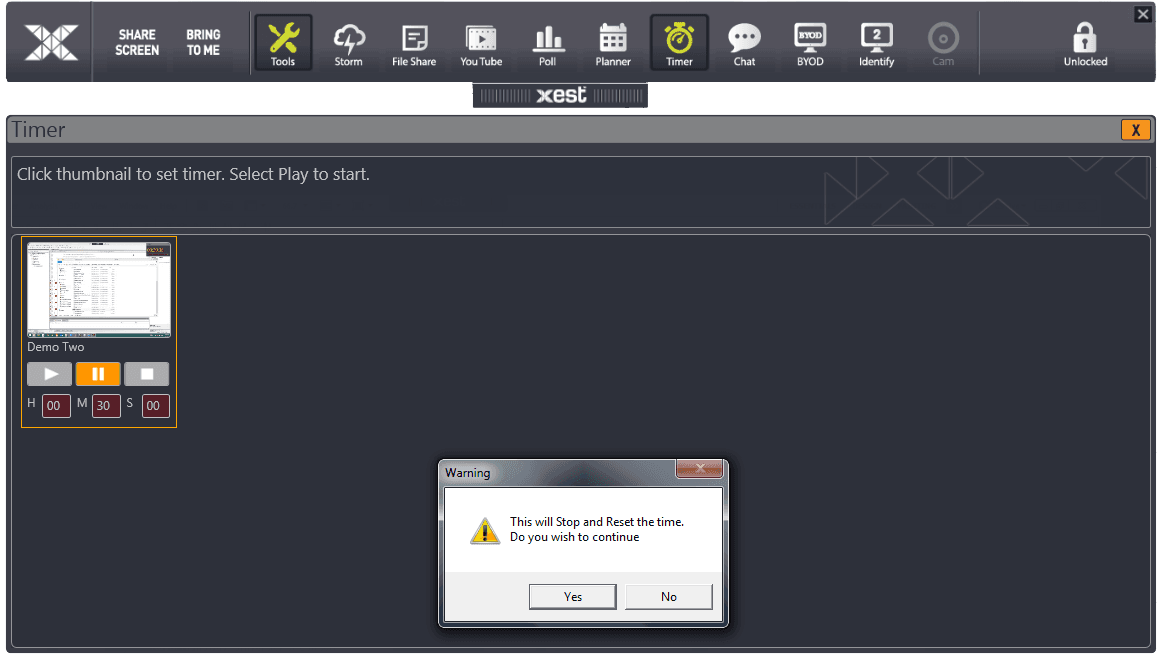
Timer Stop Warning.
.
.
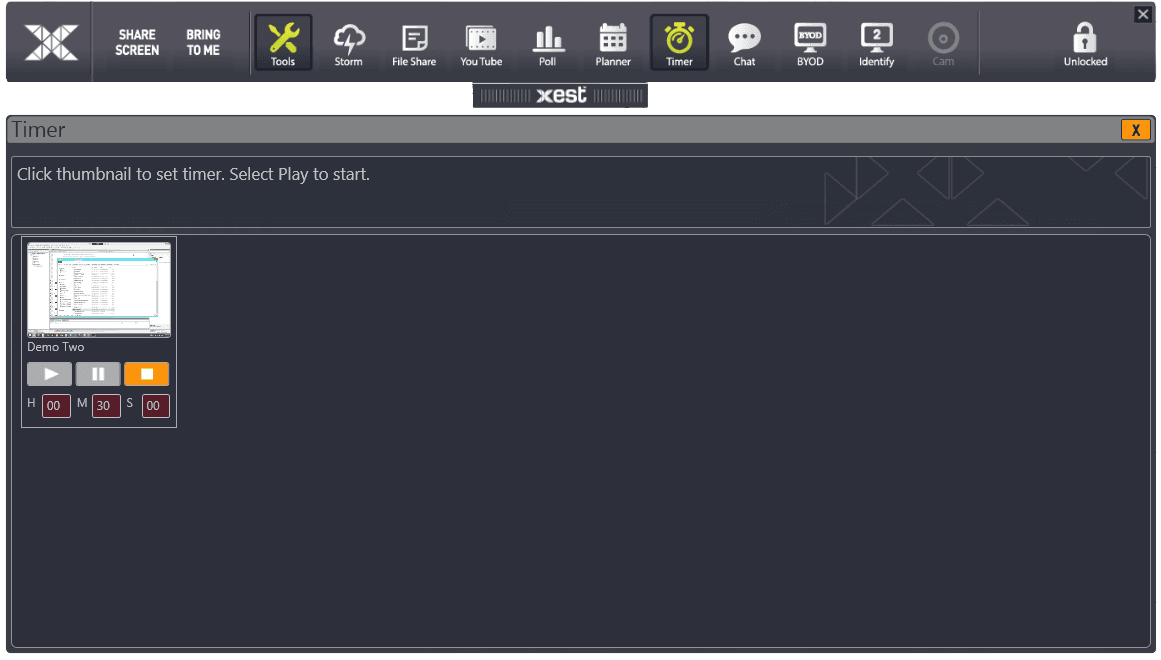
Timer Stopped.
.
.
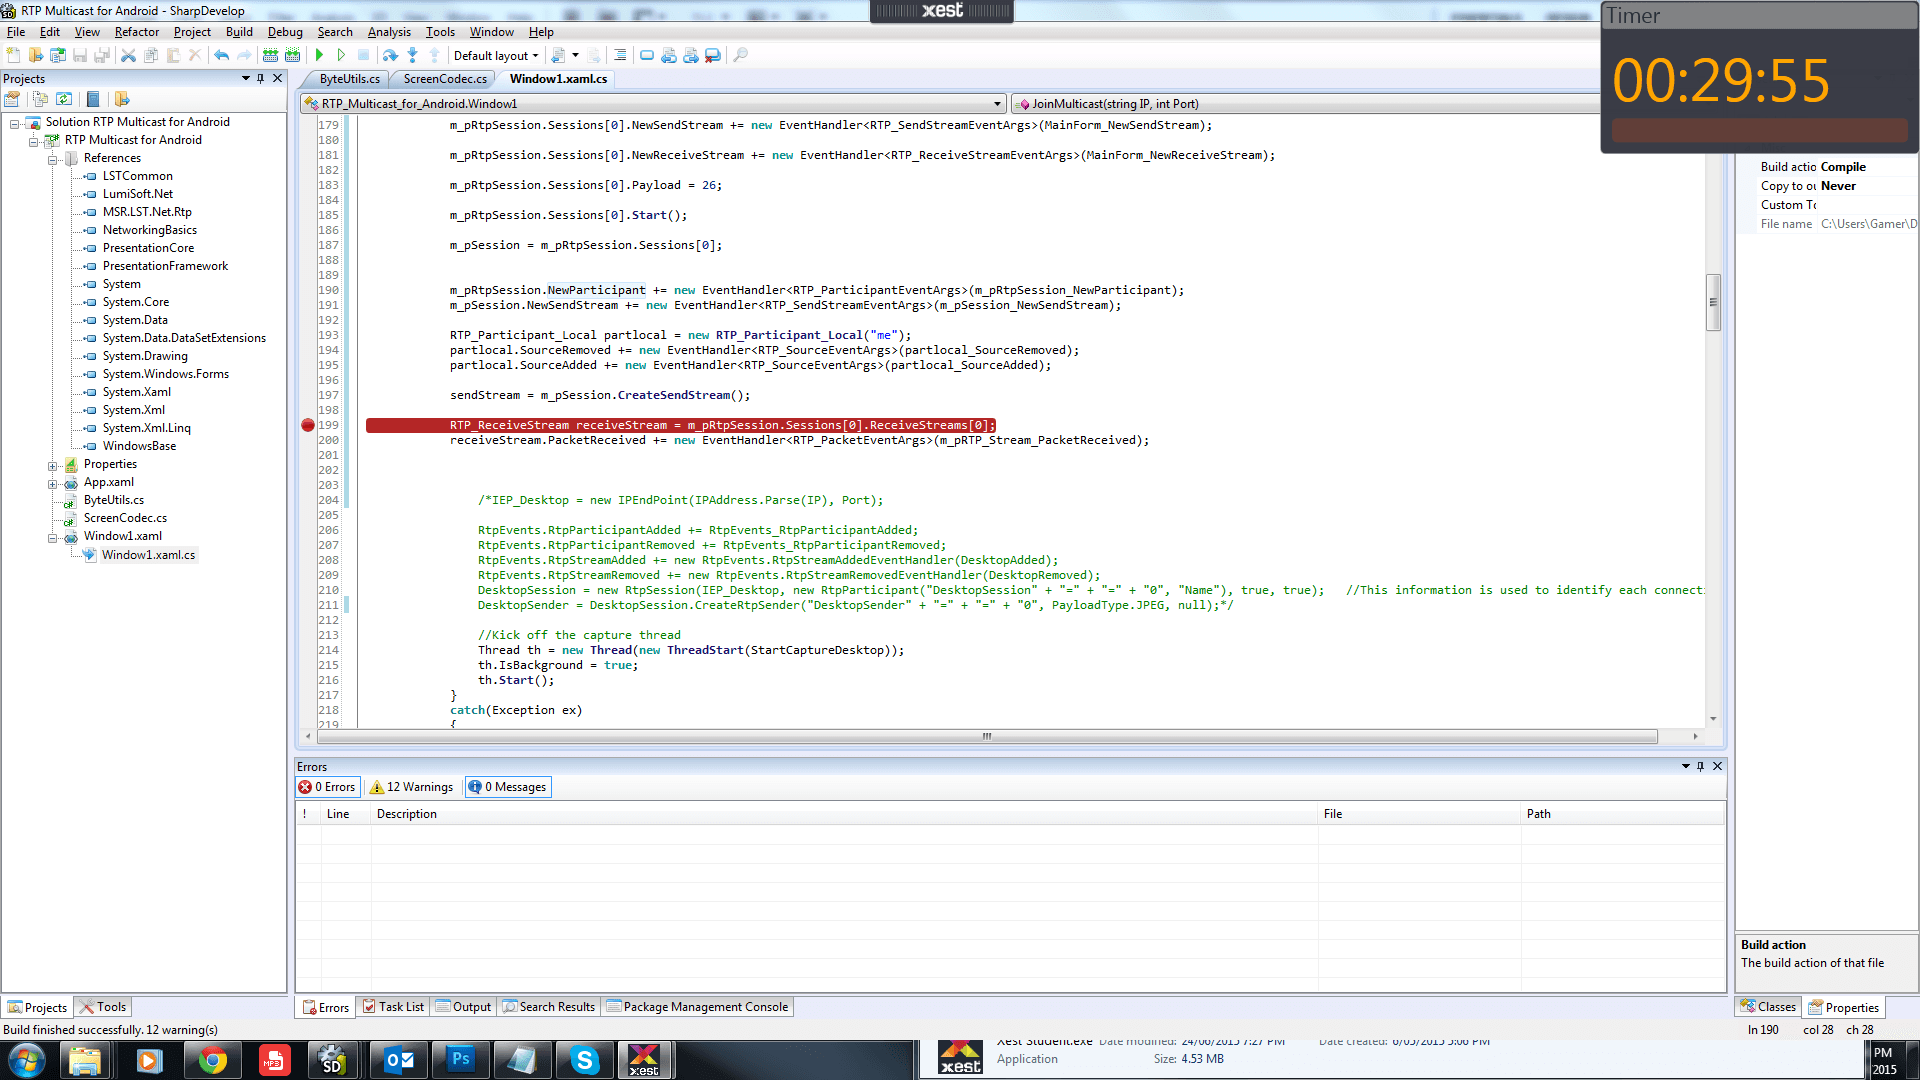
The Timer is shown in the top right of the Student Screen.
.
.
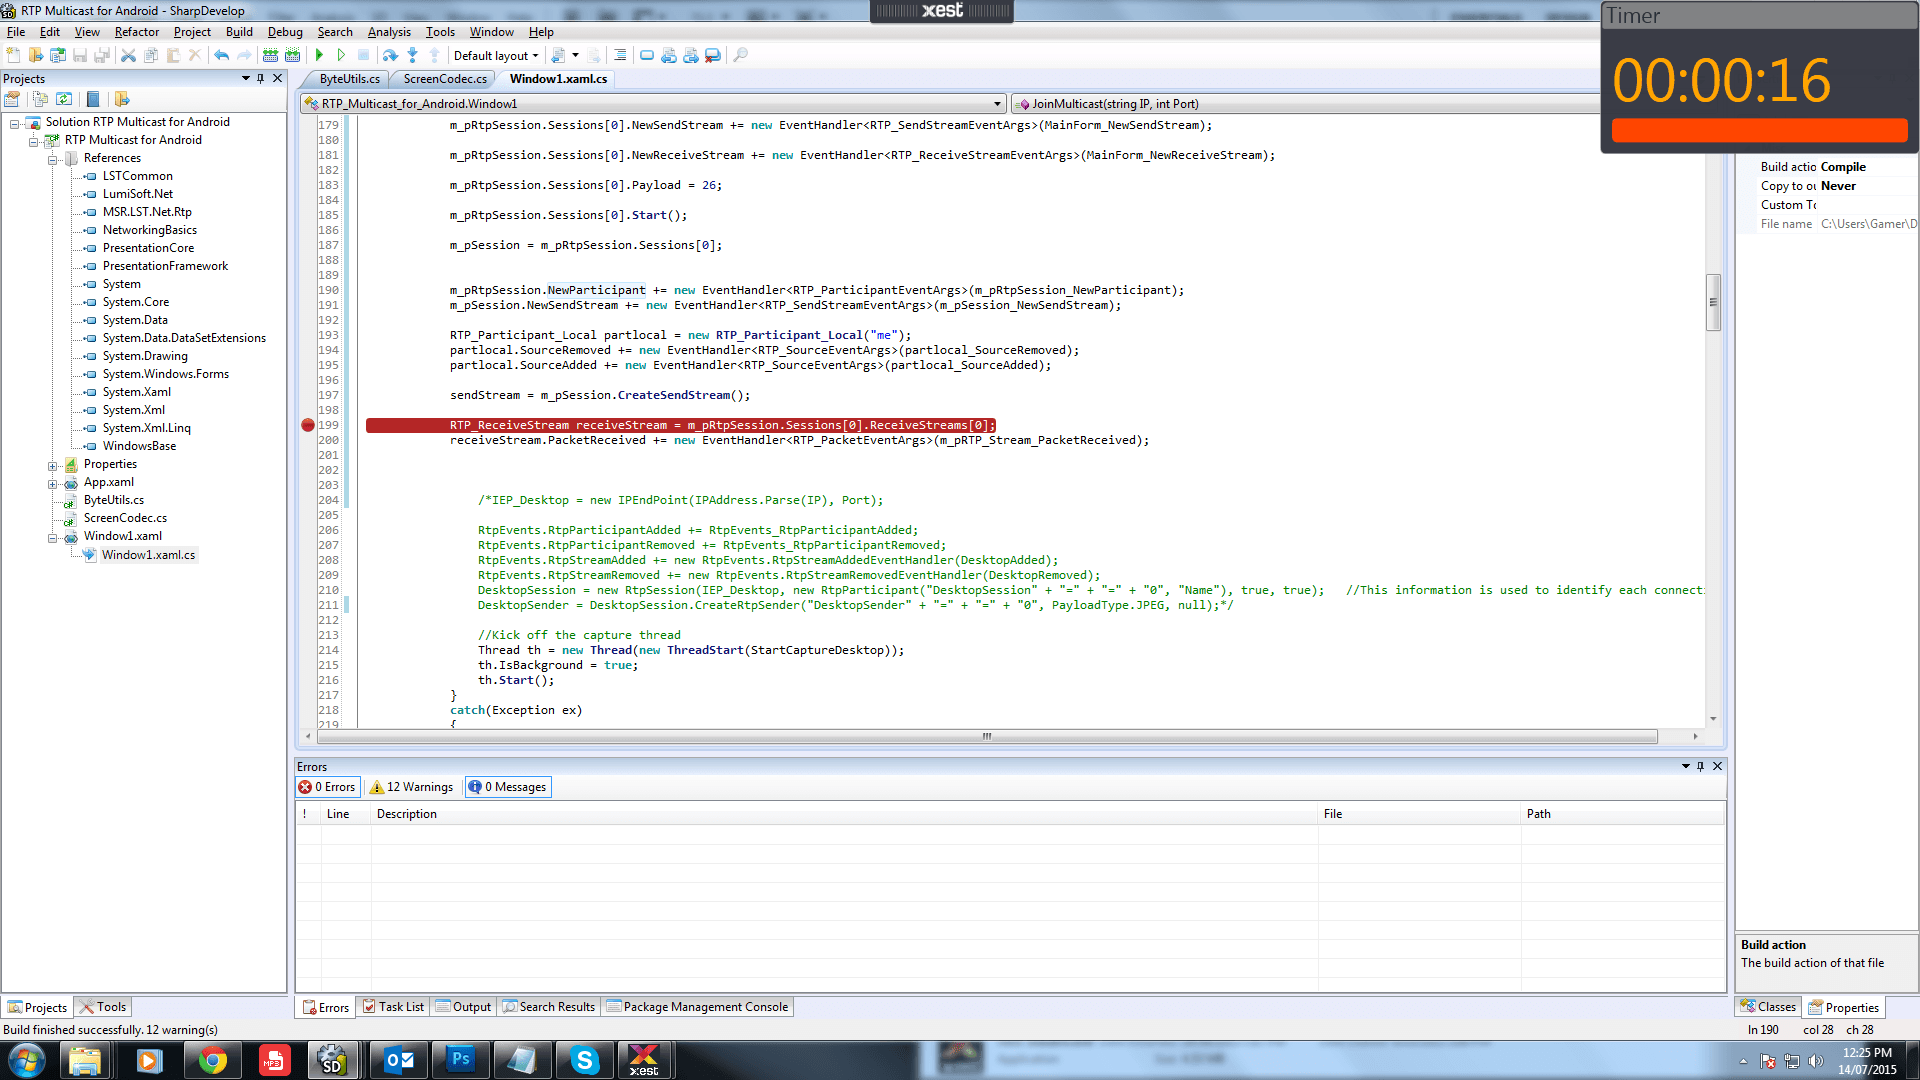
The Students Timer will flash for the last 20 seconds.
.
.
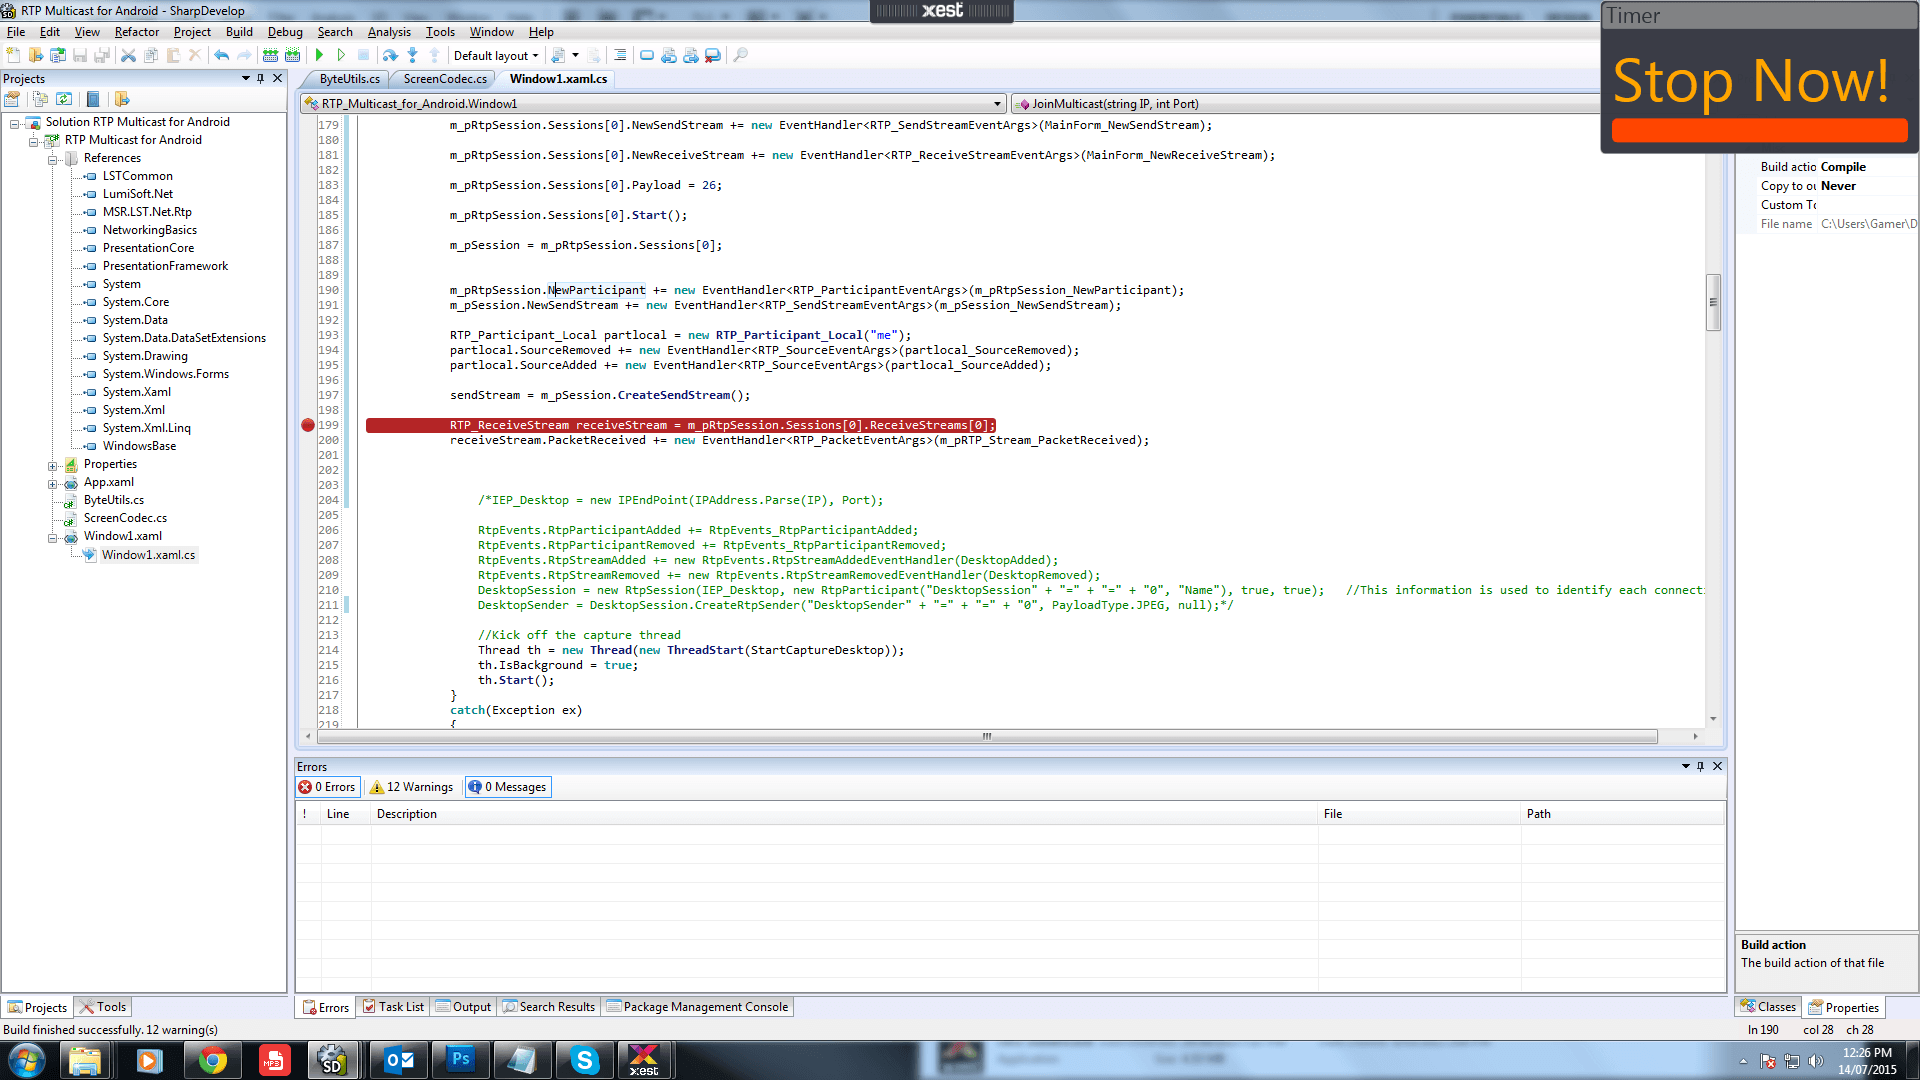
The Timer will allert the Student when to stop.
.
.
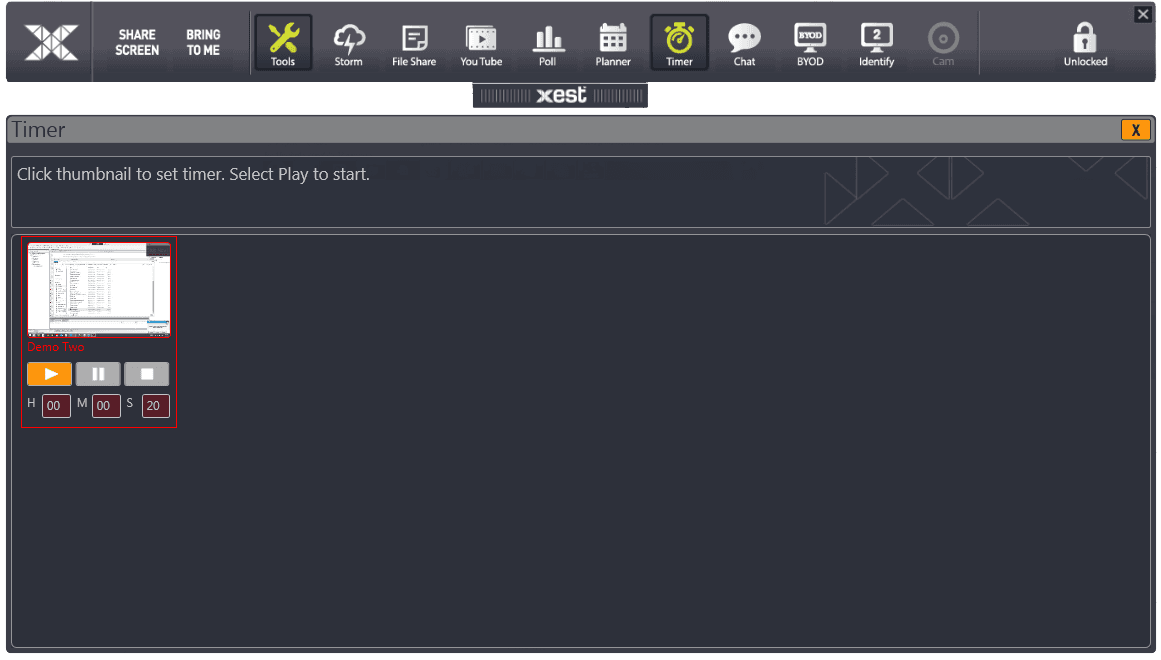
The Timer will allert the Teacher window with a red border around each Student Timer that has finished.
.

Student Menu Privacy option. (toggle on/off).
.
.
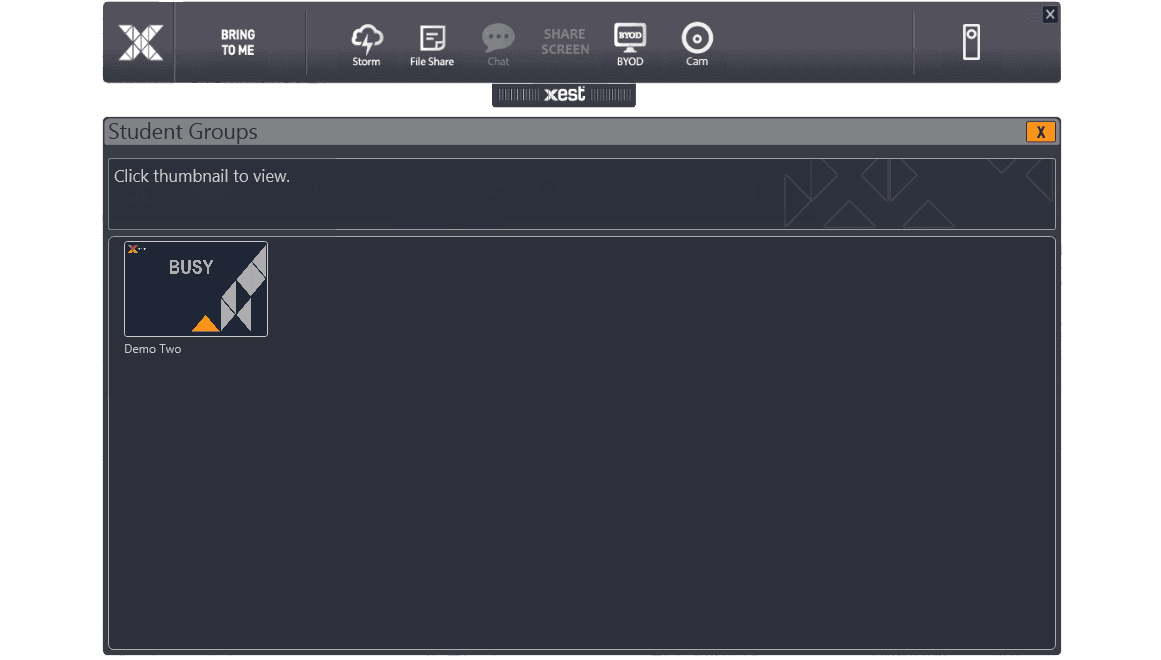
Students can elect to be shown as "Busy" like a "Do Not Disturb". Their screen icon will show to other Students that they are busy and cannot connect to them. The Teacher will always be able to see all Students and connect to all Students regardless of this feature.
.
.
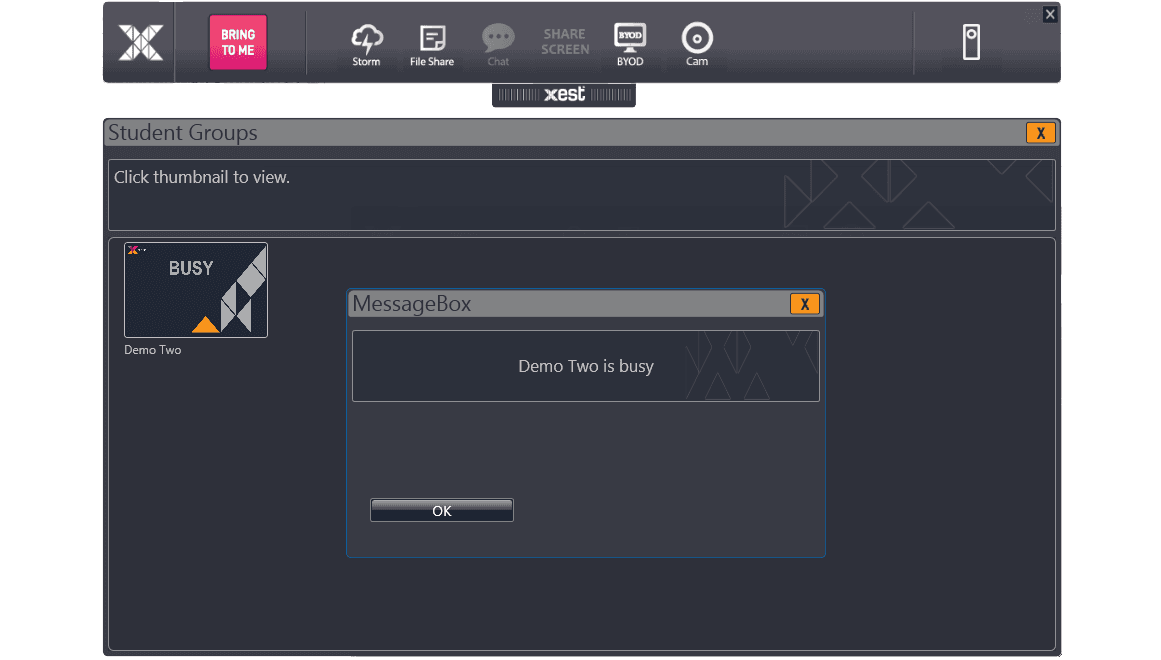
When a Student sends a connection request by clicking on the Student thumbnail of a Student who has elected to be Private, they will receive a message saying that the Student is Busy.
.

Lock the Students Screen. (toggle on/off).
.
.

When you elect to Lock the Students screen, a window will overlay their screen and disable their keyboards. This is handy for "can i have your attention please". This screen image can be changed to your 1920x1080 logo for personalisation.
.
.
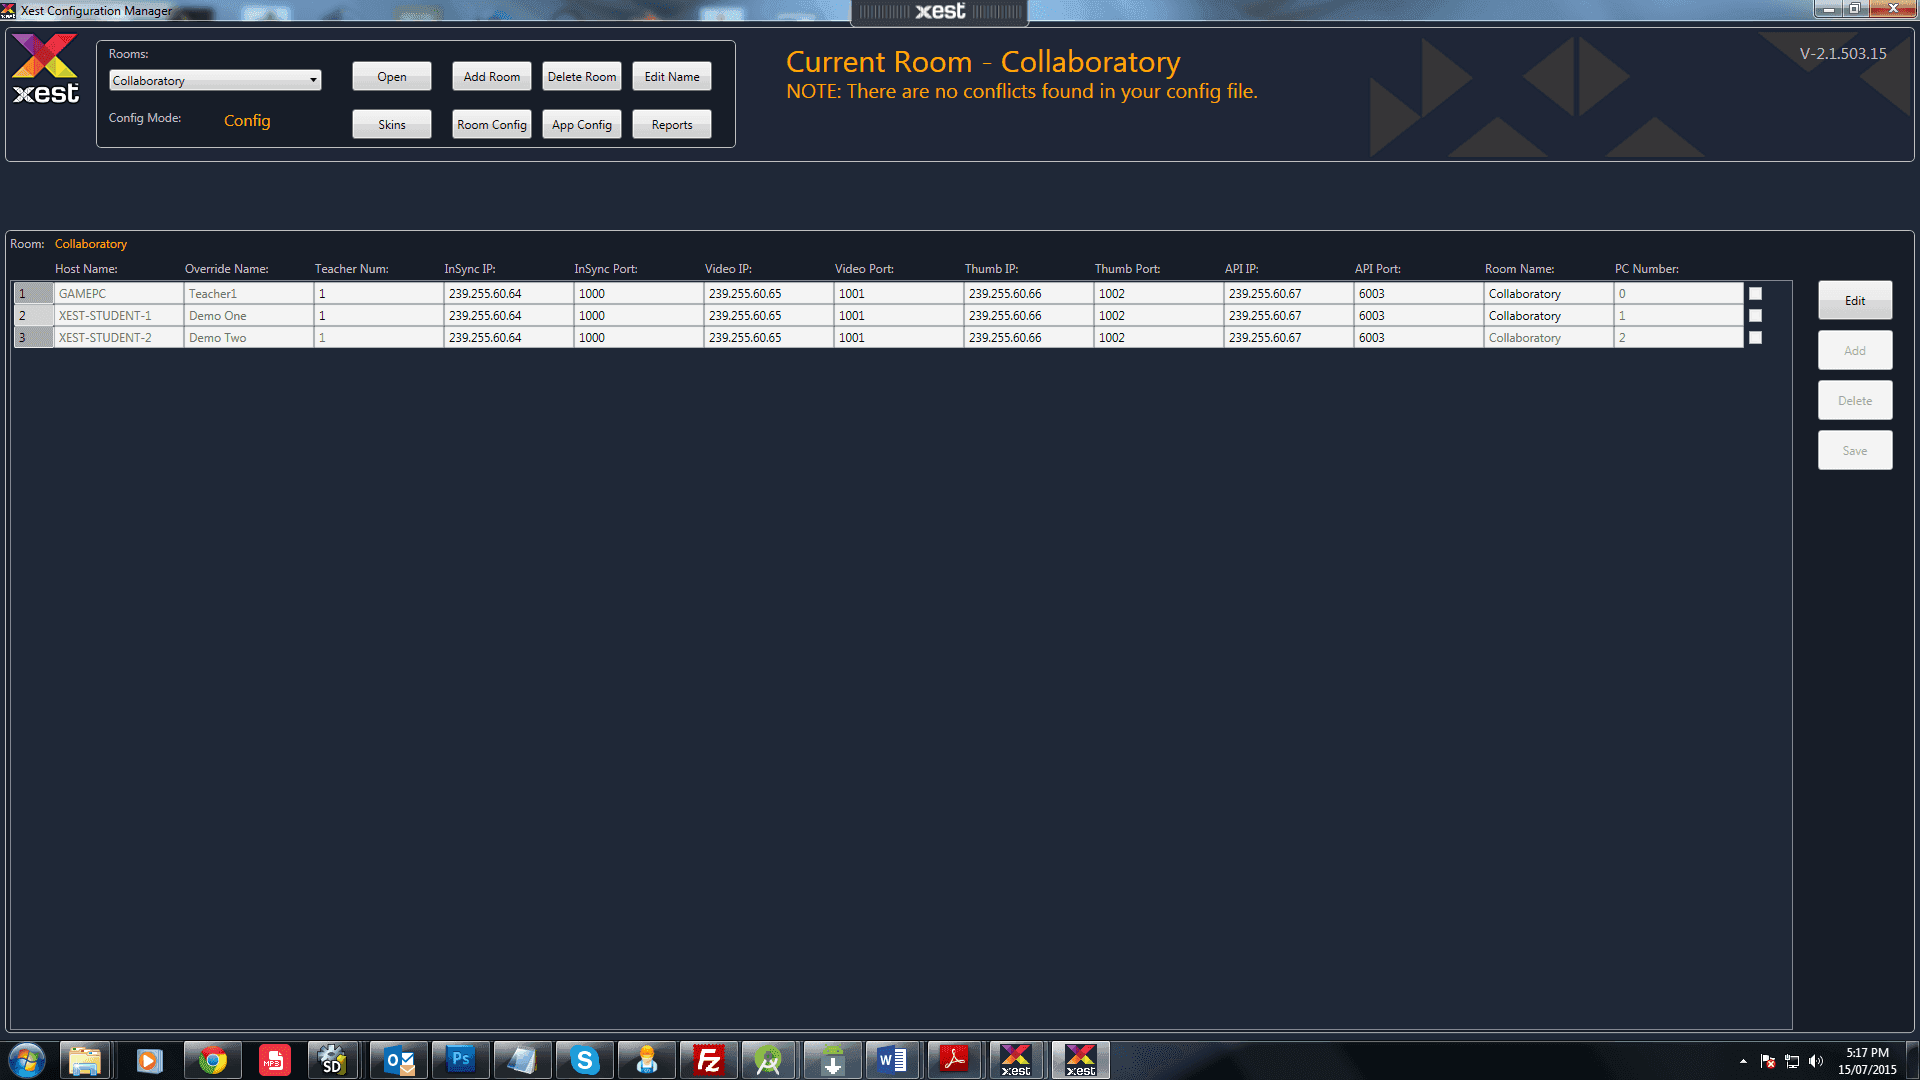
The Xest Configuration Manager allows you to manage all of your Xest Teacher and Xest Student applications campus wide from the 1 application.
If you run your XestConfigs.db file from a central remote location, by having this application in the same folder will open your current XestConfigs.db file on start up. Otherwise you can click the "Open" button to navigate to the XestConfigs.db file you wish to edit.
.
.
.
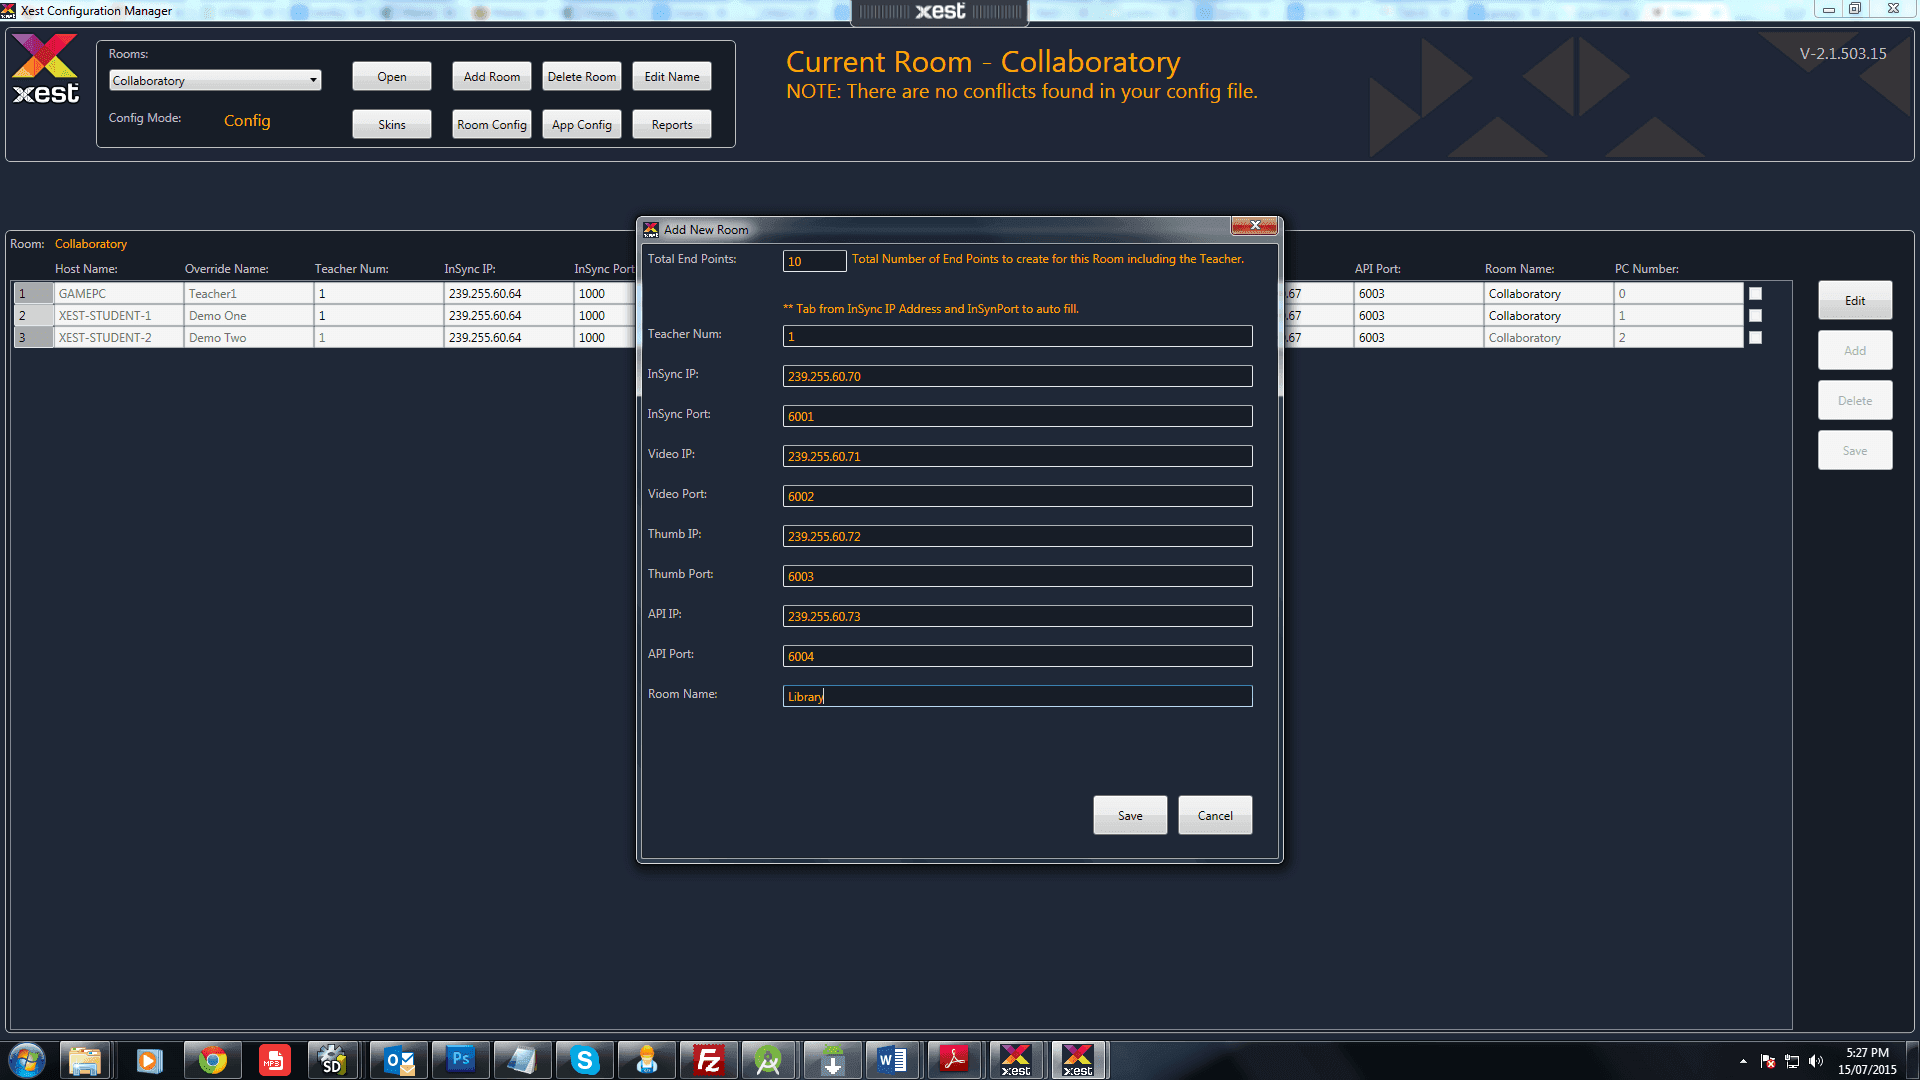
To begin you will need to add each room on your campus. Simply select "Add Room" to show the dialog.
Enter the number of End Points this room will have. This also includes the Teacher so for a room with 9 Students and 1 Teacher add 10.
Enter the Multicast Address and Multicast Port into the InSync fields. The other Multicast fields will auto fill and increment.
Enter the name of the room and click "Save".
.
.
.
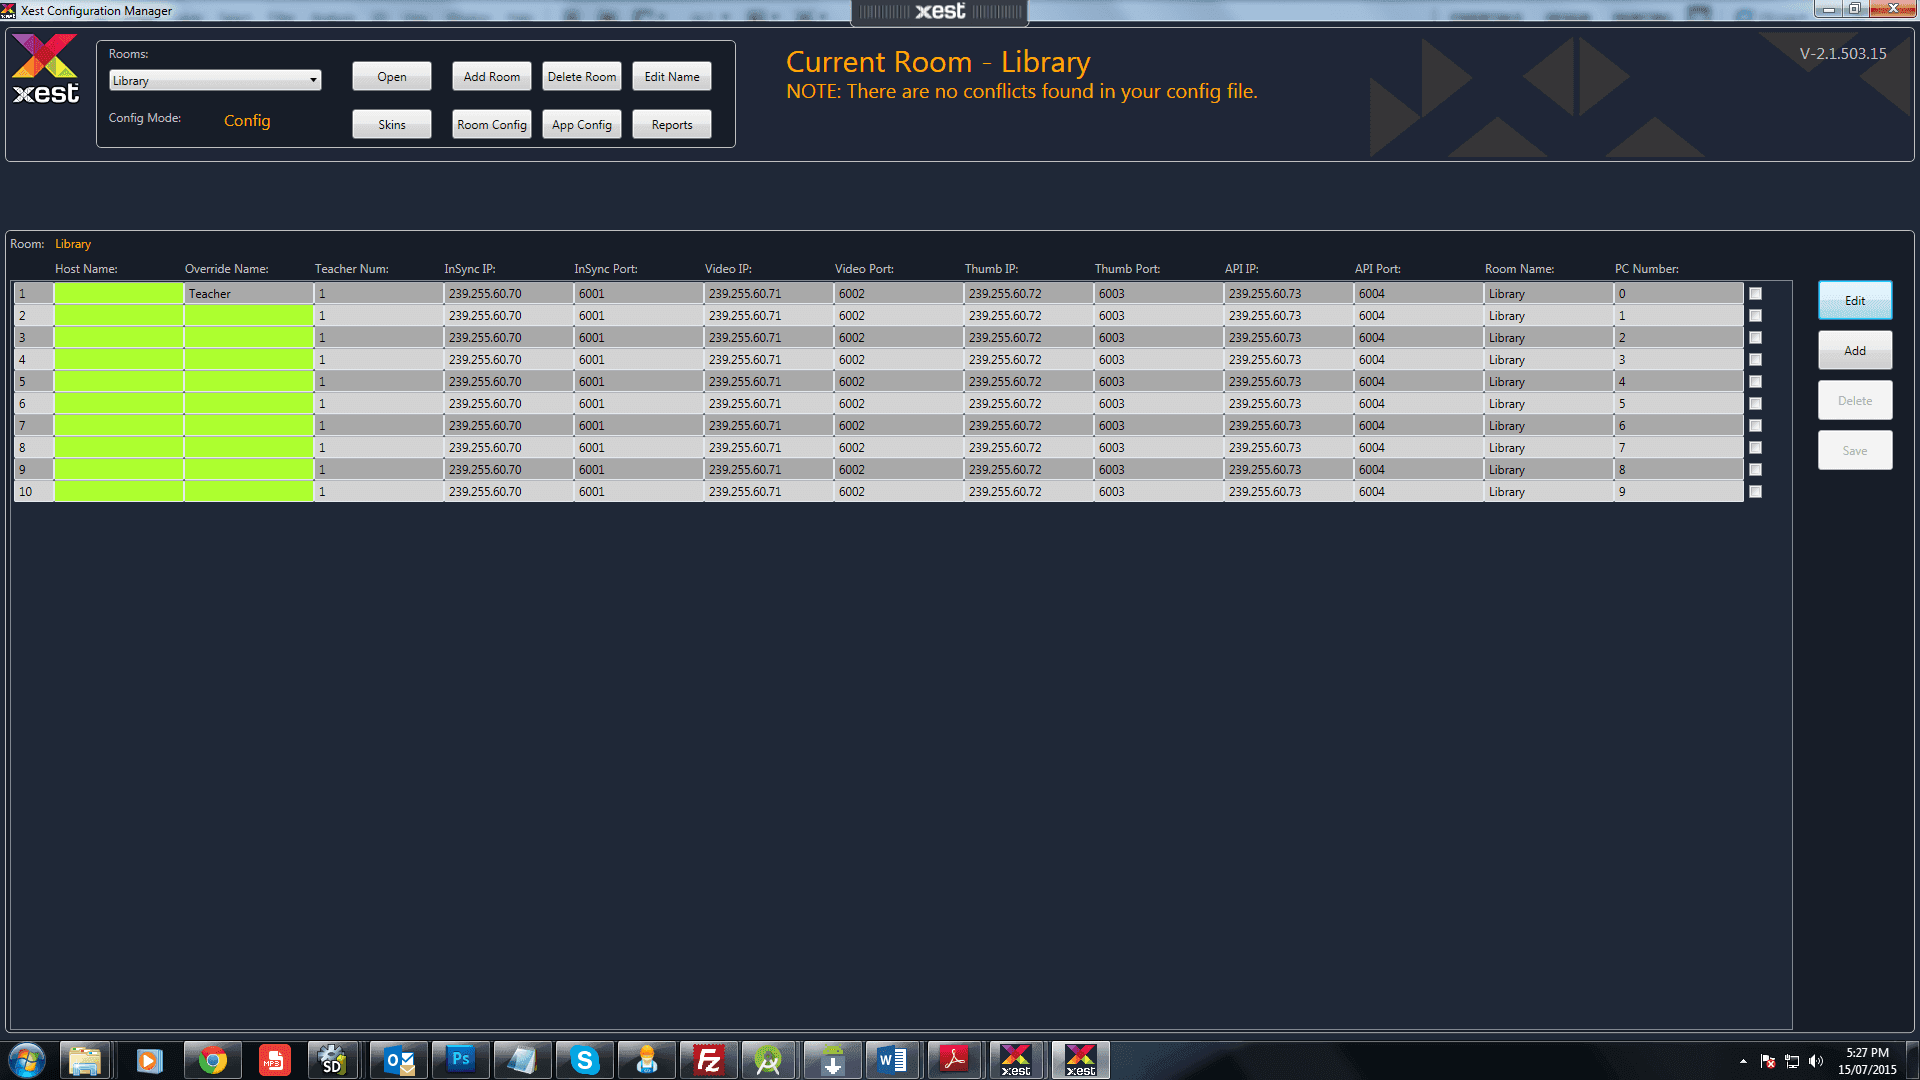
When you select "Save" from the "Add Room" you will now have all the details required for a new room.
The green entries show the "Host Name" of the PC's and the "Override Name" for each entry.
Select the "Edit" button to the right to allow for editing.
Enter the information for each entry and select "Save" to save this room to your XestConfigs.db file.
.
.
.
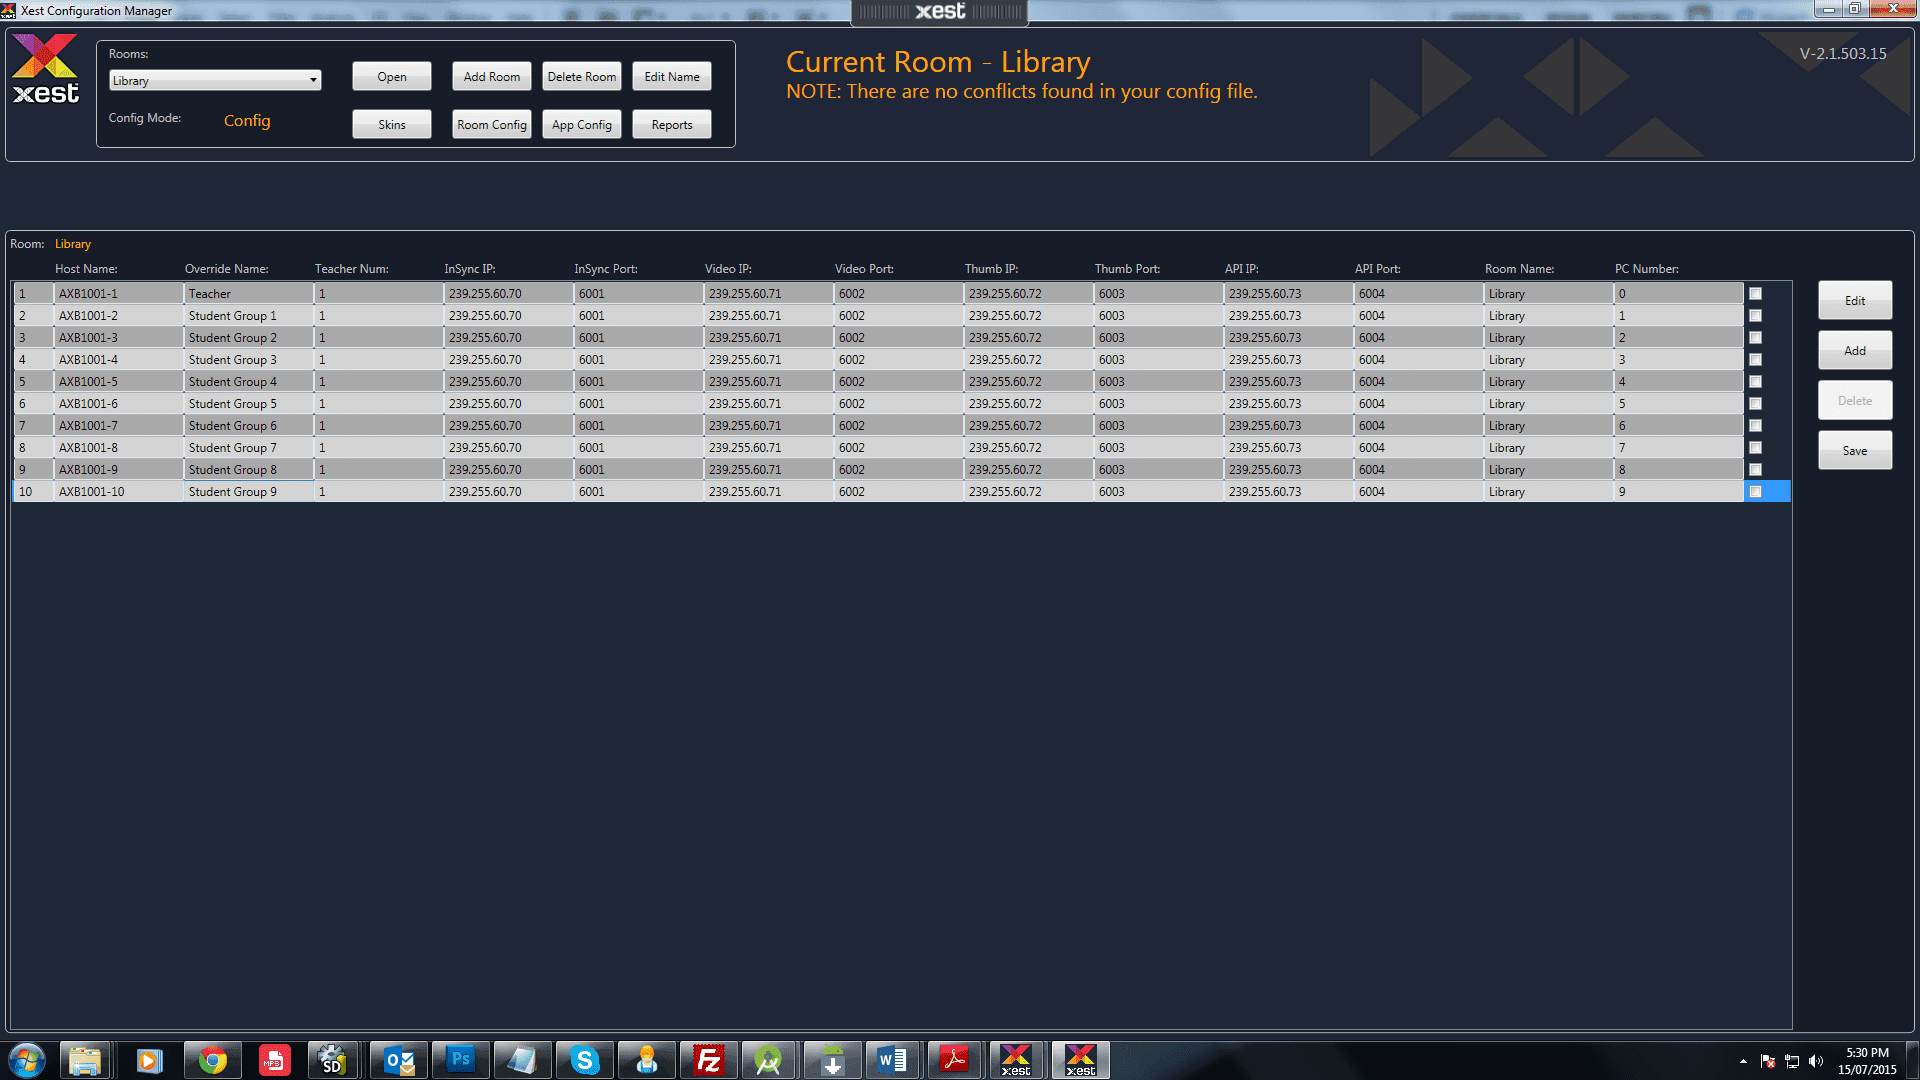
This shows a typical "Host name" and "Override Name" when saved.
.
.
.
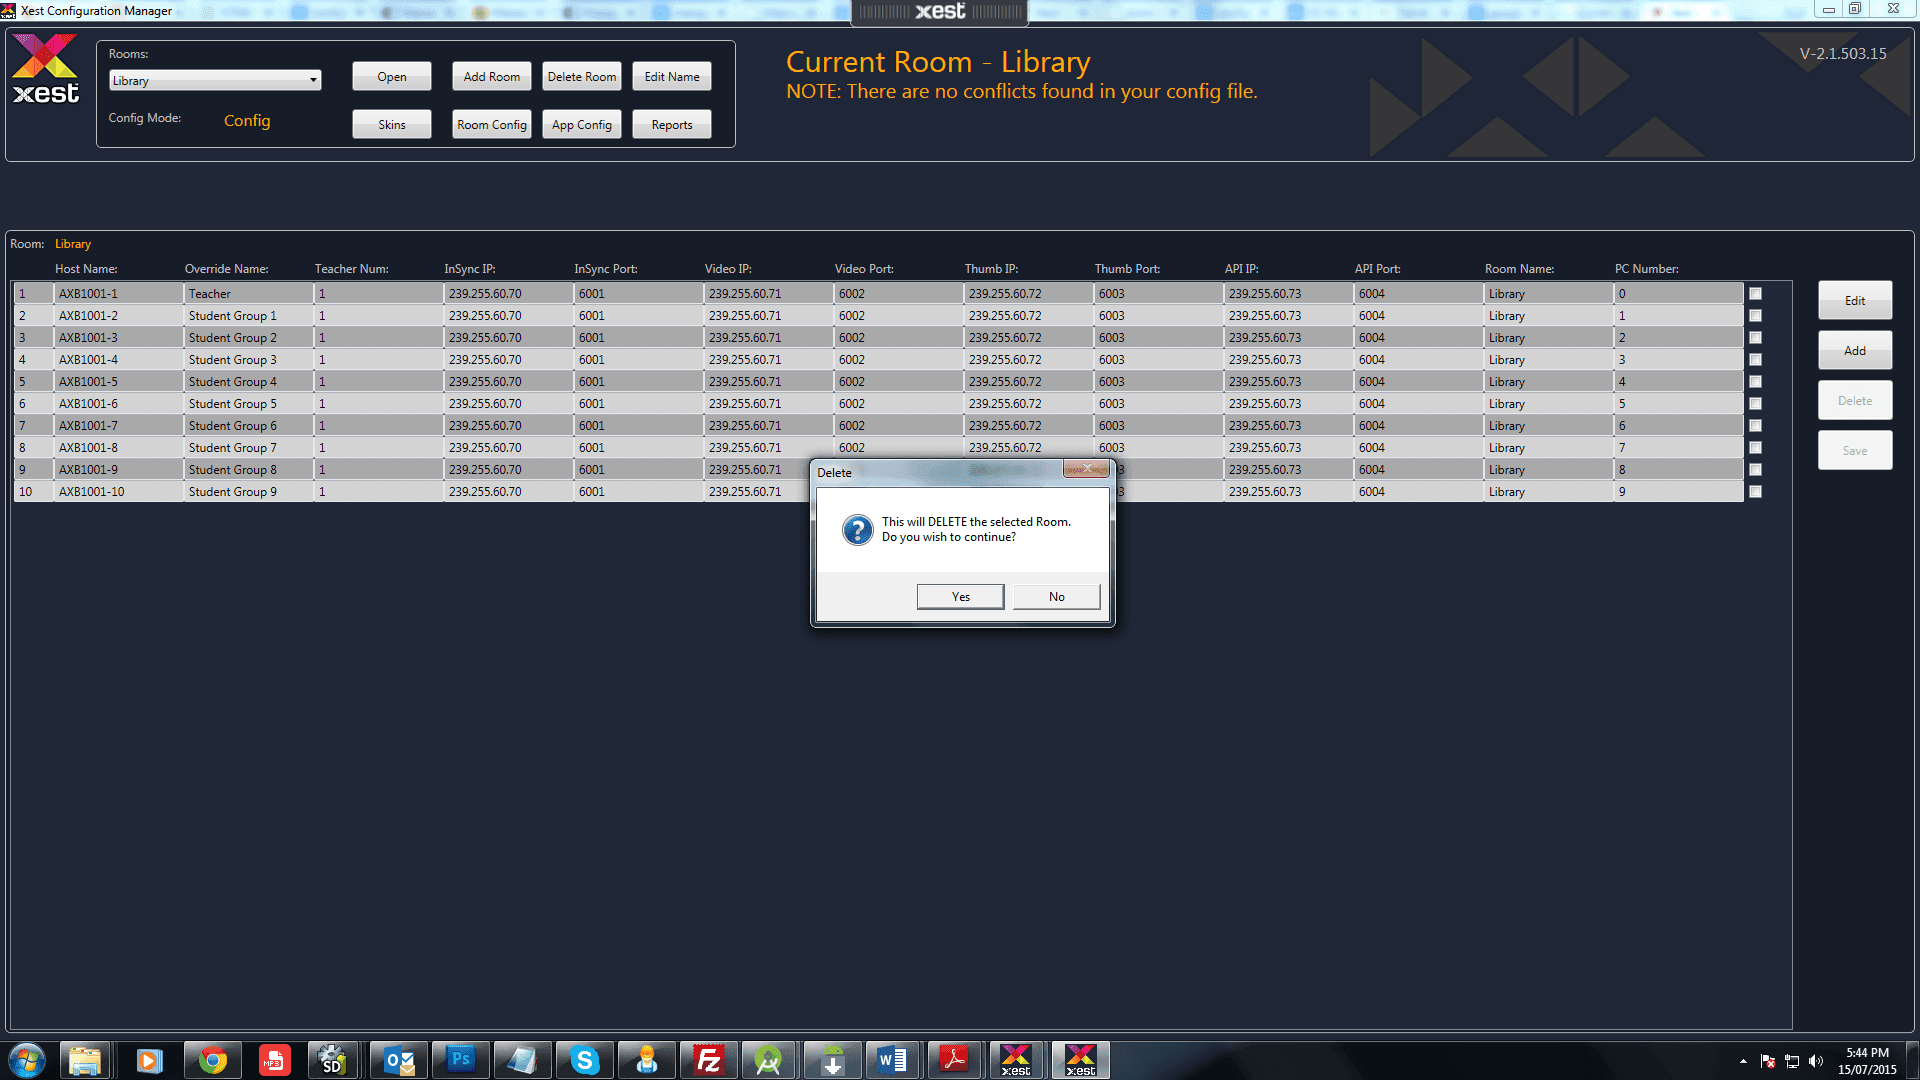
To "Delete" a room simply select the room via the Room drop down box in the upper left corner. Click the "Delete Room" button and select "Yes" when prompted.
*** Note: This action cannot be undone so be careful.
.
.
.
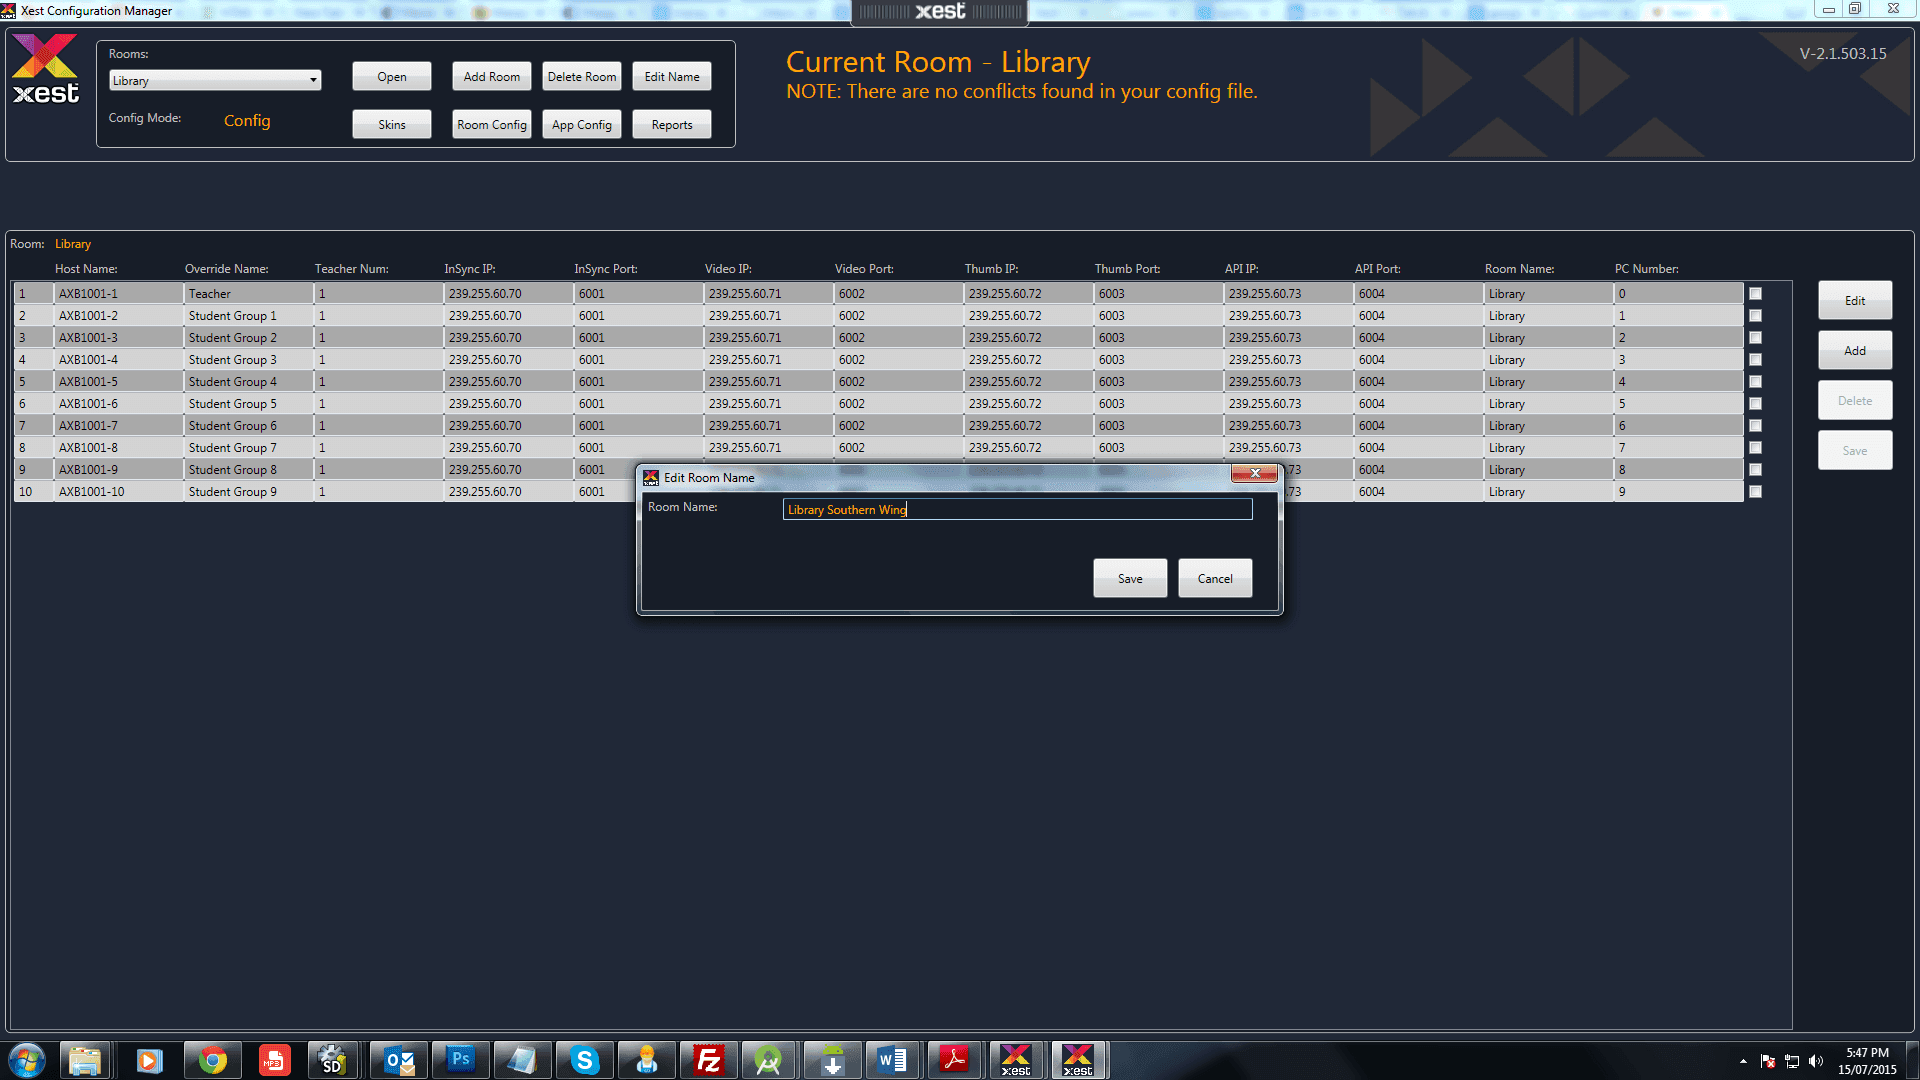
To change the room name simple select "Edit Name" and enter the new room name and select "Save".
.
.
.
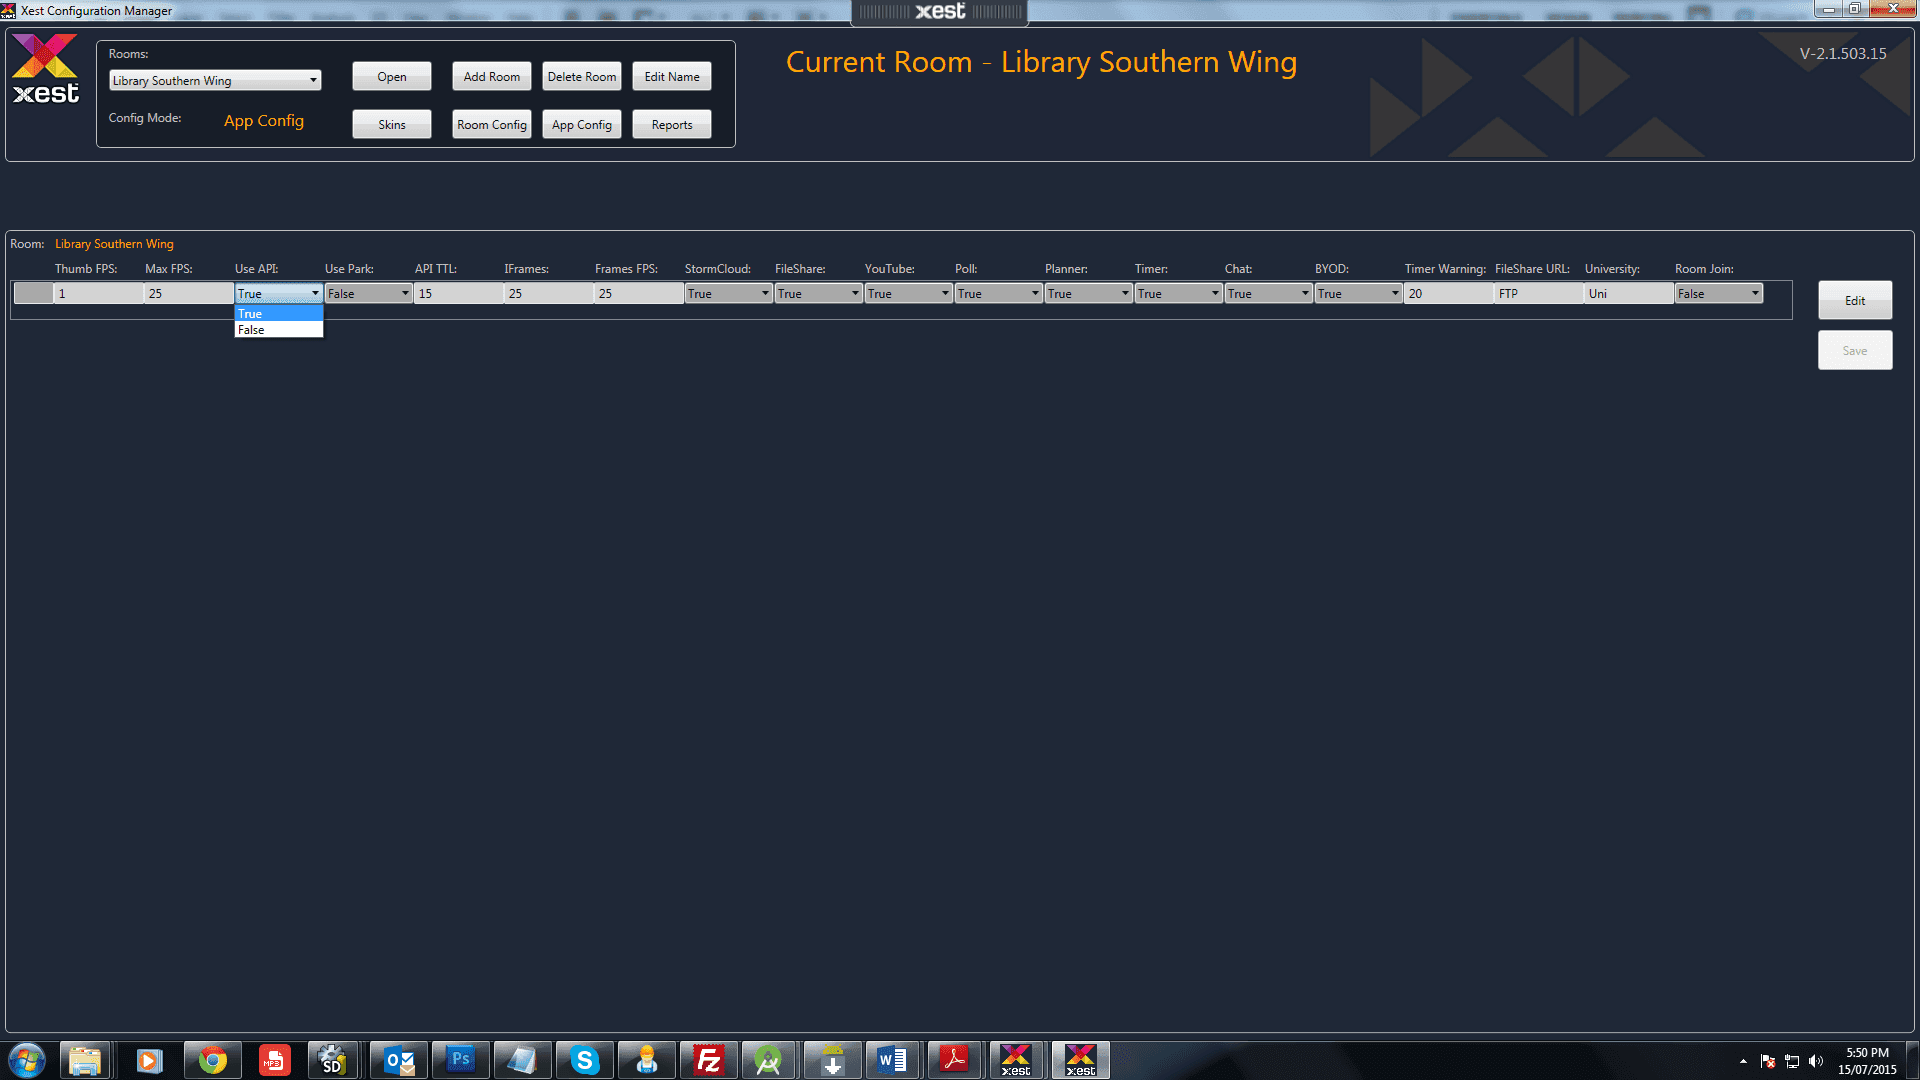
The "App Config" button allows you to edit the global functions for the room.
Thumb FPS: - Allows you to control the number of thumbnails per second to be shown on the "Bring to Me" window.
Max FPS: - Allows you to control the maximum Frames Per Second for video streaming.
Use API: - Set this to "True" if you are using the API for a Crestron, AMX, or Extron control system as well as the Mobile App Controller.
Use Park: - If set to True, this setting will hide all of the Student menu's on startup until the Teacher application is started via a control system.
API TTL: - Adjust this setting to allow for Multicast between subnets for you Teacher, Student and AV equipment Networks.
IFrames: - This setting lets you set the IFrame frequency for full frame video streaming. A higher setting will reduce bandwidth but can also produce digital blocking.
Frames FPS: - Prefered Frames Per Second setting. 25 = Pal and 30 = NTSC. Note: there is no real difference and this also depends on the specs of each PC.
StormCloud: - Set to True to show this feature on the Xest menu bar or False to hide it.
FileShare: - Set to True to show this feature on the Xest menu bar or False to hide it.
YouTube: - Set to True to show this feature on the Xest menu bar or False to hide it.
Poll: - Set to True to show this feature on the Xest menu bar or False to hide it.
Groups: - Set to True to show this feature on the Xest menu bar or False to hide it.
Timer: - Set to True to show this feature on the Xest menu bar or False to hide it.
Chat: - Set to True to show this feature on the Xest menu bar or False to hide it.
BYOD: - Set to True to show this feature on the Xest menu bar or False to hide it.
Timer Warning: - This setting allows you to change the time a Student's timer flashes while counting down.
FileShare URL: - Note: not currently used but will be the location to hold all FileShare files.
University: - Your Univerisity acronym for the licensing system.
Room Join: - When set to True, the "Room Join" button will be visible on the Teacher's Xest menu bar.
.
.
.
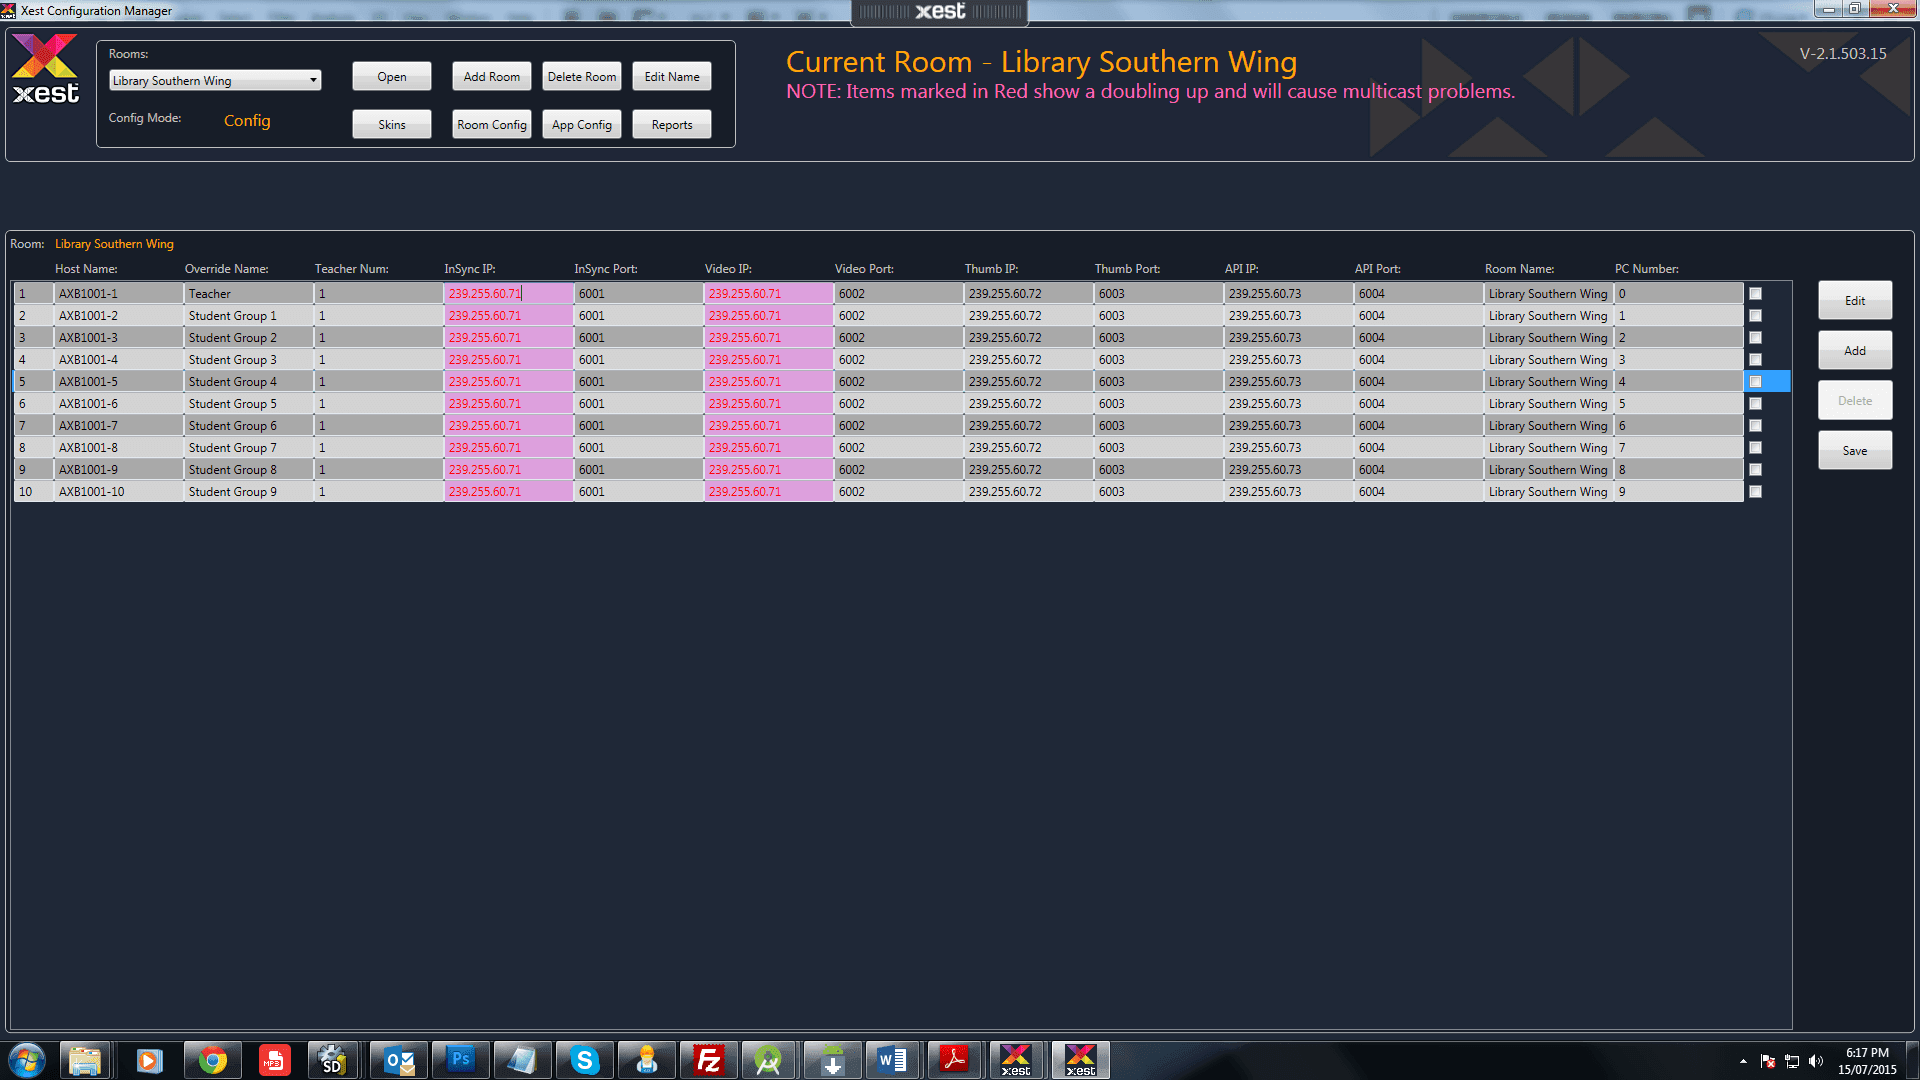
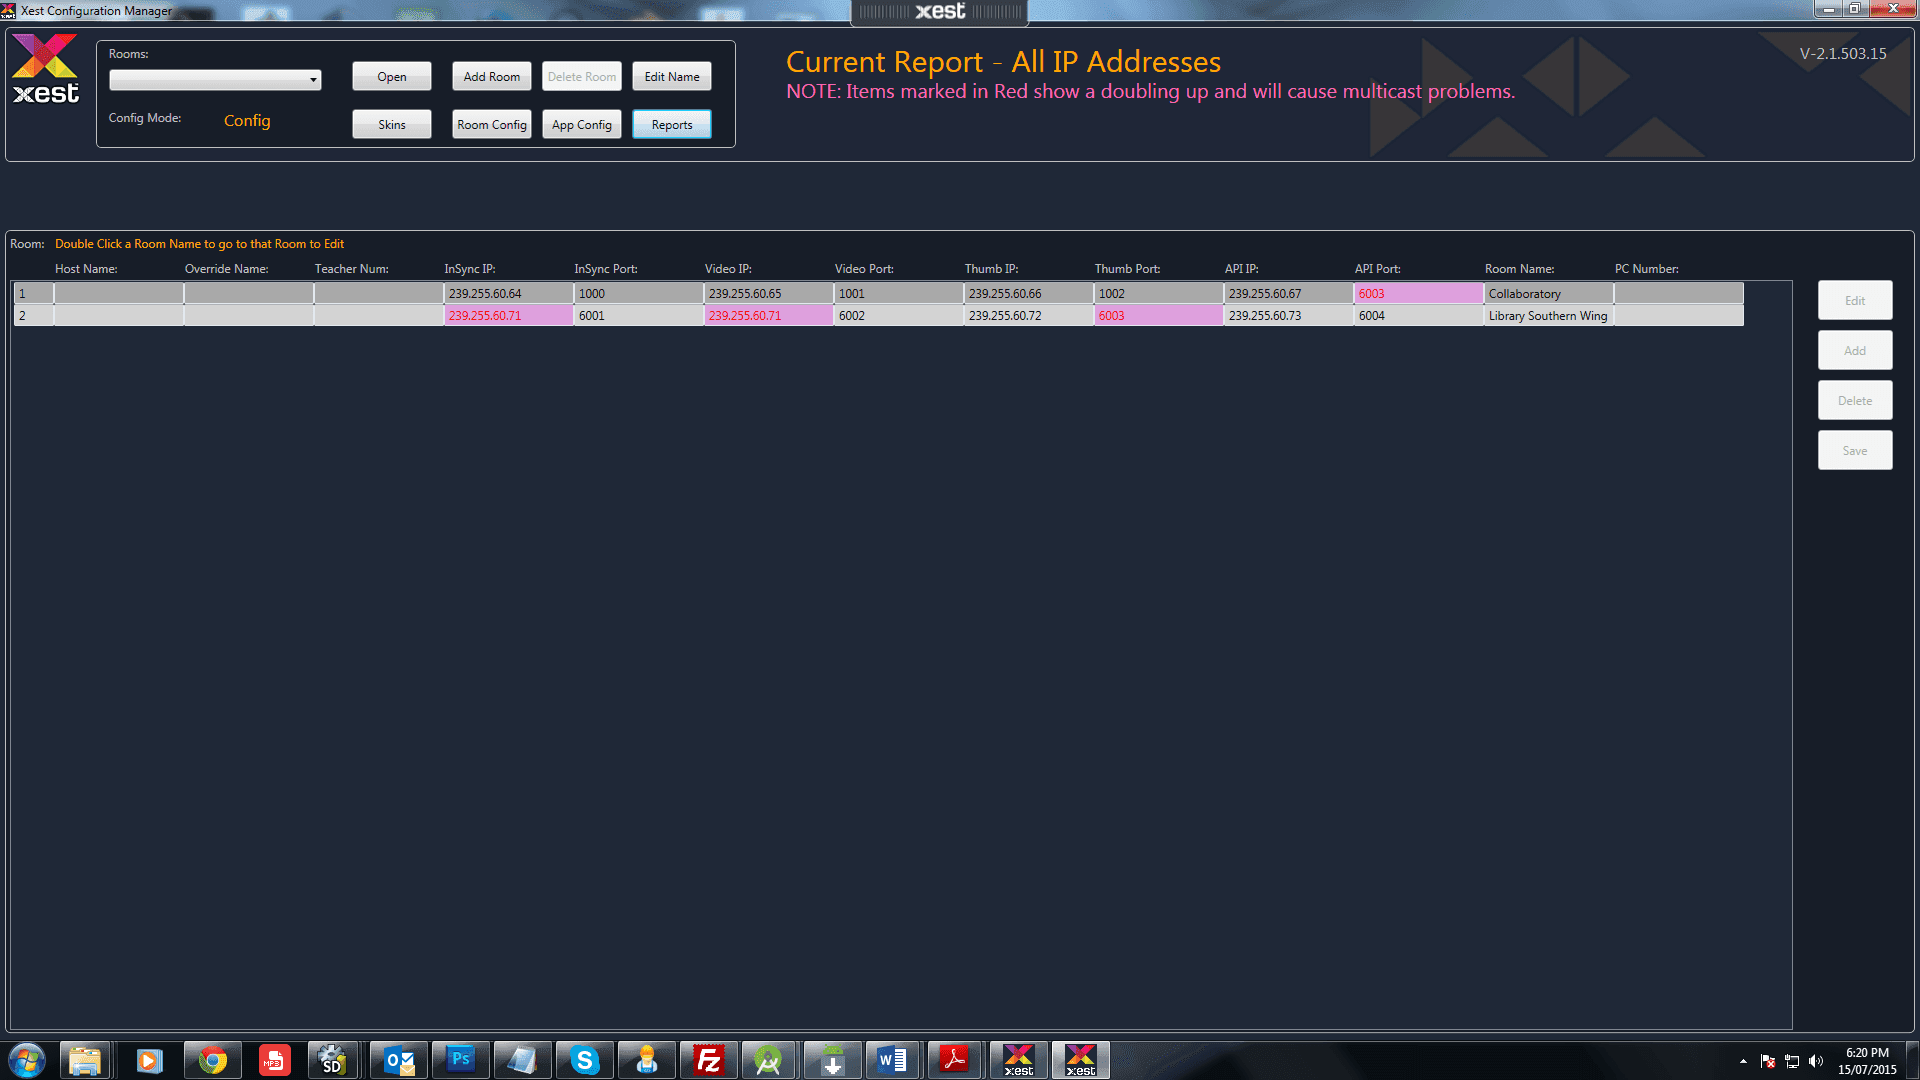
If you have doubled up on any Multicast Address or Multicast Ports for an individual room, those entries will show in red text with a pink background. This means that there will be displays that will flash between other applications. This needs to be changed so that all entries are black text with a gray background.
.
.
.
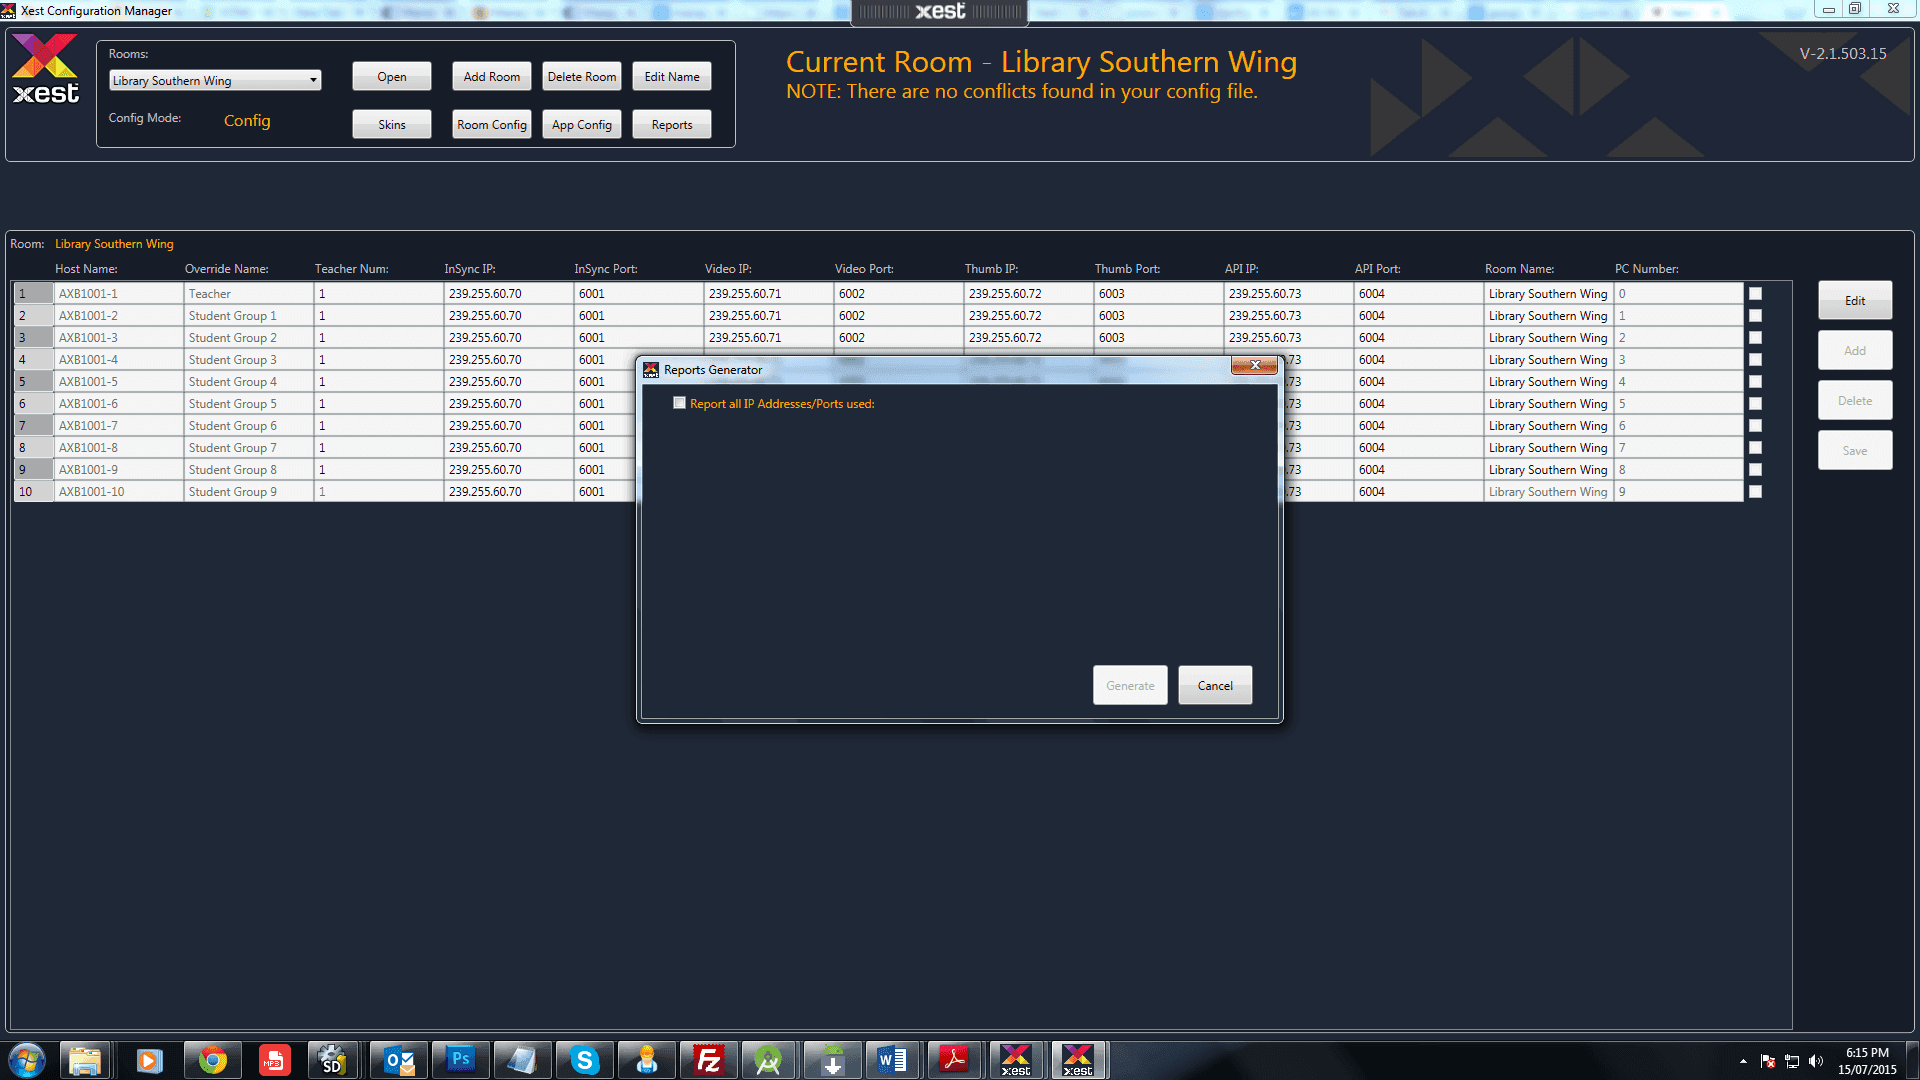
The "Reports" section will allow you to quickly check if there are any conflicts in your Multicast Address and Ports between rooms.
.
.
.
If you have doubled up on any Multicast Address or Multicast Ports for an individual room, those entries will show in red text with a pink background. This means that there will be displays that will flash between other applications. This needs to be changed. Simply double click on the Room Name to go directly to the entry so you can change it and save again.
.
.
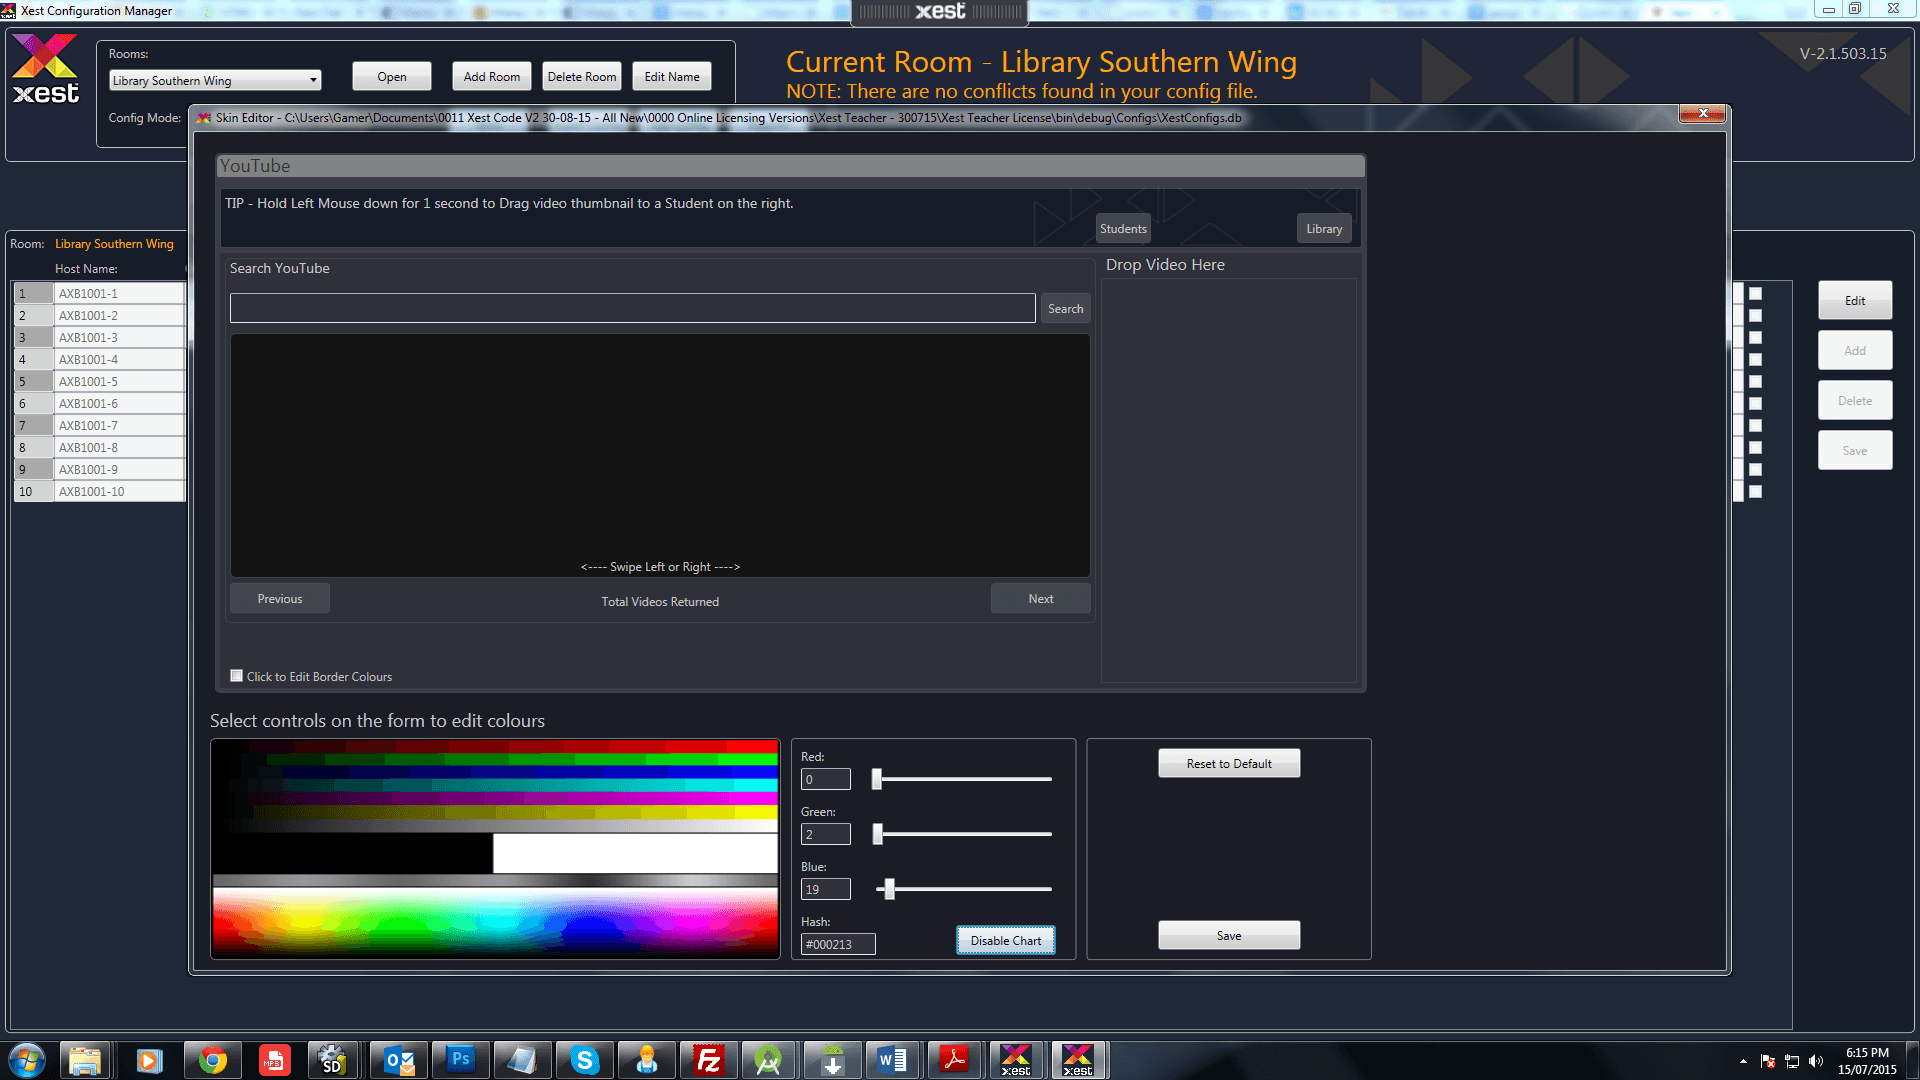
The Xest Skin Editor can be used to customise the colours of the Application. Simply click on an area of the Xest window you wish to change. The selected area will be displayed in the text above the colour chart. Then click "Encable Chart". From here you can now move your mouse over the colour chart to see an imediate affect of what that part of the window will look like. Click the chart to commit. Alternatevely you can use the colour sliders to adjust the colours. When you have finished click the "Save" button. To return to the Xest default skin, simply click "Reset to Default" then click "Save".
Note. This will directly edit the currently opened XestConfigs.db file. Now when you start the Xest Teacher or Xest Student application, you will see your changes.
.
.
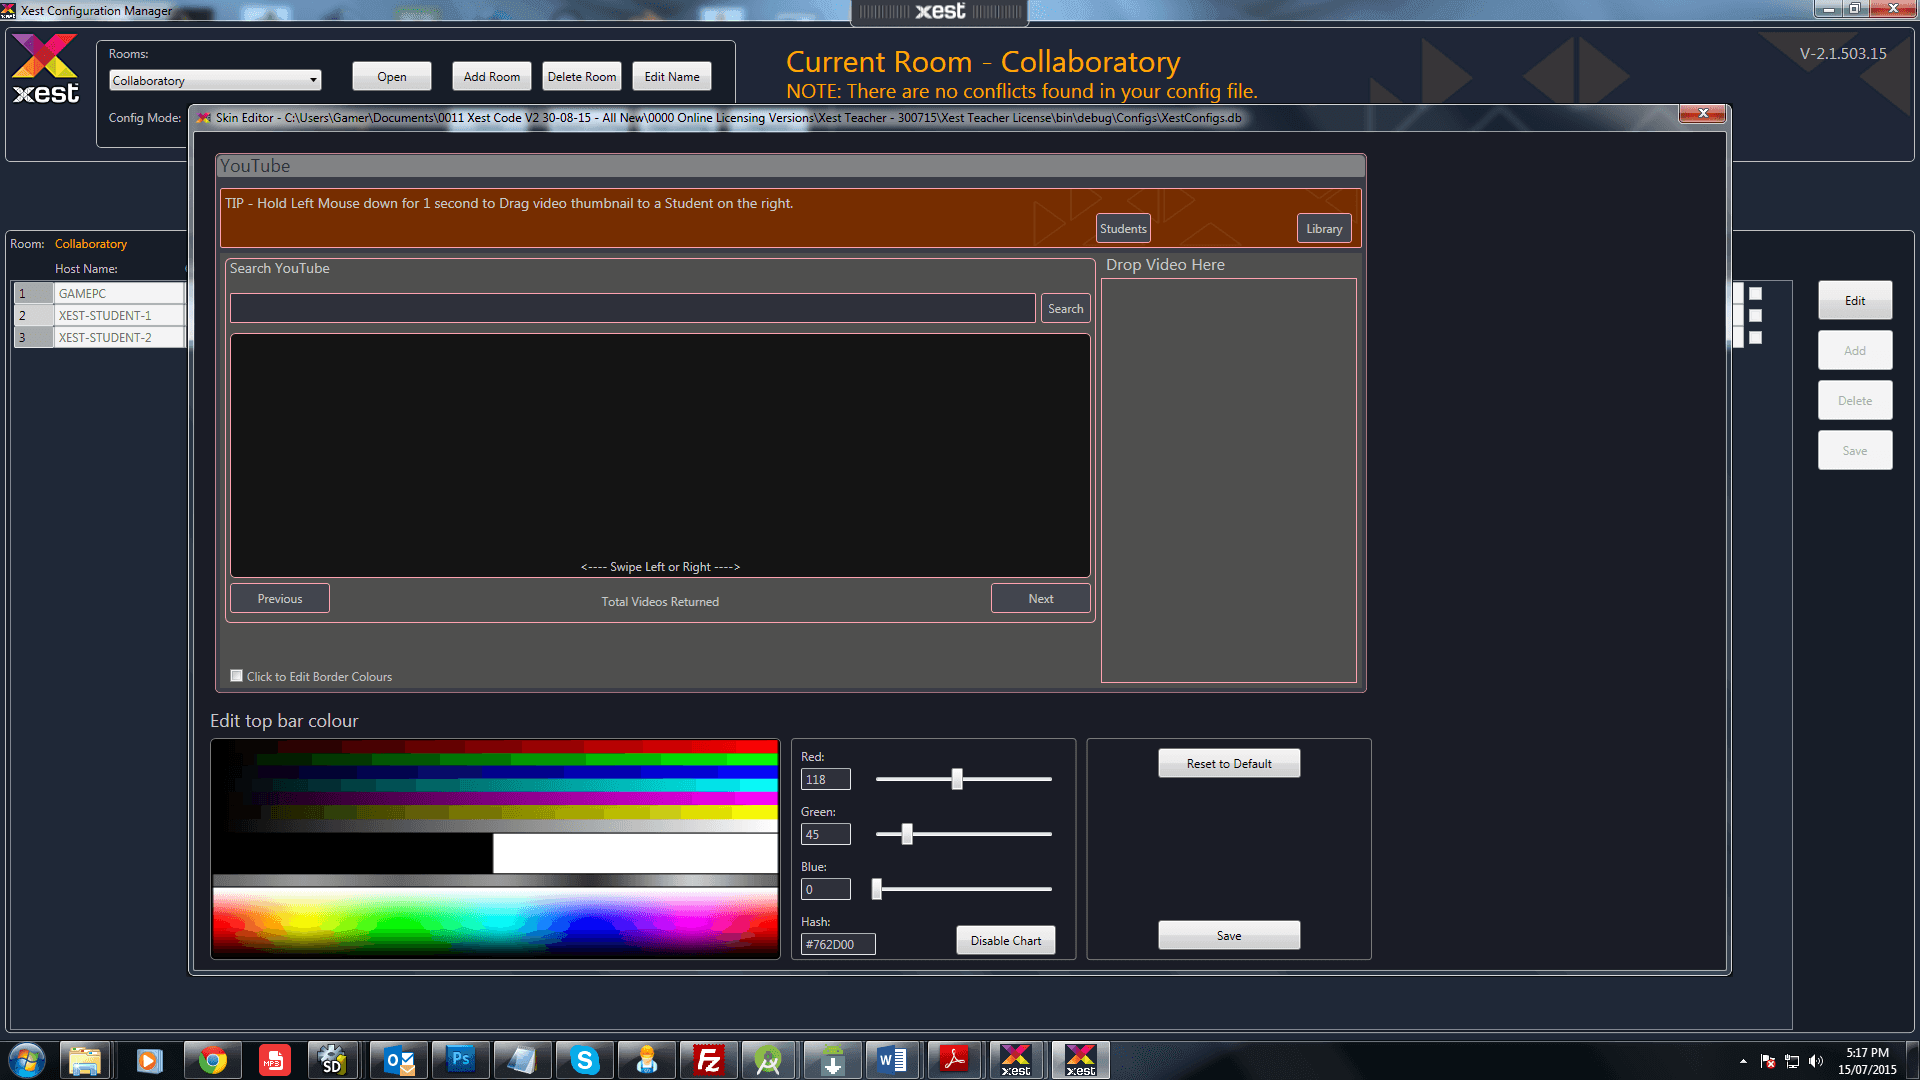
This is an idea of what you can change with the Xest Skin Editor.
-
. Xest User Guides